跳转到主内容

HP Pavilion x360 m3-u103dx Fan Replacement

你所需要的

  1. HP Pavilion x360 m3-u103dx Fan Replacement, Fan: 步骤 1 中的图像 1,1
    • Power off device.

    • Flip laptop over.

  2. HP Pavilion x360 m3-u103dx Fan Replacement: 步骤 2 中的图像 1,2 HP Pavilion x360 m3-u103dx Fan Replacement: 步骤 2 中的图像 2,2
    • Remove the rubber foot with a Metal spudger

    • Remove 5 Phillip 2.4 x 5.7mm screws using a PH0 Phillips head screwdriver.

    • Remove 5 Phillips 2.8 x 5.0mm screws using a PH0 Phillips head screwdriver.

  3. HP Pavilion x360 m3-u103dx Fan Replacement: 步骤 3 中的图像 1,3 HP Pavilion x360 m3-u103dx Fan Replacement: 步骤 3 中的图像 2,3 HP Pavilion x360 m3-u103dx Fan Replacement: 步骤 3 中的图像 3,3
    • Open computer and pry open keyboard panel using the Metal Spudger. Apply little pressure then increase until keyboard pops away from motherboard.

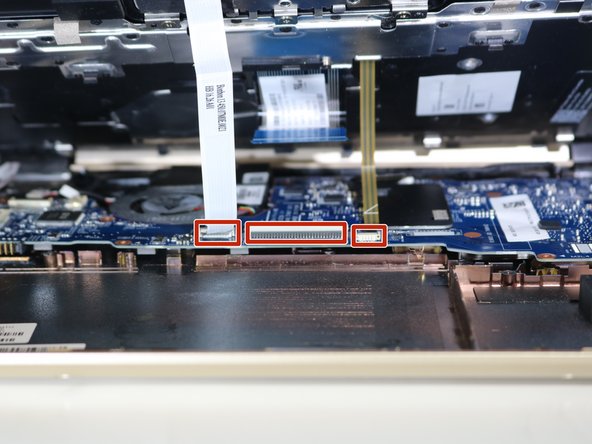
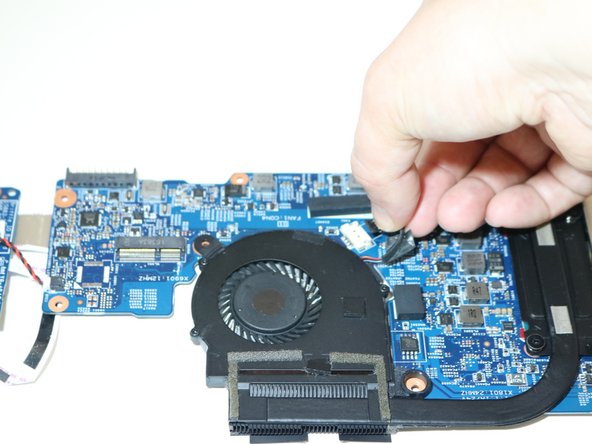
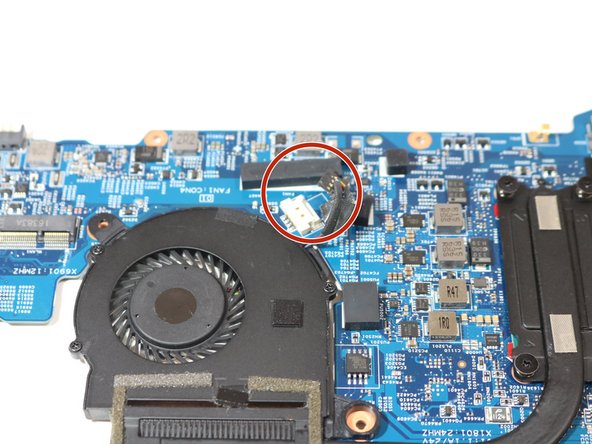
    • Gently lift keyboard on the mouse pad side. Remove three connected ribbon wires connecting keyboard to frame by gently disconnecting them from the motherboard.

  4. HP Pavilion x360 m3-u103dx Fan Replacement: 步骤 4 中的图像 1,1
    • Remove eleven 2.0 x 4.6mm screws using the Phillips 00 Screwdriver

  5. HP Pavilion x360 m3-u103dx Fan Replacement: 步骤 5 中的图像 1,3 HP Pavilion x360 m3-u103dx Fan Replacement: 步骤 5 中的图像 2,3 HP Pavilion x360 m3-u103dx Fan Replacement: 步骤 5 中的图像 3,3
    • Remove the motherboard gently from the base of the laptop.

    • Disconnect the fastened cables from the motherboard by carefully pushing the cable's plastic edges using the metal Spudger.

  6. HP Pavilion x360 m3-u103dx Fan Replacement: 步骤 6 中的图像 1,2 HP Pavilion x360 m3-u103dx Fan Replacement: 步骤 6 中的图像 2,2
    • Using the Phillips 00 Screw Driver. remove 4 screws from the heat sink.

    • Remove any adhesive tape. Detach the fan/heat sink.

结论

To reassemble your device, follow these instructions in reverse order.

2等其他人完成本指南。

0条评论

添加评论

浏览统计数据:

过去 24 小时: 0

过去 7 天: 2

过去 30 天: 4

总计 1,276