跳转到主内容

HP Pavilion 17-e146us Screen Replacement

你所需要的

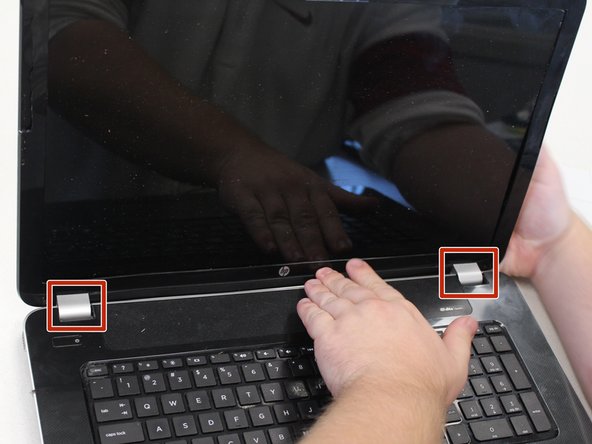
  1. HP Pavilion 17-e146us Screen Replacement, Screen: 步骤 1 中的图像 1,2 HP Pavilion 17-e146us Screen Replacement, Screen: 步骤 1 中的图像 2,2
    • Open the laptop.

    • Remove the two stickers on the lower left and right-hand corner of the laptop screen.

  2. HP Pavilion 17-e146us Screen Replacement: 步骤 2 中的图像 1,1
    • Using a Phillips #0 screwdriver, remove the two 5 mm screws in the lower left and right-hand corner of the laptop screen.

  3. HP Pavilion 17-e146us Screen Replacement: 步骤 3 中的图像 1,2 HP Pavilion 17-e146us Screen Replacement: 步骤 3 中的图像 2,2
    • Place a spudger or opening tool between the laptop screen and the plastic laptop frame.

    • Apply light pressure to the spudger to separate the plastic laptop frame covering the edges of the laptop screen.

    • These silver pieces cover the laptop hinges and will need to be removed as well.

  4. HP Pavilion 17-e146us Screen Replacement: 步骤 4 中的图像 1,1
    • Using a Phillips #0 screwdriver, remove the four 4 mm screws in each corner of the laptop screen.

    • This will separate the laptop cover from the laptop screen frame.

    • Hold the laptop cover securely to prevent damage.

  5. HP Pavilion 17-e146us Screen Replacement: 步骤 5 中的图像 1,2 HP Pavilion 17-e146us Screen Replacement: 步骤 5 中的图像 2,2
    • Using a Phillips #0 screwdriver, remove the four 3 mm screws on the side of the frame, one in each corner.

    • This will release the laptop screen from the frame.

    • Hold the laptop screen and frame securely to prevent damage to the motherboard attachments.

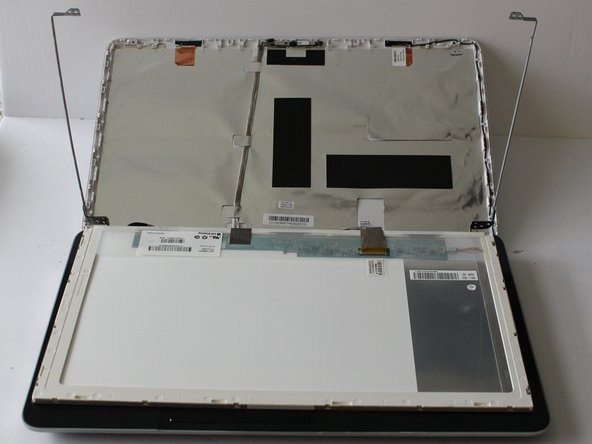
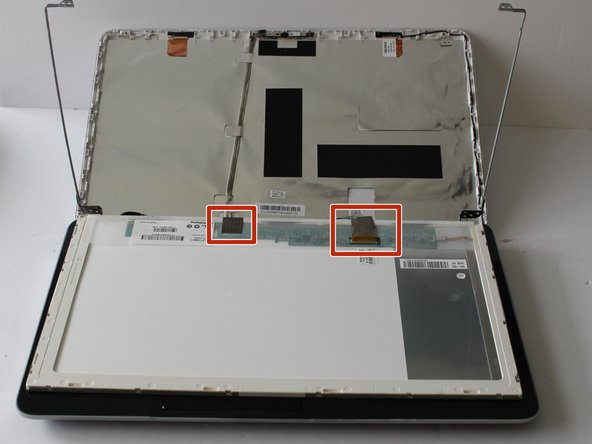
  6. HP Pavilion 17-e146us Screen Replacement: 步骤 6 中的图像 1,2 HP Pavilion 17-e146us Screen Replacement: 步骤 6 中的图像 2,2
    • Remove laptop screen.

    • While removing the laptop screen, be careful not to destroy the tape connection or break the motherboard.

结论

To reassemble your device, follow these instructions in reverse order.

0条评论

添加评论

浏览统计数据:

过去 24 小时: 0

过去 7 天: 0

过去 30 天: 6

总计 459