跳转到主内容

HP PSC 2410 Photosmart All In One Printer Scanner Lamp Replacement

你所需要的

  1. HP PSC 2410 Photosmart All In One Printer Scanner Lamp Replacement, Scanner Glass: 步骤 1 中的图像 1,1
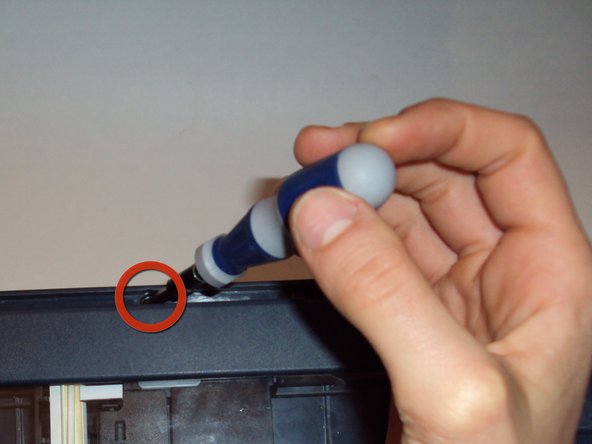
    • Carefully wedge the flathead 3/32" screwdriver on the outer groove of the control panel faceplate.

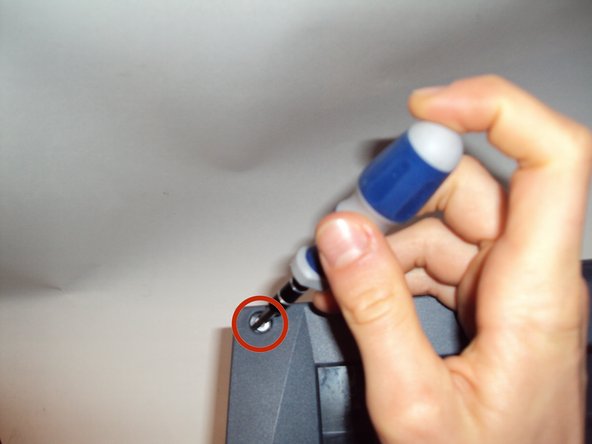
    • Follow the perimeter of the groove with the flathead 3/32" screwdriver making sure to gently pry and lift upward until the control panel faceplate comes off.

    • Potential for device damage: Take your time prying off the control panel faceplate. If too much pressure is applied, the control panel faceplate can break.

  2. HP PSC 2410 Photosmart All In One Printer Scanner Lamp Replacement: 步骤 2 中的图像 1,1
    • Once the control panel faceplate is off, look for the Lock/Unlock tab located underneath the off button.

    • To unlock and release the control panel, insert the flathead 3/32" screwdriver into the tab and carefully push down. The control panel will then separate from the printer's base by sliding it downward a little.

  3. HP PSC 2410 Photosmart All In One Printer Scanner Lamp Replacement: 步骤 3 中的图像 1,1
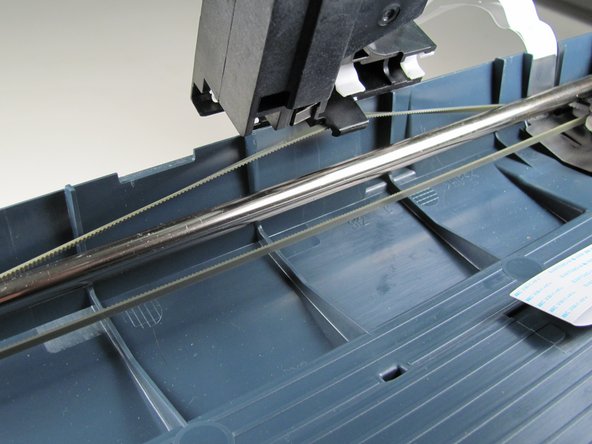
    • Underneath the control panel will be a flat grey ribbon cable. This cable is attached at the base of the green control board with the other end of the cable located on the back side of the printer's base.

    • Carefully disconnect both ends of the flat grey ribbon cable to release the control panel in its entirety.

    • Potential for device damage: Only pull from the connector portion of the cable, as pulling on the wires may damage them.

  4. HP PSC 2410 Photosmart All In One Printer Scanner Lamp Replacement: 步骤 4 中的图像 1,1
    • Lift open the scanner lid and locate a black tab located at the center of the scanner bed.

    • Using your finger push (pull on some printers) the tab towards the scanner lid. This will release the scanner lid

  5. HP PSC 2410 Photosmart All In One Printer Scanner Lamp Replacement: 步骤 5 中的图像 1,2 HP PSC 2410 Photosmart All In One Printer Scanner Lamp Replacement: 步骤 5 中的图像 2,2
    • Once the scanner lid is removed, use the Philips #1(Torx on some printers) Screwdriver to remove the screw.

  6. HP PSC 2410 Photosmart All In One Printer Scanner Lamp Replacement: 步骤 6 中的图像 1,2 HP PSC 2410 Photosmart All In One Printer Scanner Lamp Replacement: 步骤 6 中的图像 2,2
    • Remove all four silver screws from the corners of the scanner glass cover with a T10 Torx Screwdriver.

    • Organization is everything. Remember to have your iFixit Magnetic Work Mat next to you. It will help keep screws organized and in place.

  7. HP PSC 2410 Photosmart All In One Printer Scanner Lamp Replacement: 步骤 7 中的图像 1,1
    • Once you have removed the four torx screws, gently lift the scanner glass cover from the printer's base.

  8. HP PSC 2410 Photosmart All In One Printer Scanner Lamp Replacement, Scanner Lamp: 步骤 8 中的图像 1,1
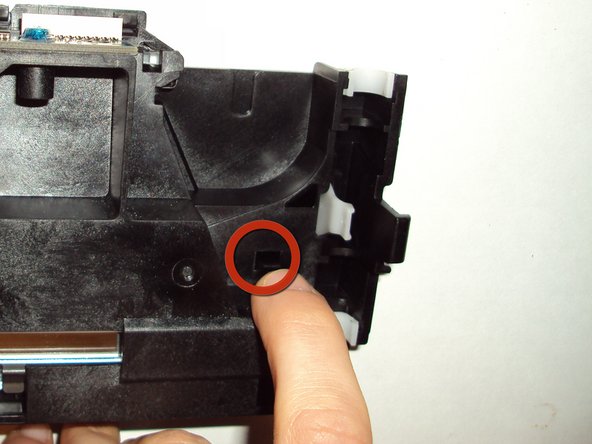
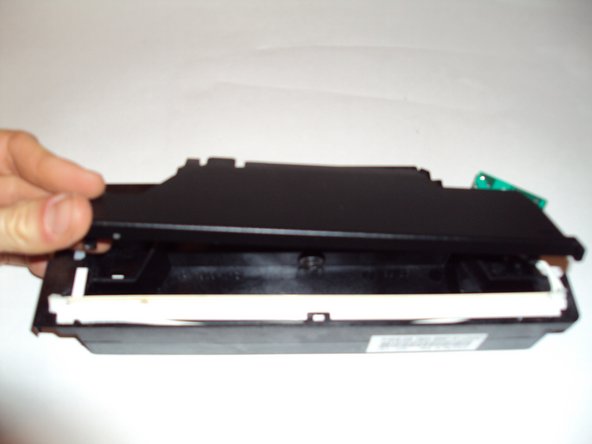
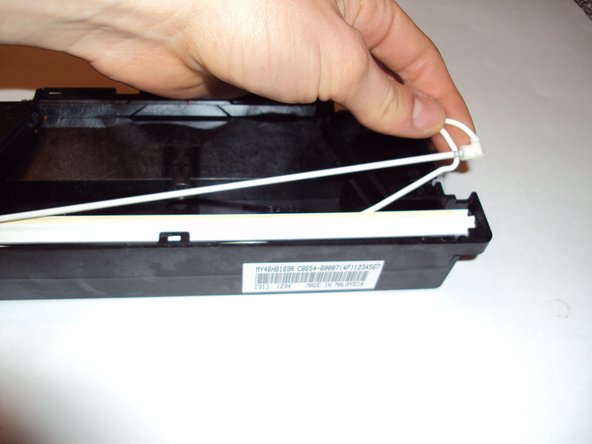
    • Remove the scanner head from the scanner tray by lifting the scanner head up and pulling the black tab from the gray drive belt.

  9. HP PSC 2410 Photosmart All In One Printer Scanner Lamp Replacement: 步骤 9 中的图像 1,2 HP PSC 2410 Photosmart All In One Printer Scanner Lamp Replacement: 步骤 9 中的图像 2,2
    • Turn the scanner upside down and place it on a level surface.

    • Remove the small silver screw in the scanner head's control panel.

  10. HP PSC 2410 Photosmart All In One Printer Scanner Lamp Replacement: 步骤 10 中的图像 1,1
    • Remove the control panel from the scanner head.

  11. HP PSC 2410 Photosmart All In One Printer Scanner Lamp Replacement: 步骤 11 中的图像 1,3 HP PSC 2410 Photosmart All In One Printer Scanner Lamp Replacement: 步骤 11 中的图像 2,3 HP PSC 2410 Photosmart All In One Printer Scanner Lamp Replacement: 步骤 11 中的图像 3,3
    • Remove the black face plate from the scanner head. Push on the two black tabs located on opposite sides of the scanner head. One of them is located in the groove the control panel normally rests in.

  12. HP PSC 2410 Photosmart All In One Printer Scanner Lamp Replacement: 步骤 12 中的图像 1,2 HP PSC 2410 Photosmart All In One Printer Scanner Lamp Replacement: 步骤 12 中的图像 2,2
    • Carefully twist white scanner lamp support out of its carriage and replace it with a new one.

    • Note: Scanner lamps are fragile and should be handled with care.

结论

To reassemble your device, follow these instructions in reverse order.

2等其他人完成本指南。

团队

Cal Poly, Team 12-31, Maness Spring 2011 Cal Poly, Team 12-31, Maness Spring 2011 的会员

CPSU-MANESS-S11S12G31

5 名成员

创作了9篇指南

一条评论

Very good instruction. Easy to follow. Removed lamp as instructed but where does one buy a replacement lamp?

John Baker - 回复

添加评论

浏览统计数据:

过去 24 小时: 0

过去 7 天: 1

过去 30 天: 9

总计 10,172