跳转到主内容

HP Laserjet Pro 200 Color MFP Power Button Replacement

你所需要的

  1. HP Laserjet Pro 200 Color MFP Power Button Replacement, Power Button: 步骤 1 中的图像 1,2 HP Laserjet Pro 200 Color MFP Power Button Replacement, Power Button: 步骤 1 中的图像 2,2
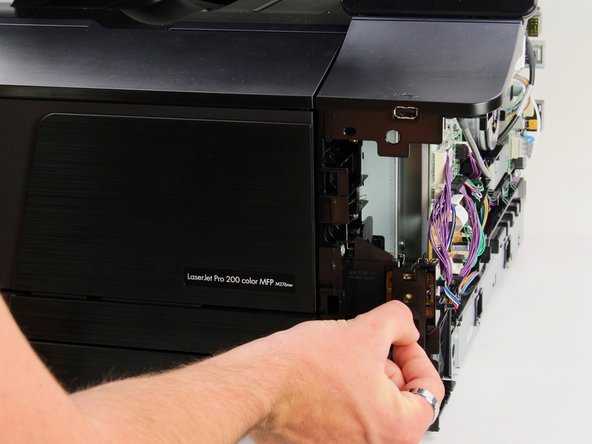
    • Turn the printer so that the front is facing to your left.

    • Flip the printer so that it is laying with its left side facing down and the bottom facing you.

  2. HP Laserjet Pro 200 Color MFP Power Button Replacement: 步骤 2 中的图像 1,1
    • Use a #2 Phillips head screwdriver to unscrew the 8mm screw on the top edge of the printer.

  3. HP Laserjet Pro 200 Color MFP Power Button Replacement: 步骤 3 中的图像 1,3 HP Laserjet Pro 200 Color MFP Power Button Replacement: 步骤 3 中的图像 2,3 HP Laserjet Pro 200 Color MFP Power Button Replacement: 步骤 3 中的图像 3,3
    • There are three tabs along the back right corner of the printer underneath the panel (location is displayed in the second picture).

    • Use a flathead screwdriver to depress the tabs while lightly pulling the panel towards you.

    • Begin with the upmost tab and move your way down, individually depressing the tabs.

    • Pull the panel towards you and remove it from the printer.

  4. HP Laserjet Pro 200 Color MFP Power Button Replacement: 步骤 4 中的图像 1,2 HP Laserjet Pro 200 Color MFP Power Button Replacement: 步骤 4 中的图像 2,2
    • Turn the printer so that you are facing the open side with the power button chord.

    • Carefully remove this cord.

  5. HP Laserjet Pro 200 Color MFP Power Button Replacement: 步骤 5 中的图像 1,3 HP Laserjet Pro 200 Color MFP Power Button Replacement: 步骤 5 中的图像 2,3 HP Laserjet Pro 200 Color MFP Power Button Replacement: 步骤 5 中的图像 3,3
    • There is a cover that protects the electronics within the power button.

    • Remove it by pinching the two tabs on the cover.

    • Pull it outward from the printer.

  6. HP Laserjet Pro 200 Color MFP Power Button Replacement: 步骤 6 中的图像 1,1
    • A tension spring in the form of a bent wire is used to hold the assembly in the printer.

    • In order to remove the spring completely, begin by removing the right end of the wire from it's slot above the power button with a metal spudger.

  7. HP Laserjet Pro 200 Color MFP Power Button Replacement: 步骤 7 中的图像 1,1
    • Unclip the left side of the wire from printer by applying upwards pressure along the edge of the wire.

    • This step can be done with either your fingers or a prying tool of your choosing.

  8. HP Laserjet Pro 200 Color MFP Power Button Replacement: 步骤 8 中的图像 1,3 HP Laserjet Pro 200 Color MFP Power Button Replacement: 步骤 8 中的图像 2,3 HP Laserjet Pro 200 Color MFP Power Button Replacement: 步骤 8 中的图像 3,3
    • Grab the wire and hold it firmly with two fingers.

    • Pull it directly upwards.

    • Wiggle it until it is fully removed from the printer.

  9. HP Laserjet Pro 200 Color MFP Power Button Replacement: 步骤 9 中的图像 1,1
    • Pull the power button board directly towards you, until both the board and the wire are fully clear of the printer.

结论

To reassemble your device, follow the instructions in reverse order.

2等其他人完成本指南。

Kendall Gentzen

于04/18/19注册

981 声望

创作了5篇指南

团队

Cal Poly, Team S9-G14, Maness Spring 2019 Cal Poly, Team S9-G14, Maness Spring 2019 的会员

CPSU-MANESS-S19S9G14

4 名成员

创作了11篇指南

一条评论

super tuto

avez vous un tuto similaire pour le remplacement de la carte d'alimentation grillée par la foudre ?

philippe juge - 回复

添加评论

浏览统计数据:

过去 24 小时: 2

过去 7 天: 6

过去 30 天: 35

总计 1,905