跳转到主内容

HP Envy x360 m6-aq105dx Solid State Drive Replacement

已存档的指南
本指南只作为历史记录保留。请使用指南的最新版本来进行维修。

你所需要的

  1. HP Envy x360 m6-aq105dx Solid State Drive Replacement, Back Cover: 步骤 1 中的图像 1,1
    • Ground yourself by touching a metal object or surface. This prevents electrical damage to other components in the laptop.

    • Remove the two 7.8 mm screws using the Phillips #0 screwdriver.

    • Remove the six 5.2 mm screws using the Torx T5 screwdriver.

  2. HP Envy x360 m6-aq105dx Solid State Drive Replacement: 步骤 2 中的图像 1,1
    • Light to moderate force is required to remove the back cover.

    • Insert the Jimmy in between the frame of the laptop and the removable back cover and remove the back cover from the device.

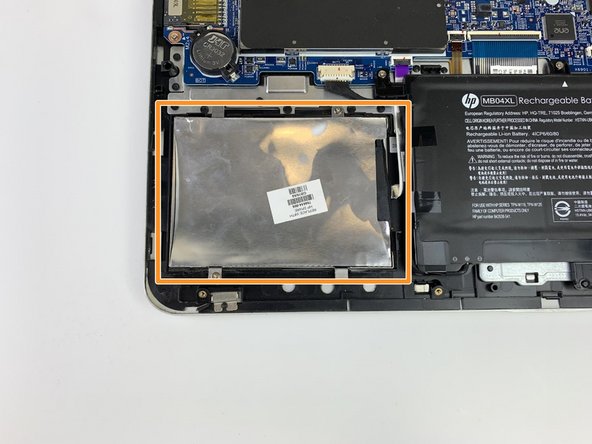
  3. HP Envy x360 m6-aq105dx Solid State Drive Replacement, Solid State Drive: 步骤 3 中的图像 1,1
    • Remove the two 4.6 mm screws securing old hard drive/solid-state drive in place using the Phillips #0 screwdriver.

  4. HP Envy x360 m6-aq105dx Solid State Drive Replacement: 步骤 4 中的图像 1,2 HP Envy x360 m6-aq105dx Solid State Drive Replacement: 步骤 4 中的图像 2,2
    • Disconnect the SATA cable connected to the old hard drive/solid-state drive.

    • Remove the solid state drive.

结论

To reassemble your device, follow these instructions in reverse order.

0条评论

添加评论

浏览统计数据:

过去 24 小时: 0

过去 7 天: 1

过去 30 天: 1

总计 37