跳转到主内容

HP Envy m6-n010dx Hard Drive Replacement

你所需要的

  1. HP Envy m6-n010dx Hard Drive Replacement, Battery: 步骤 1 中的图像 1,3 HP Envy m6-n010dx Hard Drive Replacement, Battery: 步骤 1 中的图像 2,3 HP Envy m6-n010dx Hard Drive Replacement, Battery: 步骤 1 中的图像 3,3
    • Find the battery removal slider.

    • Slide it across while simultaneously popping out and removing the device's battery.

  2. HP Envy m6-n010dx Hard Drive Replacement, Hard Drive: 步骤 2 中的图像 1,1
    • Remove the five marked screws found under the battery using a philips head screwdriver.

  3. HP Envy m6-n010dx Hard Drive Replacement: 步骤 3 中的图像 1,2 HP Envy m6-n010dx Hard Drive Replacement: 步骤 3 中的图像 2,2
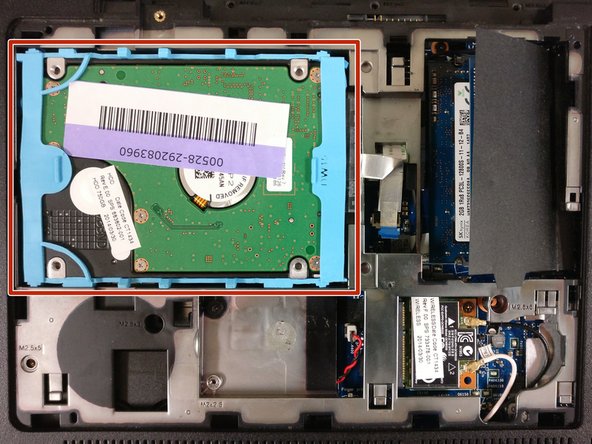
    • Remove the small panel on the back by prying it off. This should reveal the hard drive.

  4. HP Envy m6-n010dx Hard Drive Replacement: 步骤 4 中的图像 1,3 HP Envy m6-n010dx Hard Drive Replacement: 步骤 4 中的图像 2,3 HP Envy m6-n010dx Hard Drive Replacement: 步骤 4 中的图像 3,3
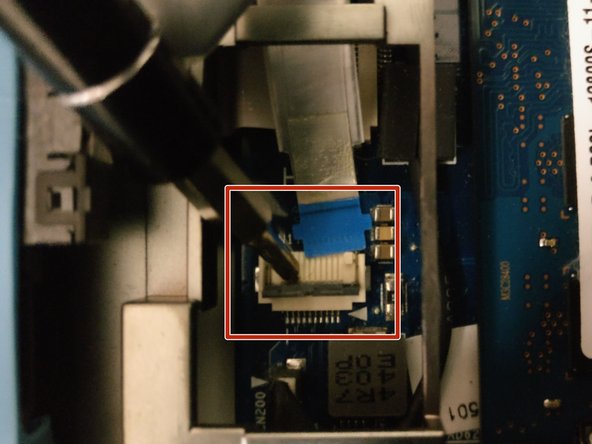
    • The hard drive is connected to the motherboard via this blue-tabbed cable, highlighted in red.

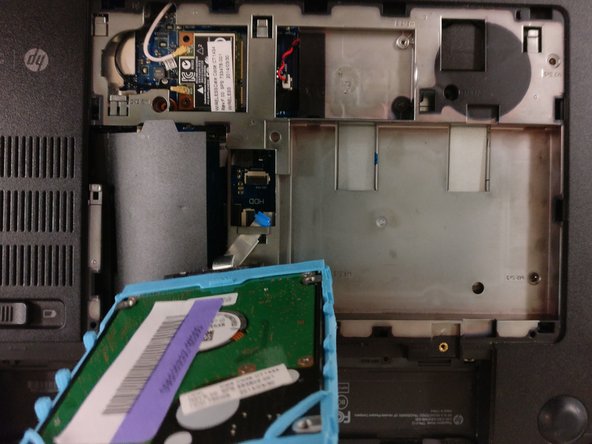
    • Gently pry off the cover to release the cable.

    • Slowly lift the hard drive out and away from the device.

结论

To reassemble your device, follow these instructions in reverse order.

另外一个人完成了本指南。

0条评论

添加评论

浏览统计数据:

过去 24 小时: 0

过去 7 天: 1

过去 30 天: 2

总计 1,262