你所需要的
-
-
Remove the ROUND rubber pads along the edge of the monitor. One in each corner. The center bottom ones do not cover screws.
-
They are held on with a lite adhesive
-
-
-
Under the rubber pads are T8 screws.
-
Remove the 4 of them. (One each corner)
-
-
-
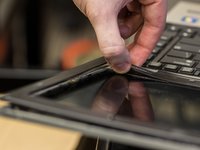
At this point, the face is held on with little clips and adhesive. Go around the edge of the laptop screen gently prying the clips open.
-
The adhesive is on the inner edge. Since I didn’t care about the current screen, I also gripped the inner edge of the face, and pushed against the screen a little.
-
-
-
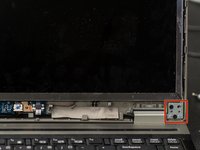
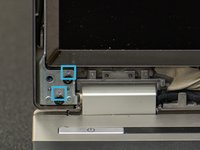
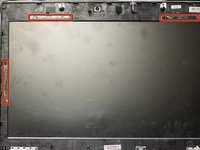
Each lower corner of the screen has two PH0 screws. Remove them.
-
Note that the two holes with screws have little triangle marks. This will make your reassembly easier when you try to remember which two holes to use.
-
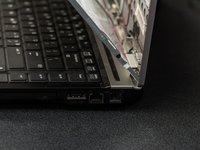
Lift the screen 45º of the laptop. The back should now be disconnected from the main frame of the display, and should be able to be pulled up to 90º.
-
-
-
-
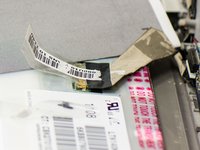
On the back of the display, 4” (10cm) from the left side is a small data cable, unplug it.
-
There is a piece of clear tape over the connector, and a barcode with a clear backing. Carefully remove this.
-
-
-
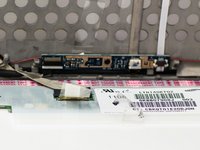
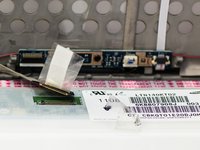
Remove the three PH0 screws from each side of the LCD assembly.
-
-
-
At this point, the LCD is removed, and the new one can be attached.
-
From this point forward in the instructions, you will need to pretty much work backwards.
-
I made notes to make it a bit easier.
-
Remember the little triangle markers when attaching the frame to the back.
-
-
-
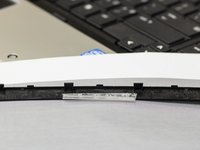
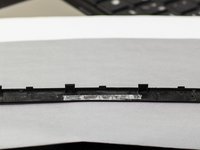
Apply new adhesive to the back of the LCD face (otherwise there will be a little rattle).
-
I used standard double-sided tape.
-
I folded it lengthwise to thicken it, and trimmed with a razor.
-
If you look closely, you will see light markings where the tape should be applied.
-
(sorry about this last photo,iFixit makes the crop 4:3, which cuts off the image... Ill try to replace next time I replace one.)
-
-
-
To put the face back on, open the screen up all the way up.
-
Place the face gently in place, use the light and knobs on the top to reference the placing.
-
Start at the hp logo, and push down firmly, and slide out the the edges.
-
Do each side separately, starting at the bottom, and working up.
-
-
-
Reattach the four screw covers / rubber pads.
-
You can use small pieces of double-stick tape.
-


To reassemble your device, follow these instructions in reverse order. Steps 8-11 are reassembly notes.
13等其他人完成本指南。

4指南评论
Good guide, I used it to replace an LCD on a HP EliteBook 8540p.
The only difference between those two models for replaceling the screen is that there are 6 rubber pads need to be removed (and thus 6 screws under the pads) (the two rubber pads at the top center you need to remove to).
hi i am anas from india
my laptop screen is damage today
can you help me how can i purchase it in low cost of lcd
because there price is too high and it is not genuine price
my email :anas.malik3377@gmail.com
mobile no +919210744541
anas malik - 回复
modle is hp elitebook 8440p
anas malik - 回复
Excellent guide! I used it to replace the screen on my 8440p; everything went according to the instructions, it took me about 35 mins. or so.
Robert Old - 回复