当前版本的文档还未经巡查,您可以查看最新的已查核版本。
-
-
Be sure to power off and unplug your device before you begin your repair.
-
With the screen face down, lift up the stand as far as it goes.
-
Make sure not to force it past the resting point.
-
-
-
After removing the screws, delicately close the stand.
-
Flip the tablet on its back so that the screen is facing up.
-
-
-
Use the suction cup to carefully separate the screen from the device. Pull upwards with a fluid and smooth motion.
-
Do not lift too fast! There will still be wires connecting the screen to the device. Make sure they are not tampered with.
-
-
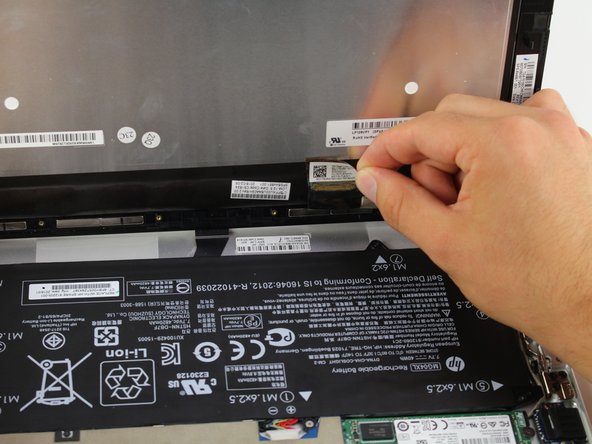
Remove the tape on the lower left side of the screen.
-
Underneath the tape, disconnect the LCM cable, the larger wire that was underneath the tape, from the back of the tablet screen.
-
-
-
-
Slightly lift the card up and then remove the SSD card from the device.
-
As you slide it out, make sure it gets unplugged from the port. Do not continue to tug on a stuck port.
嵌入本指南
选择一个尺寸并复制下面的代码,将本指南作为一个小插件嵌入到你的网站/论坛中。
预览