跳转到主内容

HP DS0011 DX Battery and M2 Replacement

你所需要的

  1. HP DS0011 DX Battery and M2 Replacement, Shut Down Laptop: 步骤 1 中的图像 1,1
    • Firstly, shut down the laptop so that the hard drive is not damaged while removing and replacing the m.2. After doing this, set laptop down on its back.

  2. HP DS0011 DX Battery and M2 Replacement, Remove Back Cover Screws: 步骤 2 中的图像 1,2 HP DS0011 DX Battery and M2 Replacement, Remove Back Cover Screws: 步骤 2 中的图像 2,2
    • Remove the screws on the back cover using a Phillips head screwdriver.

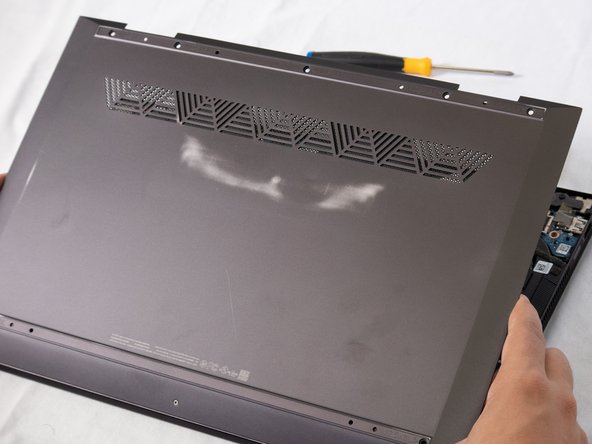
  3. HP DS0011 DX Battery and M2 Replacement, Remove Back Cover: 步骤 3 中的图像 1,2 HP DS0011 DX Battery and M2 Replacement, Remove Back Cover: 步骤 3 中的图像 2,2
    • Approach the back cover from the corners and pry it off with a flathead so that the m.2 is exposed.

  4. HP DS0011 DX Battery and M2 Replacement, Remove screws from m.2.: 步骤 4 中的图像 1,1
    • Remove the screws from the m.2 so that it can be removed. Adjust Phillips head accordingly.

  5. HP DS0011 DX Battery and M2 Replacement, Unplug m.2.: 步骤 5 中的图像 1,1
    • Unplug the m.2 from the laptop and remove it. Remove gently to ensure other parts of the laptop are not damaged.

  6. HP DS0011 DX Battery and M2 Replacement, Replace With New m.2.: 步骤 6 中的图像 1,1
    • Replace the old m.2 with the new one. Plug in the new m.2 to the m.2 port and screw in tightly.

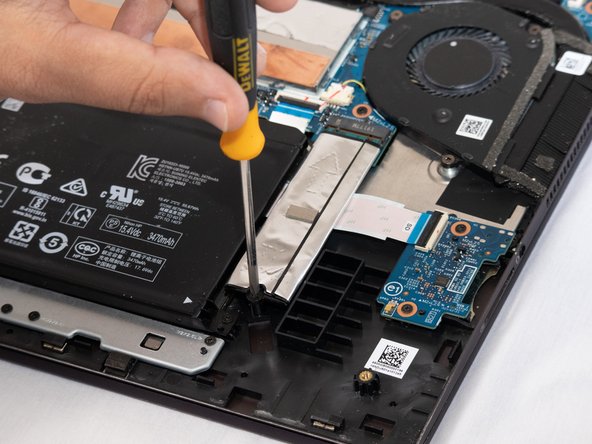
  7. HP DS0011 DX Battery and M2 Replacement, Unscrew Battery: 步骤 7 中的图像 1,1
    • Adjust Phillips head screw-driver and unscrew the screws for the battery.

  8. HP DS0011 DX Battery and M2 Replacement, Remove Battery: 步骤 8 中的图像 1,1
    • Take out the battery by lifting up and pulling from the port.

  9. HP DS0011 DX Battery and M2 Replacement, Replace With New Battery: 步骤 9 中的图像 1,2 HP DS0011 DX Battery and M2 Replacement, Replace With New Battery: 步骤 9 中的图像 2,2
    • Replace the old battery with the new one. Plug battery into port and screw the screws.

  10. HP DS0011 DX Battery and M2 Replacement, Put Back Cover Back On: 步骤 10 中的图像 1,2 HP DS0011 DX Battery and M2 Replacement, Put Back Cover Back On: 步骤 10 中的图像 2,2
    • After completely screwing in the battery and m2, put the back cover on by putting it on the magnetic contact and pushing it down into the clips.

  11. HP DS0011 DX Battery and M2 Replacement, Screw Back Cover back: 步骤 11 中的图像 1,1
    • Screw the back cover back on to the laptop.

结论

Once completed it may take a little bit for the computer to reboot. If the computer does not restart, contact a speacialist.

Zak Boyadjian

于11/23/21注册

193 声望

撰写一个指南

0条评论

添加评论

浏览统计数据:

过去 24 小时: 0

过去 7 天: 0

过去 30 天: 8

总计 207