跳转到主内容

HP Compaq nc8430 LCD Screen Replacement

你所需要的

  1. HP Compaq nc8430 LCD Screen Replacement, Battery: 步骤 1 中的图像 1,1
    • Completely shut down the device and unplug any adapters and cords connected to the device.

    • Carefully flip the device over so that the bottom is facing up.

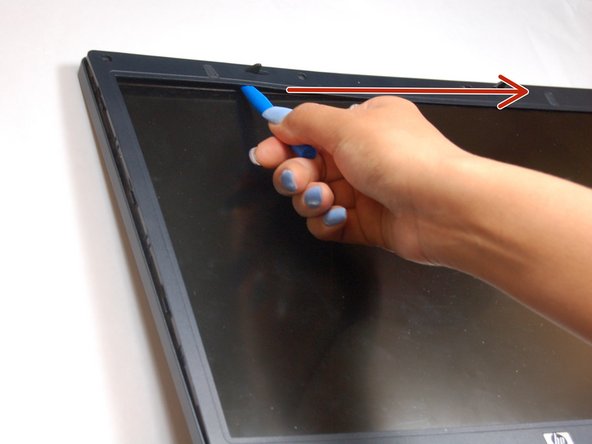
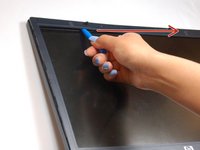
    • Slide both of the latches to the left.

  2. HP Compaq nc8430 LCD Screen Replacement: 步骤 2 中的图像 1,1
    • Slide up against the three lines the battery has.

  3. HP Compaq nc8430 LCD Screen Replacement: 步骤 3 中的图像 1,1
    • Slide the battery up and away from the laptop.

    • Slowly remove the battery to prevent any connectors from getting damaged.

  4. HP Compaq nc8430 LCD Screen Replacement, LCD Screen: 步骤 4 中的图像 1,1
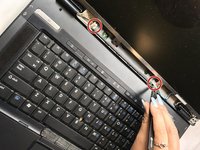
    • Remove the four 1.2mm Phillip #1 screws circled.

    • The laptop may have rubber covers over the screws,. Remove them using a pointed tool to pry them out.

  5. HP Compaq nc8430 LCD Screen Replacement: 步骤 5 中的图像 1,2 HP Compaq nc8430 LCD Screen Replacement: 步骤 5 中的图像 2,2
    • Pry up the plastic screen cover with the pry tool.

    • Once a corner of the plastic screen cover is lifted, slide the pry tool around the entire screen until the screen is completely lifted from the base.

  6. HP Compaq nc8430 LCD Screen Replacement: 步骤 6 中的图像 1,1
    • Remove the 1.2 Phillips screws circled.

  7. HP Compaq nc8430 LCD Screen Replacement: 步骤 7 中的图像 1,1
    • Remove the four 1.2mm Phillip screws circled.

  8. HP Compaq nc8430 LCD Screen Replacement: 步骤 8 中的图像 1,1
    • Gently lift the monitor, from the base of the laptop.

    • The laptop will still be connected to the monitor wires located at the bottom of the screen.

  9. HP Compaq nc8430 LCD Screen Replacement: 步骤 9 中的图像 1,2 HP Compaq nc8430 LCD Screen Replacement: 步骤 9 中的图像 2,2
    在这个步骤中使用的工具:
    Tweezers
    $4.99
    购买
    • Locate the video cable wires.

    • Gently remove the video cables from the sensor board with tweezers.

  10. HP Compaq nc8430 LCD Screen Replacement: 步骤 10 中的图像 1,1
    • All cables should be disconnected from the sensor board. Remove the eight 2mm Phillip screws attaching the bezel to the side of the monitor.

    • Attach the bezel to the new replacement screen.

结论

To reassemble your device, follow these instructions in reverse order.

Corey Nickerson II

于03/20/17注册

111 声望

撰写一个指南

团队

Texas Tech, Team S13-G4, Bennett Spring 2017 Texas Tech, Team S13-G4, Bennett Spring 2017 的会员

TTU-BENNETT-S17S13G4

5 名成员

创作了5篇指南

0条评论

添加评论

浏览统计数据:

过去 24 小时: 3

过去 7 天: 4

过去 30 天: 11

总计 795