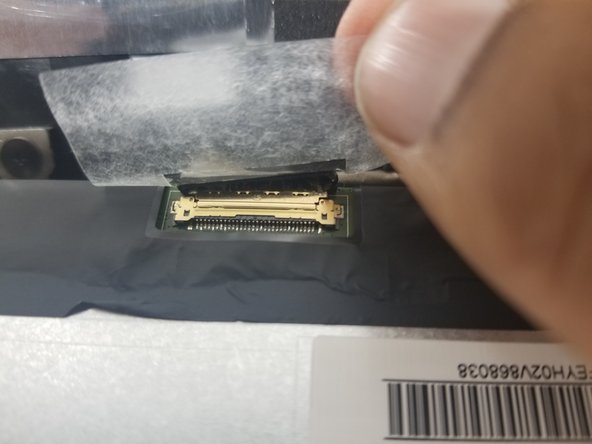
跳转到主内容

HP Chromebook 11 G5 Screen Replacement

你所需要的

  1. HP Chromebook 11 G5 Screen Replacement, Screen: 步骤 1 中的图像 1,2 HP Chromebook 11 G5 Screen Replacement, Screen: 步骤 1 中的图像 2,2
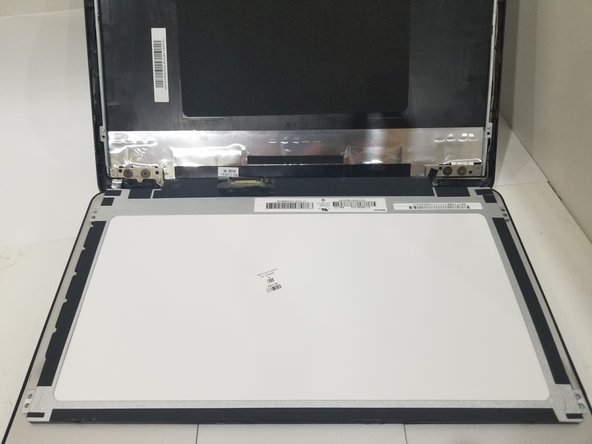
    • Open the lid as far as possible.

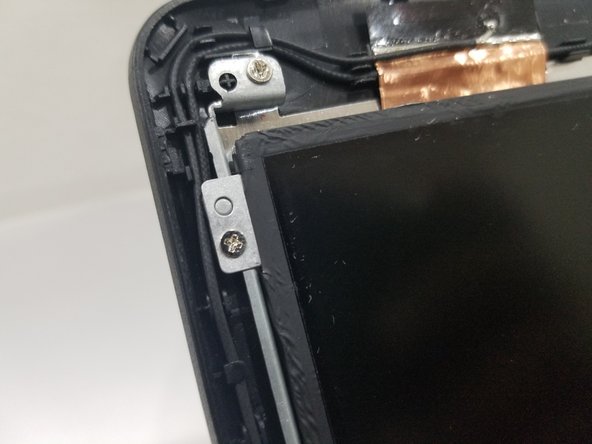
    • Slide your spudger into the bezel of the laptop until it appears on the other side.

    • Make your way around the bezel with the spudger while gently prying up the bezel to snap it out of place.

    • You should hear an audible click when the snap is removed.

    • Make sure there is a gap between the spudger and the components behind the bezel while prying.

  2. HP Chromebook 11 G5 Screen Replacement: 步骤 2 中的图像 1,2 HP Chromebook 11 G5 Screen Replacement: 步骤 2 中的图像 2,2
    • Hold the bezel on both sides, and twist the bezel repeatedly until the bottom bezel snaps out of place.

    • This step is likely the most difficult, and you may have to use additional force to remove the bezel.

  3. HP Chromebook 11 G5 Screen Replacement: 步骤 3 中的图像 1,2 HP Chromebook 11 G5 Screen Replacement: 步骤 3 中的图像 2,2
    • Unscrew the four silver 4mm Phillips #0 screws on the edges of the display.

    • To ensure that the LCD panel does not immediately slide down upon removing the screws, make sure the display is still tilted as far back as possible.

  4. HP Chromebook 11 G5 Screen Replacement: 步骤 4 中的图像 1,2 HP Chromebook 11 G5 Screen Replacement: 步骤 4 中的图像 2,2
    • Gently lift the LCD panel out of the body and lower it onto the keyboard deck.

    • Ensure that the power button is not accidentally pressed while lowering the display.

  5. HP Chromebook 11 G5 Screen Replacement: 步骤 5 中的图像 1,3 HP Chromebook 11 G5 Screen Replacement: 步骤 5 中的图像 2,3 HP Chromebook 11 G5 Screen Replacement: 步骤 5 中的图像 3,3
    • Identify the eDP 30-pin connector and use the sharp end of the spudger to peel off a corner of the tape over the connector.

    • To avoid damaging internal components, only use a metal spudger as a last resort.

    • Use your fingers to peel off the rest of the tape.

    • Peel the tape slowly to ensure that the connector does not get pulled while peeling the tape.

  6. HP Chromebook 11 G5 Screen Replacement: 步骤 6 中的图像 1,1
    • Hold both sides of the tape and gently push back the connector to disconnect the display.

    • When attaching the new display, make sure there is no gap between the connector and its socket.

    • Two audible clicks should be heard when the connector is reattached, one click for each side of the connector.

结论

To reassemble your device, follow these instructions in reverse order.

2等其他人完成本指南。

Kunal Chopra

于01/14/20注册

474 声望

创作了2篇指南

团队

0条评论

添加评论

浏览统计数据:

过去 24 小时: 0

过去 7 天: 4

过去 30 天: 25

总计 1,134