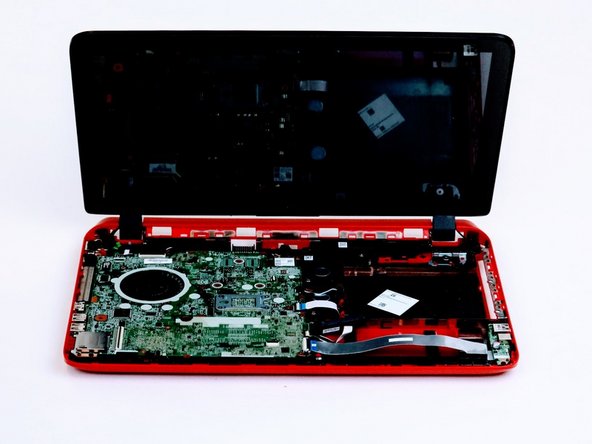
跳转到主内容

HP Beats Special Edition 15-p390nr Fan Replacement

你所需要的

  1. HP Beats Special Edition 15-p390nr Fan Replacement, Keyboard: 步骤 1 中的图像 1,2 HP Beats Special Edition 15-p390nr Fan Replacement, Keyboard: 步骤 1 中的图像 2,2
    • Turn computer off before starting.

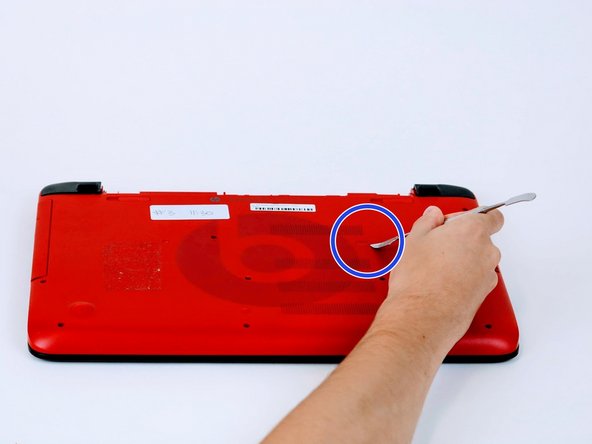
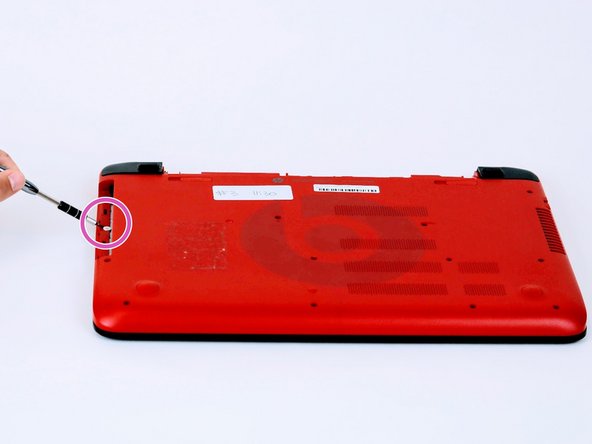
    • Turn computer over and begin removing noticeable 8mm screws with a Phillips #0 screwdriver.

  2. HP Beats Special Edition 15-p390nr Fan Replacement: 步骤 2 中的图像 1,2 HP Beats Special Edition 15-p390nr Fan Replacement: 步骤 2 中的图像 2,2
    • Some screws may be hidden under a screw cover.

    • Simply use a metal spudger to pop off the screw cover to unveil the hidden 8mm screw.

    • Screw cover may fly when removing.

  3. HP Beats Special Edition 15-p390nr Fan Replacement: 步骤 3 中的图像 1,2 HP Beats Special Edition 15-p390nr Fan Replacement: 步骤 3 中的图像 2,2
    • Once screws are removed you may now remove the optical drive.

    • Remove the hidden 3mm screw in the optical drive port.

  4. HP Beats Special Edition 15-p390nr Fan Replacement: 步骤 4 中的图像 1,2 HP Beats Special Edition 15-p390nr Fan Replacement: 步骤 4 中的图像 2,2
    • Remove the rubberized feet located on the left and right shoulder of the computer to uncover hidden 8mm screws.

    • Popping noises are normal.

    • The shoulder caps are removable. Underneath there are 2 additional screws.

  5. HP Beats Special Edition 15-p390nr Fan Replacement: 步骤 5 中的图像 1,2 HP Beats Special Edition 15-p390nr Fan Replacement: 步骤 5 中的图像 2,2
    • Flip computer over and wedge metal spudger along the computer to pop off keyboard panel

  6. HP Beats Special Edition 15-p390nr Fan Replacement: 步骤 6 中的图像 1,2 HP Beats Special Edition 15-p390nr Fan Replacement: 步骤 6 中的图像 2,2
    • Unclip wires connected to the motherboard and remove keyboard from the device.

    • 17 screws should be removed up to this point.

  7. HP Beats Special Edition 15-p390nr Fan Replacement, Motherboard: 步骤 7 中的图像 1,1
    • Remove screws from the motherboard.

    • 11 screws should be removed from the motherboard

  8. HP Beats Special Edition 15-p390nr Fan Replacement: 步骤 8 中的图像 1,1
    • Unclamp wire strips from motherboard.

  9. HP Beats Special Edition 15-p390nr Fan Replacement: 步骤 9 中的图像 1,1
    • Detach by lifting the motherboard up and flip the motherboard over.

  10. HP Beats Special Edition 15-p390nr Fan Replacement: 步骤 10 中的图像 1,1
    • Unclip wifi card for further procedures

  11. HP Beats Special Edition 15-p390nr Fan Replacement, Fan: 步骤 11 中的图像 1,1
    • Remove the fan cable from the connector that connects to the motherboard.

    • Pull straight out to avoid damage to connectors.

  12. HP Beats Special Edition 15-p390nr Fan Replacement: 步骤 12 中的图像 1,1
    • Remove all three screws that hold the fan to the system board

  13. HP Beats Special Edition 15-p390nr Fan Replacement: 步骤 13 中的图像 1,1
    • Lift and remove the fan from the top cover.

结论

To reassemble your device, follow these instructions in reverse order.

0条评论

添加评论

浏览统计数据:

过去 24 小时: 0

过去 7 天: 9

过去 30 天: 29

总计 2,591