跳转到主内容

HP 7 PLUS 1301 Front and Back Camera Replacement

你所需要的

  1. HP 7 PLUS 1301 Front and Back Camera Replacement, Front and Back Camera: 步骤 1 中的图像 1,2 HP 7 PLUS 1301 Front and Back Camera Replacement, Front and Back Camera: 步骤 1 中的图像 2,2
    • Make sure the device is off and not plugged in before starting.

    • Using a Torx T5 screwdriver, remove the 3mm screws on all four corners of the device.

  2. HP 7 PLUS 1301 Front and Back Camera Replacement: 步骤 2 中的图像 1,2 HP 7 PLUS 1301 Front and Back Camera Replacement: 步骤 2 中的图像 2,2
    • Using the plastic opening tool, push in between the front, then slide it around.

    • Slide the plastic opening tool all the way around the tablet to separate the back cover.

    • Be careful when trying to remove the back as the screen can be damaged with excessive force.

  3. HP 7 PLUS 1301 Front and Back Camera Replacement: 步骤 3 中的图像 1,2 HP 7 PLUS 1301 Front and Back Camera Replacement: 步骤 3 中的图像 2,2
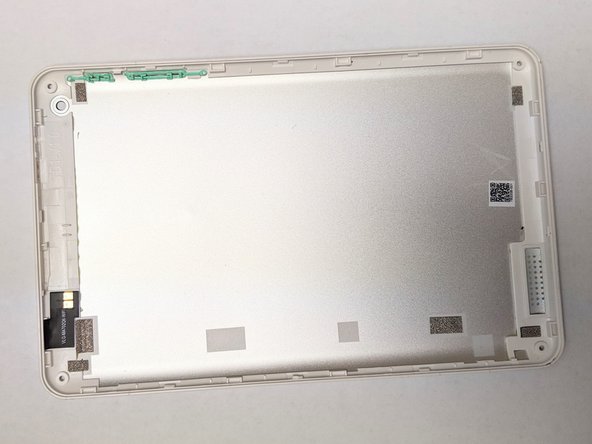
    • Continue sliding the plastic opening tool around the tablet until the cover fully separates from the device.

    • Remove the back cover.

  4. HP 7 PLUS 1301 Front and Back Camera Replacement: 步骤 4 中的图像 1,1
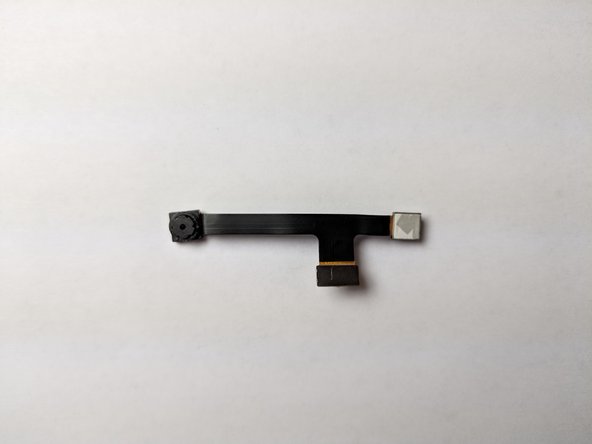
    • Locate the front and rear cameras.

  5. HP 7 PLUS 1301 Front and Back Camera Replacement: 步骤 5 中的图像 1,2 HP 7 PLUS 1301 Front and Back Camera Replacement: 步骤 5 中的图像 2,2
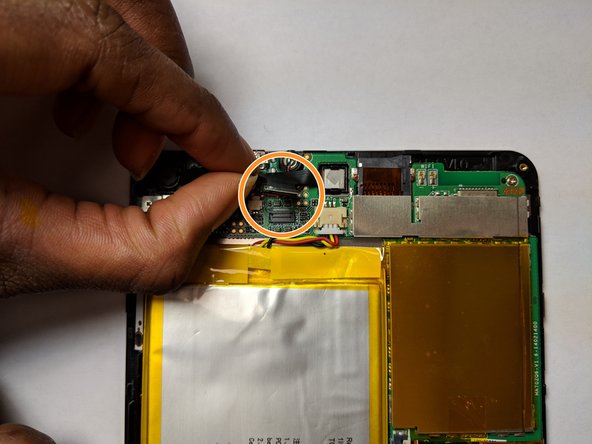
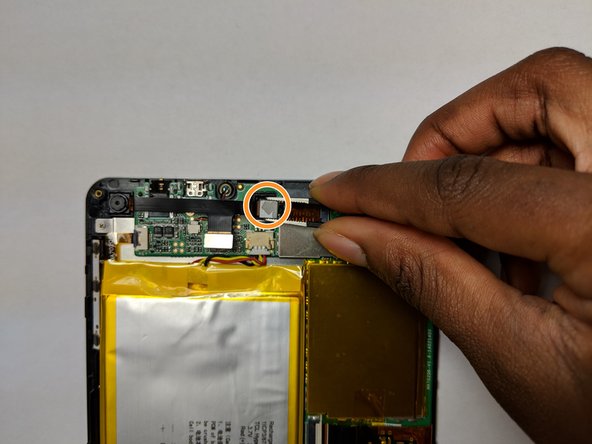
    • Using the opening tool, locate the rectangular gray connector near the camera and gently release its connection.

    • Lift the connector out and away from the board.

    • This will come out very easily so don't use much force.

  6. HP 7 PLUS 1301 Front and Back Camera Replacement: 步骤 6 中的图像 1,2 HP 7 PLUS 1301 Front and Back Camera Replacement: 步骤 6 中的图像 2,2
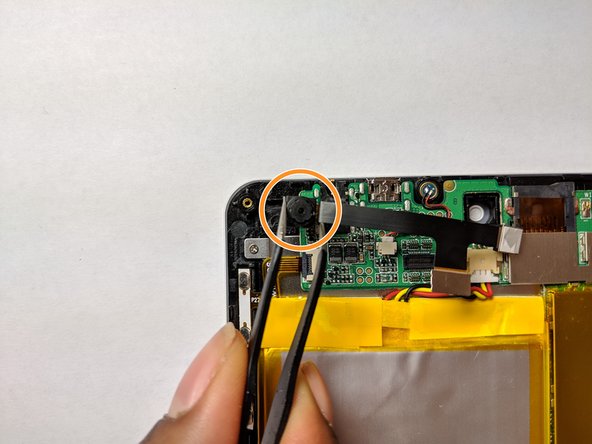
    • Gently push the tabs on both sides until the front camera is loose.

    • Using your blunt tweezers, lift the front camera gently away from the board.

  7. HP 7 PLUS 1301 Front and Back Camera Replacement: 步骤 7 中的图像 1,3 HP 7 PLUS 1301 Front and Back Camera Replacement: 步骤 7 中的图像 2,3 HP 7 PLUS 1301 Front and Back Camera Replacement: 步骤 7 中的图像 3,3
    • Using your angled tweezers, gently pry out the back camera.

    • The camera is held down with tape.

    • Lift the back camera out of its socket and gently pull out both cameras.

结论

To reassemble your device, follow these instructions in reverse order.

另外一个人完成了本指南。

ahmed musleh

于02/05/19注册

195 声望

撰写一个指南

团队

UC Davis, Team S20-G6, Lore Winter 2019 UC Davis, Team S20-G6, Lore Winter 2019 的会员

UCD-LORE-W19S20G6

3 名成员

创作了4篇指南

0条评论

添加评论

浏览统计数据:

过去 24 小时: 0

过去 7 天: 2

过去 30 天: 3

总计 145