跳转到主内容

HP 15-ef2025nr Fan Replacement

你所需要的

  1. HP 15-ef2025nr Fan Replacement, Battery: 步骤 1 中的图像 1,1
    • Turn the laptop upside down with the hinge facing you.

  2. HP 15-ef2025nr Fan Replacement: 步骤 2 中的图像 1,2 HP 15-ef2025nr Fan Replacement: 步骤 2 中的图像 2,2
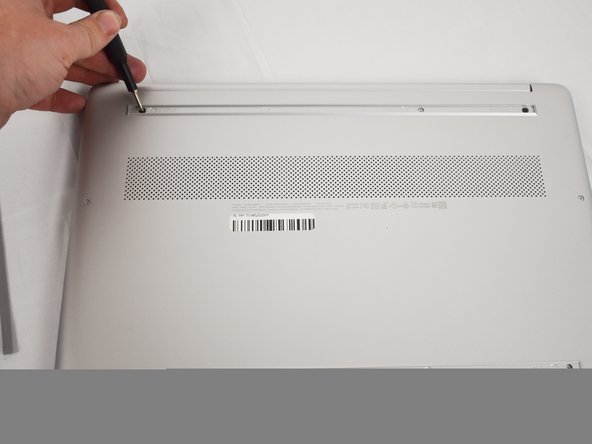
    • Use an opening tool to remove the rubber strips by prying up a corner and gently pulling off the strip.

  3. HP 15-ef2025nr Fan Replacement: 步骤 3 中的图像 1,2 HP 15-ef2025nr Fan Replacement: 步骤 3 中的图像 2,2
    • Use a Phillips screwdriver to remove the eight 3 mm screws (including the 2 screws that were not under the rubber strips) securing the lower case.

  4. HP 15-ef2025nr Fan Replacement: 步骤 4 中的图像 1,2 HP 15-ef2025nr Fan Replacement: 步骤 4 中的图像 2,2
    • Flip the laptop over and open the lid.

    • Insert an opening tool into the seam between the edge of the lower case and the chassis.

    • Gently pry around the entire perimeter until the lower case separates from the chassis.

    • Close the lid and flip the laptop back over.

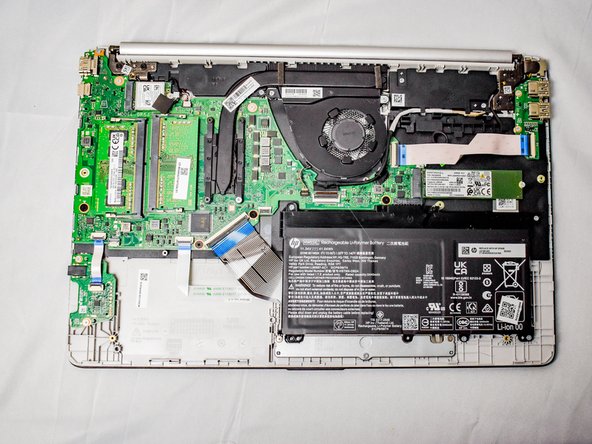
    • Remove the lower case.

  5. HP 15-ef2025nr Fan Replacement: 步骤 5 中的图像 1,3 HP 15-ef2025nr Fan Replacement: 步骤 5 中的图像 2,3 HP 15-ef2025nr Fan Replacement: 步骤 5 中的图像 3,3
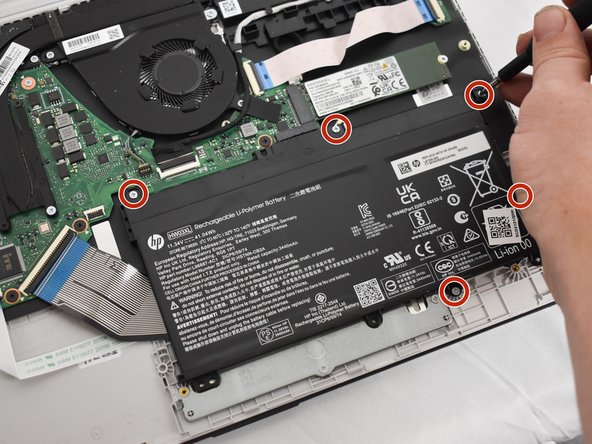
    • Remove the five 2 mm Phillips screws holding the battery down.

    • Take care not to puncture, bend, or twist the battery. Lithium batteries can be very volatile. Follow all proper hazardous disposal laws where you live.

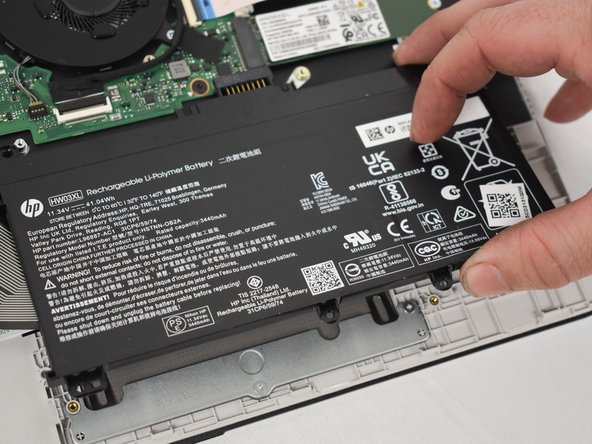
    • Gently lift the front edge of the battery up to disconnect the socket.

    • Lift the battery up and out.

  6. HP 15-ef2025nr Fan Replacement, Fan: 步骤 6 中的图像 1,3 HP 15-ef2025nr Fan Replacement, Fan: 步骤 6 中的图像 2,3 HP 15-ef2025nr Fan Replacement, Fan: 步骤 6 中的图像 3,3
    在这个步骤中使用的工具:
    Tweezers
    $4.99
    购买
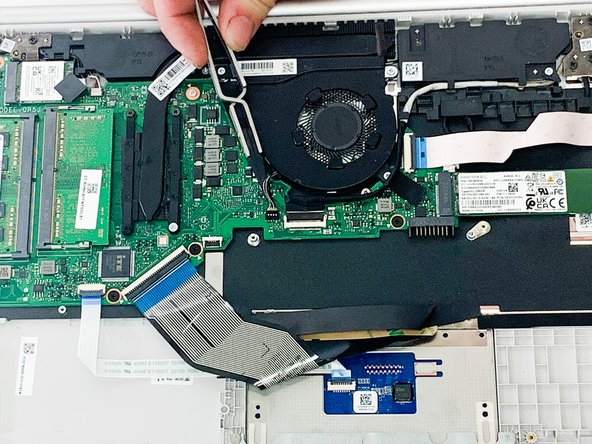
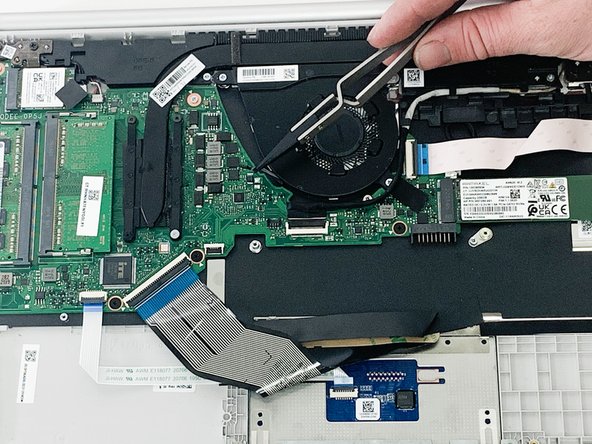
    • Use tweezers to pull the fan connector directly out of its motherboard socket.

    • Do not pull on the wires; they are very delicate.

  7. HP 15-ef2025nr Fan Replacement: 步骤 7 中的图像 1,3 HP 15-ef2025nr Fan Replacement: 步骤 7 中的图像 2,3 HP 15-ef2025nr Fan Replacement: 步骤 7 中的图像 3,3
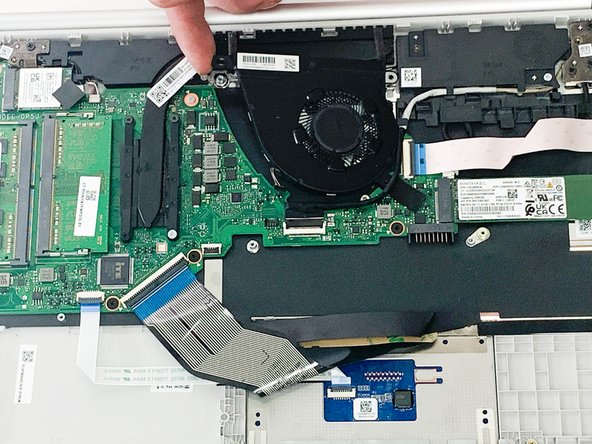
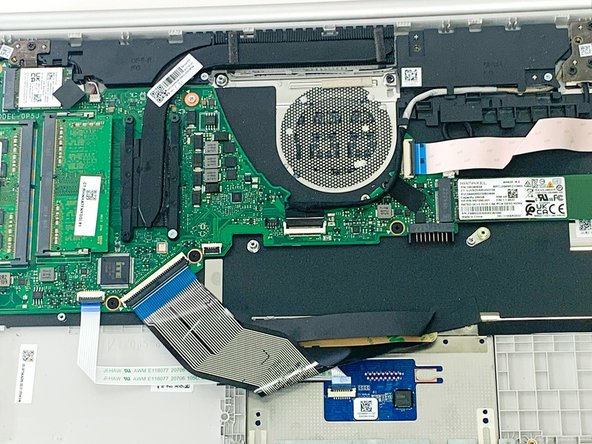
    • Remove the three 2 mm Phillips screws at the top corners and four o'clock position on the fan.

    • Remove the fan.

结论

To reassemble your device, follow these instructions in reverse order.

kyle mccomas

于02/13/23注册

291 声望

创作了2篇指南

0条评论

添加评论

浏览统计数据:

过去 24 小时: 0

过去 7 天: 2

过去 30 天: 7

总计 167