跳转到主内容

HP 15-ay091ms Fan Replacement

你所需要的

  1. HP 15-ay091ms Fan Replacement, Battery: 步骤 1 中的图像 1,2 HP 15-ay091ms Fan Replacement, Battery: 步骤 1 中的图像 2,2
    • Ensure the device is powered off and is disconnected from any AC power supply.

    • Push the latches on either side of the battery down and outward.

    • This unlatches the battery allowing for easy removal.

    • Remove the battery.

  2. HP 15-ay091ms Fan Replacement, Back Panel: 步骤 2 中的图像 1,3 HP 15-ay091ms Fan Replacement, Back Panel: 步骤 2 中的图像 2,3 HP 15-ay091ms Fan Replacement, Back Panel: 步骤 2 中的图像 3,3
    • Remove the screws from the bottom panel using a JIS #0 screwdriver.

    • Use the iFixit opening pick to lift the back cover from the device.

    • It is helpful to get an opening in one spot of the back cover and carry that opening around the device.

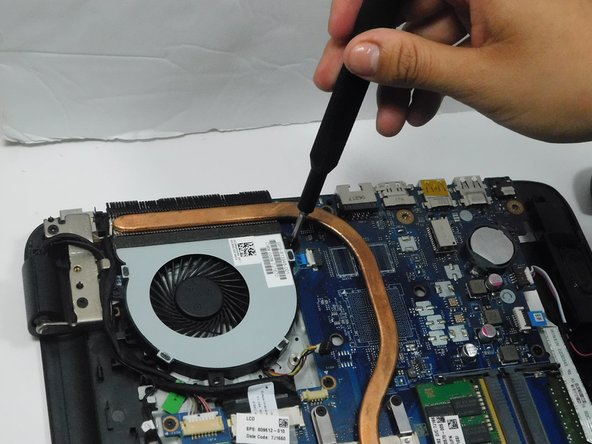
  3. HP 15-ay091ms Fan Replacement, Fan: 步骤 3 中的图像 1,3 HP 15-ay091ms Fan Replacement, Fan: 步骤 3 中的图像 2,3 HP 15-ay091ms Fan Replacement, Fan: 步骤 3 中的图像 3,3
    • Remove the screws holding the fan in place using a JIS #0 screwdriver.

    • Use a pair of tweezers to disconnect the wiring that powers the fan.

    • Remove the fan.

结论

To reassemble your device, follow these instructions in reverse order.

Gabriel

于09/07/23注册

145 声望

创作了2篇指南

团队

Gateway, Team A-1, Gonzalez Fall 2023 Gateway, Team A-1, Gonzalez Fall 2023 的会员

GCC-GONZALEZ-F23SAG1

4 名成员

创作了3篇指南

0条评论

添加评论

浏览统计数据:

过去 24 小时: 0

过去 7 天: 0

过去 30 天: 1

总计 31