简介
The replacement for your device's motherboard requires a little extra effort than the other components in the device, but is still easily manageable with a soldering kit. With the little amount of desoldering required for this project, a YouTube video undergoing basic safety precautions and soldering kit use is recommended.
你所需要的
-
-
Remove (2) screws (14 mm) with a PH1 screwdriver on the device.
-
There is one screw on the back left, and another just below it on the bottom of the device.
-
-
-
Use a plastic spudger to remove the front preset selection buttons.
-
Gently reach underneath and pull off the mesh speaker cover. It only clips in so don't worry about breaking anything.
-
-
-
-
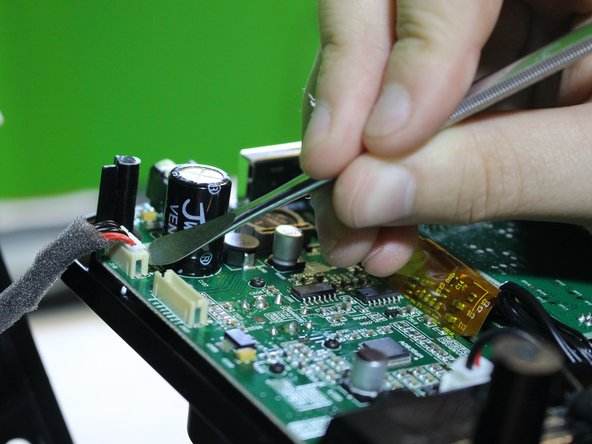
Detach a pin connector at the top of the device using a metal spudger to open up the inner components.
-
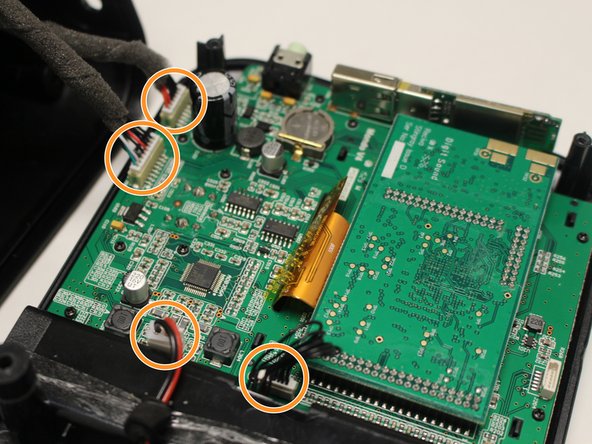
Detach (4) pin connectors inside using a metal spudger to separate the front panel from the rest of the device.
-
-
-
Remove the motherboard from the front panel.
Above in “Parts” you don’t mention motherboard. Since you are replacing the motherboard, woultn’t logic dictate this as a necessary part? And speaking of necessary parts, where would one purchase a motherboard for this referenced device?
-


To reassemble your device, follow these instructions in reverse order.
To reassemble your device, follow these instructions in reverse order.
2等其他人完成本指南。

团队

USF Tampa, Team 6-3, Eyestone Spring 2016 USF Tampa, Team 6-3, Eyestone Spring 2016 的会员
USFT-EYESTONE-S16S6G3
4 名成员
创作了8篇指南
一条评论
Nice guide. My Mondo Wi-Fi went flaky (read “died”) so I disassembled using this guide to check out the wi-fi adapter plugged into the internal USB port. Turned out the little adhesive they apply to keep the adapter in the USB port sort of flowed over the adapter. Cleaned the adapter and plugged into the USB port on the rear of the radio and I’m back with a working Mondo. Glad iFixit does more than just computers and phones and pads (though it seems the Mondo is really a little Linux box).