跳转到主内容

Google Pixelbook Go Motherboard Replacement

你所需要的

  1. Google Pixelbook Go Motherboard Replacement, Back Panel: 步骤 1 中的图像 1,2 Google Pixelbook Go Motherboard Replacement, Back Panel: 步骤 1 中的图像 2,2
    • Flip the device so that the back is facing up.

    • Peel the rubber stoppers off the top and bottom of the device.

  2. Google Pixelbook Go Motherboard Replacement: 步骤 2 中的图像 1,2 Google Pixelbook Go Motherboard Replacement: 步骤 2 中的图像 2,2
    • Remove ten 3 mm screws from around the edge of the back panel using a T5 Torx screwdriver.

  3. Google Pixelbook Go Motherboard Replacement: 步骤 3 中的图像 1,3 Google Pixelbook Go Motherboard Replacement: 步骤 3 中的图像 2,3 Google Pixelbook Go Motherboard Replacement: 步骤 3 中的图像 3,3
    • Use an iFixit opening tool to pry up the back panel cover.

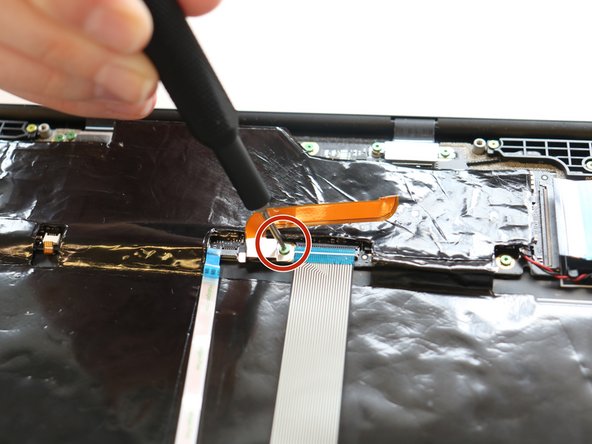
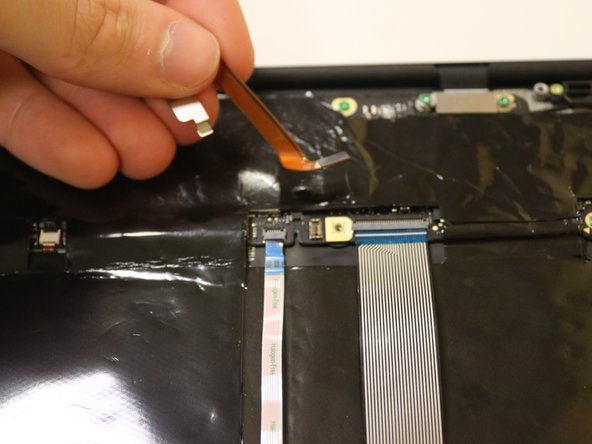
    • There is an orange ribbon cable that connects the cover to the base, so don't separate the two pieces completely.

    • Remove the single 2 mm screw using a Torx T3 screwdriver.

    • Disconnect the orange cable from the base of the device.

  4. Google Pixelbook Go Motherboard Replacement: 步骤 4 中的图像 1,1
    • Insert wisdom here.

  5. Google Pixelbook Go Motherboard Replacement, Motherboard: 步骤 5 中的图像 1,1
    • Remove the seven 2.0 mm screws using a T3 Torx screwdriver.

  6. Google Pixelbook Go Motherboard Replacement: 步骤 6 中的图像 1,3 Google Pixelbook Go Motherboard Replacement: 步骤 6 中的图像 2,3 Google Pixelbook Go Motherboard Replacement: 步骤 6 中的图像 3,3
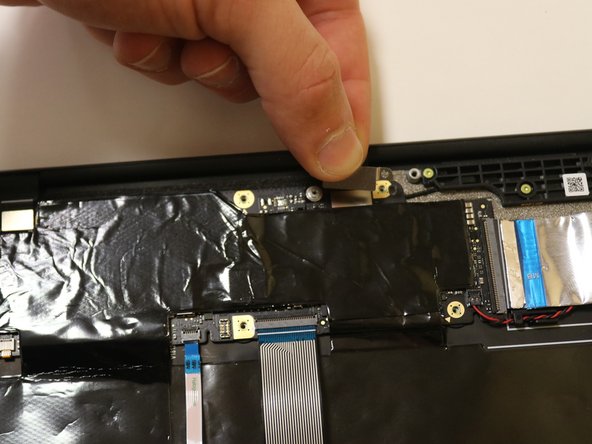
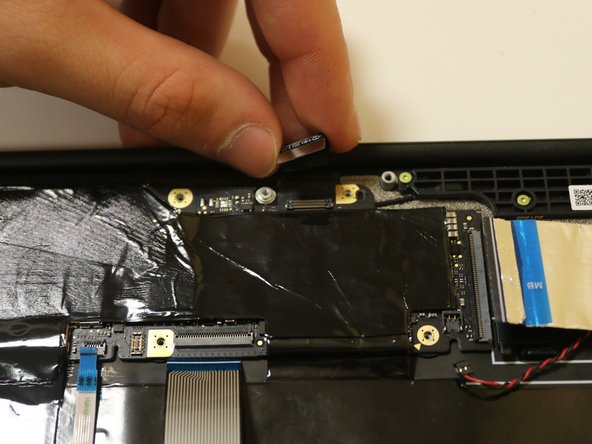
    • If they didn't fall off already, remove the small, metal casings at the top of your Pixelbook Go.

    • Both pieces are different. Be mindful of which piece goes to which side, or refer back to this step.

  7. Google Pixelbook Go Motherboard Replacement: 步骤 7 中的图像 1,3 Google Pixelbook Go Motherboard Replacement: 步骤 7 中的图像 2,3 Google Pixelbook Go Motherboard Replacement: 步骤 7 中的图像 3,3
    在这个步骤中使用的工具:
    Tweezers
    $4.99
    购买
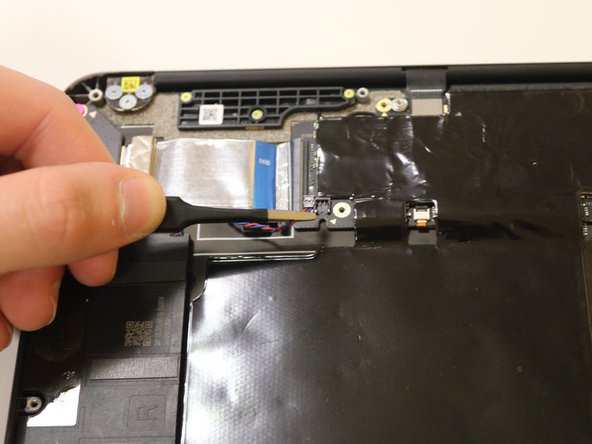
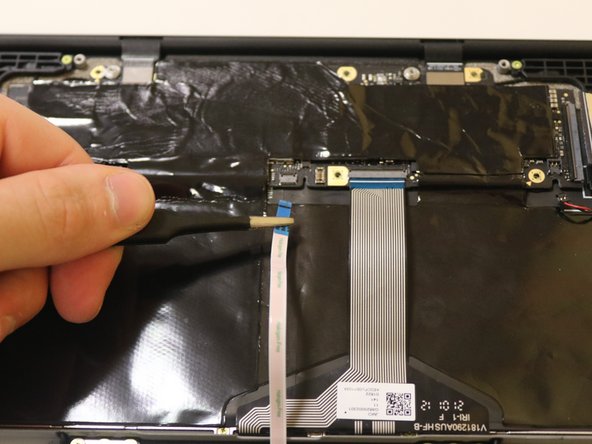
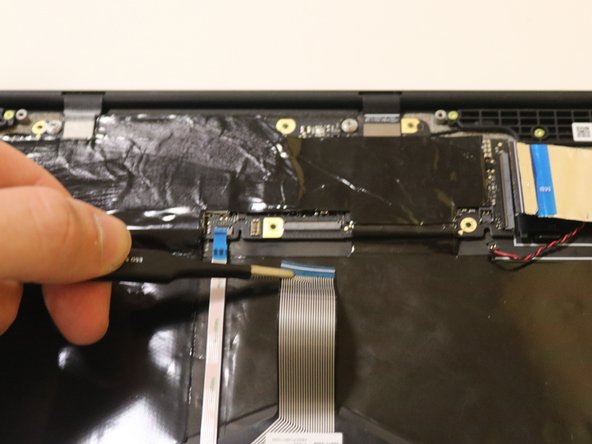
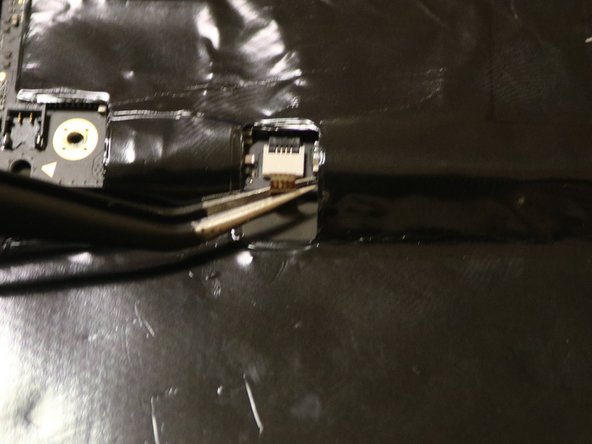
    • Disconnect the blue and red wiring cable using the needle nose tweezers. Grab as close to the connection as you can, and tug in an upwards motion.

    • Do this to both sides.

  8. Google Pixelbook Go Motherboard Replacement: 步骤 8 中的图像 1,3 Google Pixelbook Go Motherboard Replacement: 步骤 8 中的图像 2,3 Google Pixelbook Go Motherboard Replacement: 步骤 8 中的图像 3,3
    • Detach the left-hand side, wide ribbon by pulling away from the connection itself. Grab as close as you can to the connection using your spudger.

    • This part may require additional force, but be mindful not to snap it.

  9. Google Pixelbook Go Motherboard Replacement: 步骤 9 中的图像 1,2 Google Pixelbook Go Motherboard Replacement: 步骤 9 中的图像 2,2
    • Similarly, detach the right-hand side, flat ribbon by pulling away from the connection.

  10. Google Pixelbook Go Motherboard Replacement: 步骤 10 中的图像 1,2 Google Pixelbook Go Motherboard Replacement: 步骤 10 中的图像 2,2
    • Detach the thin, flat cable in the middle using your spudger or by gently pulling with your hand near the connection itself.

  11. Google Pixelbook Go Motherboard Replacement: 步骤 11 中的图像 1,2 Google Pixelbook Go Motherboard Replacement: 步骤 11 中的图像 2,2
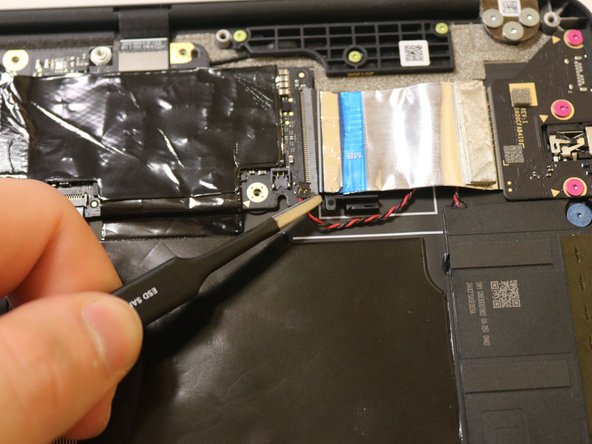
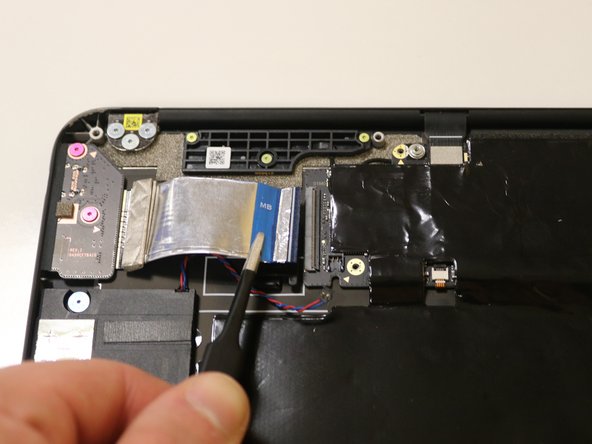
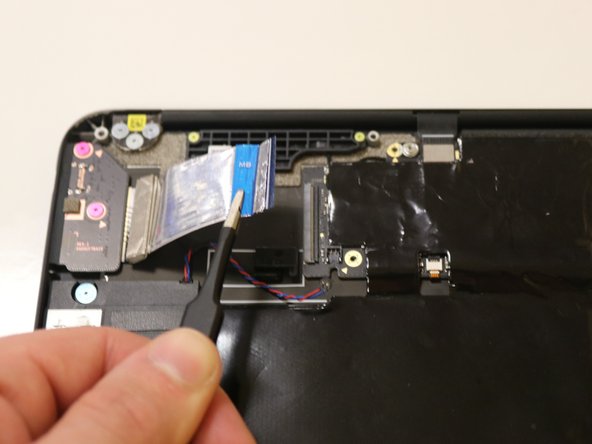
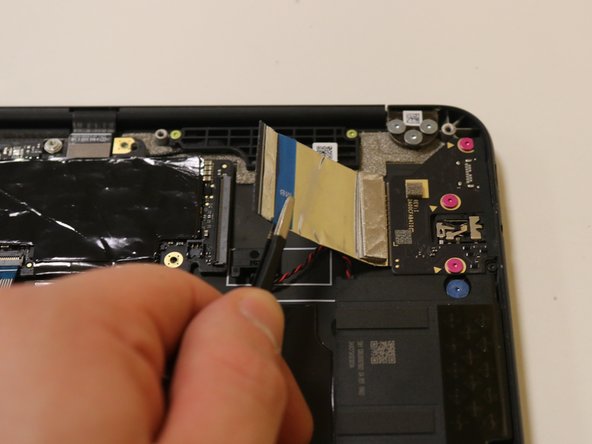
    • Detach the wider, middle cable using the same steps as before. Pull away from the connection, grabbing as close to the connection as you can.

  12. Google Pixelbook Go Motherboard Replacement: 步骤 12 中的图像 1,2 Google Pixelbook Go Motherboard Replacement: 步骤 12 中的图像 2,2
    • Detach the small, copper colored cable from the motherboard. Since this cable is so small, it will require needle-nose tweezers.

  13. Google Pixelbook Go Motherboard Replacement: 步骤 13 中的图像 1,3 Google Pixelbook Go Motherboard Replacement: 步骤 13 中的图像 2,3 Google Pixelbook Go Motherboard Replacement: 步骤 13 中的图像 3,3
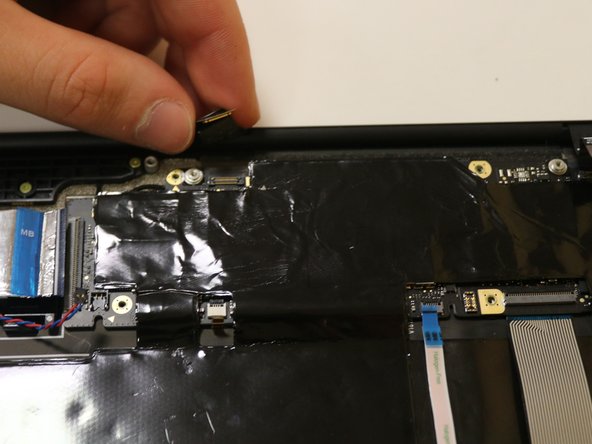
    • By hand, disconnect the top two clips gently. Although you want to detach these clips from the motherboard, these clips will remain attached on the reverse end to the base.

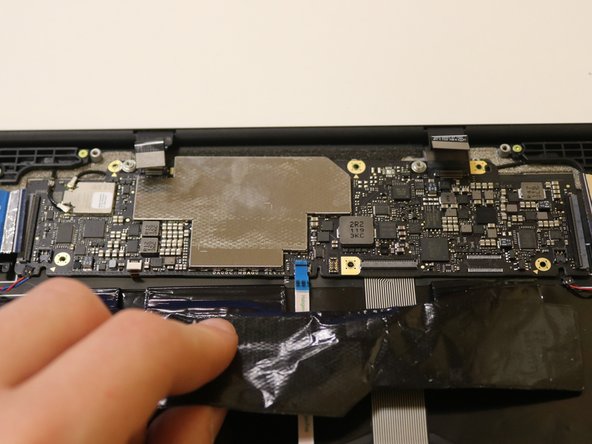
  14. Google Pixelbook Go Motherboard Replacement: 步骤 14 中的图像 1,3 Google Pixelbook Go Motherboard Replacement: 步骤 14 中的图像 2,3 Google Pixelbook Go Motherboard Replacement: 步骤 14 中的图像 3,3
    • Gently peel back the adhesive plastic covering towards the main body.

    • Avoid ripping the plastic covering as this is easy to do.

  15. Google Pixelbook Go Motherboard Replacement: 步骤 15 中的图像 1,3 Google Pixelbook Go Motherboard Replacement: 步骤 15 中的图像 2,3 Google Pixelbook Go Motherboard Replacement: 步骤 15 中的图像 3,3
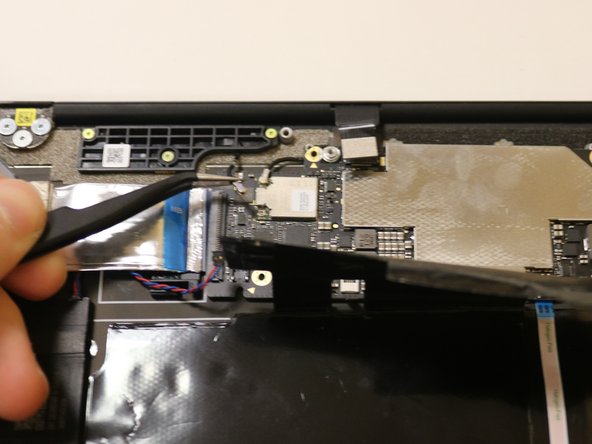
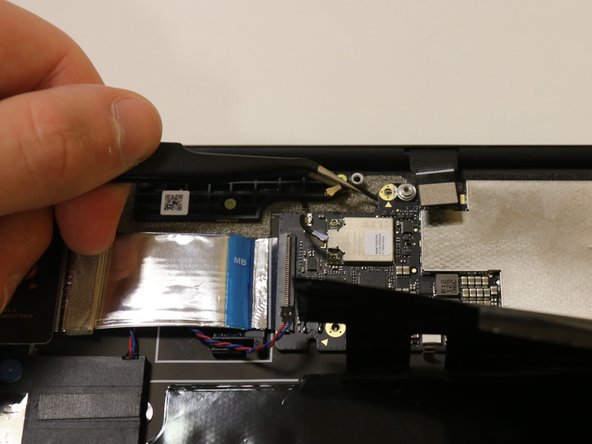
    • Detach the final two clips attached to the motherboard using the needle nose tweezers, located at the top left of the motherboard.

  16. Google Pixelbook Go Motherboard Replacement: 步骤 16 中的图像 1,3 Google Pixelbook Go Motherboard Replacement: 步骤 16 中的图像 2,3 Google Pixelbook Go Motherboard Replacement: 步骤 16 中的图像 3,3
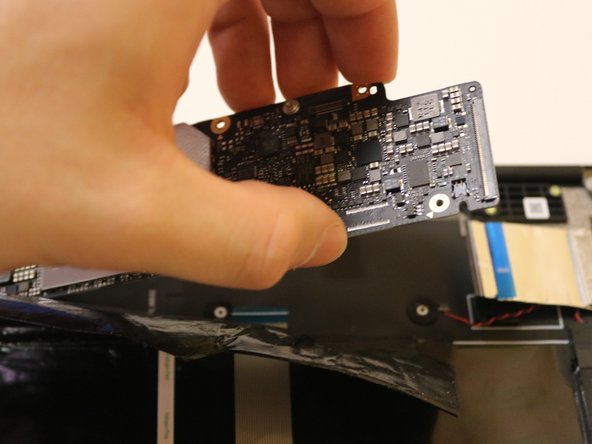
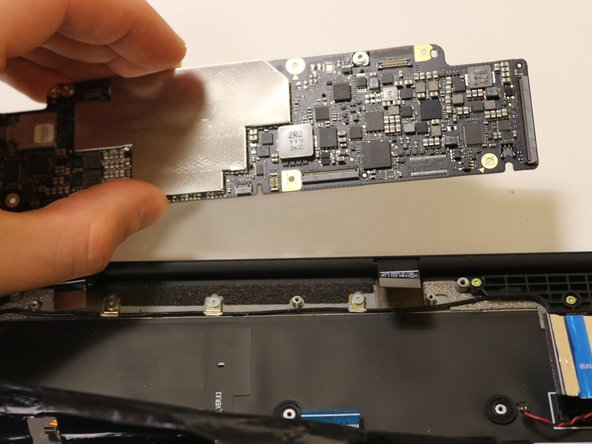
    • Remove the motherboard by gently lifting with your hands.

结论

To reassemble your device, follow these instructions in reverse order.

另外一个人完成了本指南。

0条评论

添加评论

浏览统计数据:

过去 24 小时: 1

过去 7 天: 5

过去 30 天: 17

总计 482