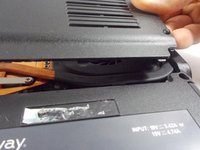
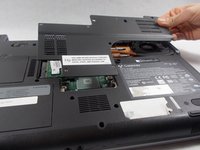
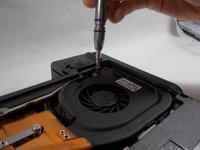
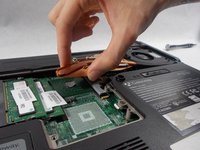
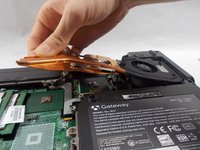
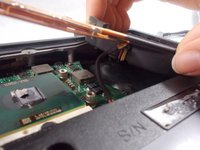
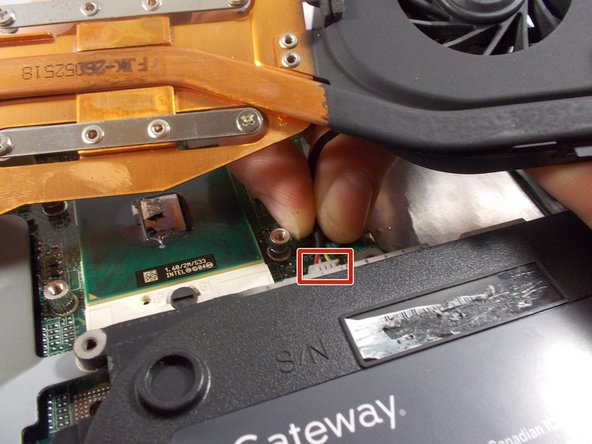
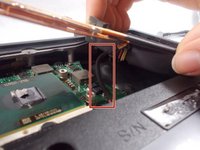
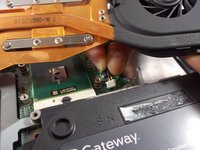
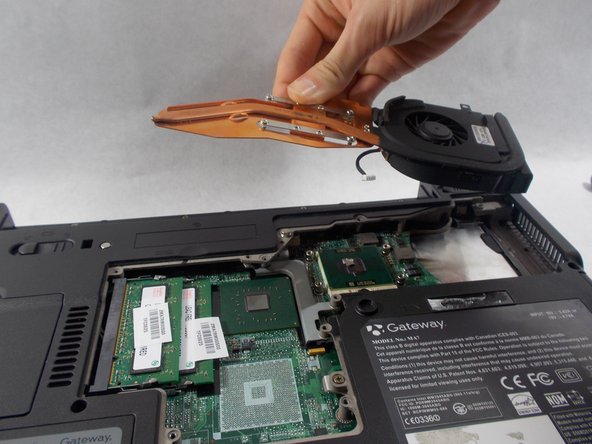
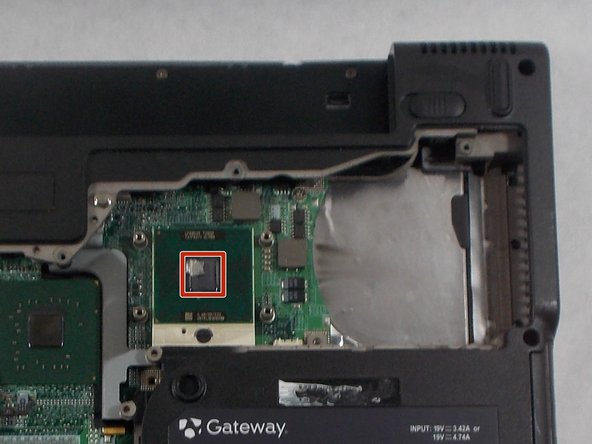
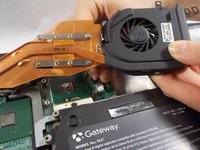
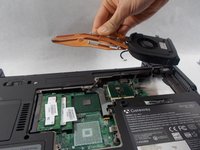
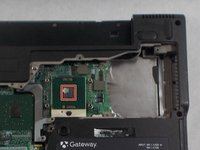
跳转到主内容

Gateway MA7 Fan Replacement

你所需要的

  1. Gateway MA7 Fan Replacement, Fan: 步骤 1 中的图像 1,1
    • Before starting this replacement, make sure the device is powered off and the battery is removed.

    • This particular device is missing the battery.

    • To remove your battery, slide the plastic tabs on the back of the laptop and pull the battery out of the device.

  2. Gateway MA7 Fan Replacement: 步骤 2 中的图像 1,3 Gateway MA7 Fan Replacement: 步骤 2 中的图像 2,3 Gateway MA7 Fan Replacement: 步骤 2 中的图像 3,3
    • Remove the seven 6mm screws from the back panel with a Phillips #0 screwdriver.

  3. Gateway MA7 Fan Replacement: 步骤 3 中的图像 1,3 Gateway MA7 Fan Replacement: 步骤 3 中的图像 2,3 Gateway MA7 Fan Replacement: 步骤 3 中的图像 3,3
    • Pull upwards on the top of the plastic panel to remove it.

    • With the exception of the screw marked "K", all of the screws will remain connected to the plastic piece.

  4. Gateway MA7 Fan Replacement: 步骤 4 中的图像 1,2 Gateway MA7 Fan Replacement: 步骤 4 中的图像 2,2
    • Remove the five 6 mm screws with a Phillips #0 screw driver to detach the fan and cooling unit from the motherboard.

    • The four screws on the silver metal bands of the fan will not come off of the actual component.

  5. Gateway MA7 Fan Replacement: 步骤 5 中的图像 1,3 Gateway MA7 Fan Replacement: 步骤 5 中的图像 2,3 Gateway MA7 Fan Replacement: 步骤 5 中的图像 3,3
    • Lifting from the left side of the fan, start to pull the fan off of the motherboard.

    • Be sure not to pull the fan all the way off the motherboard yet. Before it can be completely removed the cables must be disconnected.

    • There may be thermal paste adhering the fan to the motherboard. Be sure to lift the fan slowly and gently.

  6. Gateway MA7 Fan Replacement: 步骤 6 中的图像 1,3 Gateway MA7 Fan Replacement: 步骤 6 中的图像 2,3 Gateway MA7 Fan Replacement: 步骤 6 中的图像 3,3
    • In order to properly remove the fan, disconnect the cable that is attached to the motherboard.

    • Gently grasp the connecting cable from under the fan and pull it out of the socket on the motherboard to disconnect it.

  7. Gateway MA7 Fan Replacement: 步骤 7 中的图像 1,3 Gateway MA7 Fan Replacement: 步骤 7 中的图像 2,3 Gateway MA7 Fan Replacement: 步骤 7 中的图像 3,3
    • With the screws removed and the cable disconnected, just lift the fan off the motherboard to remove it.

    • When you replace the fan, be sure to reapply thermal paste here.

结论

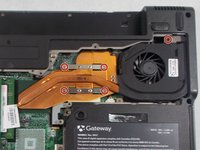
To reassemble your device, follow these instructions in reverse order.

Cameron Sheedy

于03/05/18注册

145 声望

撰写一个指南

团队

0条评论

添加评论

浏览统计数据:

过去 24 小时: 1

过去 7 天: 2

过去 30 天: 7

总计 458