跳转到主内容

Gateway MA7 CD/DVD Drive Replacement

你所需要的

  1. Gateway MA7 CD/DVD Drive Replacement, CD/DVD Drive: 步骤 1 中的图像 1,1
    • To prevent injury, make sure the laptop is unplugged before removing the battery.

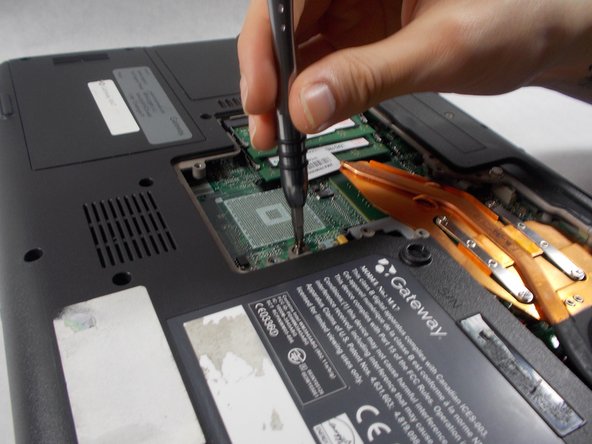
    • Push the locking tab over to the right away from the battery to unlock it from the laptop.

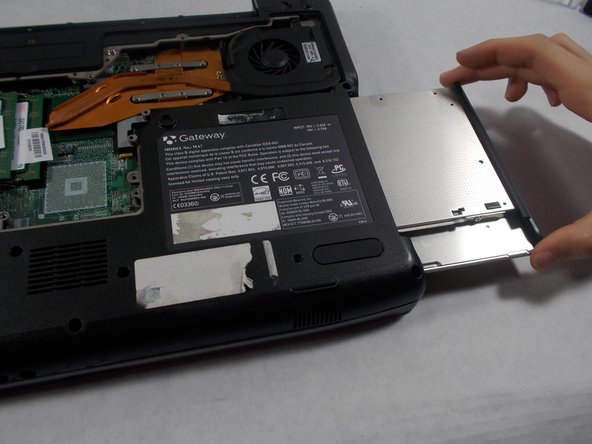
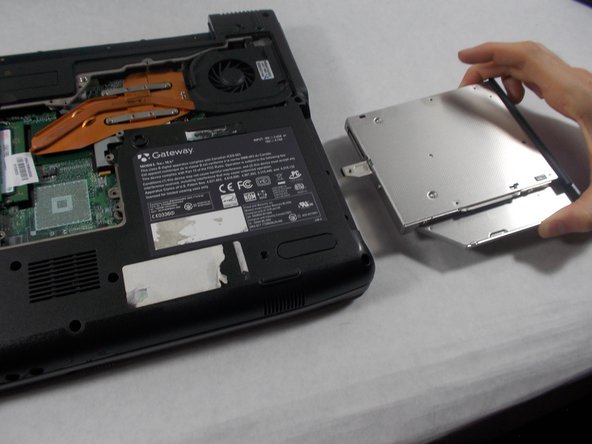
    • Hold the additional locking tab to the left while puling out the battery.

  2. Gateway MA7 CD/DVD Drive Replacement: 步骤 2 中的图像 1,2 Gateway MA7 CD/DVD Drive Replacement: 步骤 2 中的图像 2,2
    • Remove the following screws securing the plastic panel from the bottom of the laptop:

    • Remove the seven 6 mm screws with a Phillips #0 screwdriver

  3. Gateway MA7 CD/DVD Drive Replacement: 步骤 3 中的图像 1,3 Gateway MA7 CD/DVD Drive Replacement: 步骤 3 中的图像 2,3 Gateway MA7 CD/DVD Drive Replacement: 步骤 3 中的图像 3,3
    • Pull upwards on the top of the plastic panel to remove it.

    • With the exception of the screw marked "K", all of the screws will remain connected to the plastic piece.

  4. Gateway MA7 CD/DVD Drive Replacement: 步骤 4 中的图像 1,2 Gateway MA7 CD/DVD Drive Replacement: 步骤 4 中的图像 2,2
    • Remove the following screws holding the DVD/CD drive in place:

    • One 6 mm Phillips #0

  5. Gateway MA7 CD/DVD Drive Replacement: 步骤 5 中的图像 1,1
    • Use the edge of a plastic opening tool to push down on the metal latch preventing the drive from being pushed out.

    • While pressing down, push the metal latch out away from the laptop.

  6. Gateway MA7 CD/DVD Drive Replacement: 步骤 6 中的图像 1,3 Gateway MA7 CD/DVD Drive Replacement: 步骤 6 中的图像 2,3 Gateway MA7 CD/DVD Drive Replacement: 步骤 6 中的图像 3,3
    • Once the drive has been pried out, you can pull the CD drive out.

结论

To reassemble your device, follow these instructions in reverse order.

Tim Rose

于03/05/18注册

392 声望

创作了2篇指南

团队

0条评论

添加评论

浏览统计数据:

过去 24 小时: 0

过去 7 天: 1

过去 30 天: 3

总计 471