跳转到主内容

Gateway LT41P10u Webcam Replacement

你所需要的

  1. Gateway LT41P10u Webcam Replacement, Battery: 步骤 1 中的图像 1,1
    • Place the laptop upside down on a flat surface so you can see the battery.

  2. Gateway LT41P10u Webcam Replacement: 步骤 2 中的图像 1,1
    • Pull the two marked tabs towards the outside of the computer to unlock them.

  3. Gateway LT41P10u Webcam Replacement: 步骤 3 中的图像 1,1
    • While keeping both of the tabs in the unlocked position, grab the battery and pull outwards, until the battery slides out from the rest of the computer.

  4. Gateway LT41P10u Webcam Replacement, Monitor: 步骤 4 中的图像 1,2 Gateway LT41P10u Webcam Replacement, Monitor: 步骤 4 中的图像 2,2
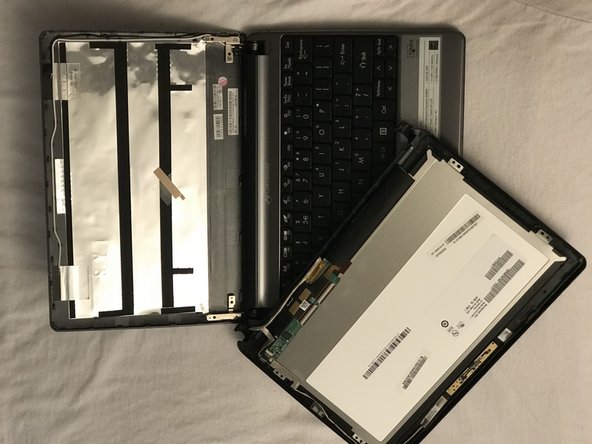
    • Carefully use a spudger to separate the monitor from top panel.

    • Gently remove lower hooks from the hinges. (see second image)

  5. Gateway LT41P10u Webcam Replacement: 步骤 5 中的图像 1,2 Gateway LT41P10u Webcam Replacement: 步骤 5 中的图像 2,2
    • Once you completed separating the monitor from the top panel disconnect the cable shown here in red by raising the cable lock and pulling the wires away.

    • The second image is how it should look once completely disconnected.

  6. Gateway LT41P10u Webcam Replacement, Webcam: 步骤 6 中的图像 1,1
    • Using a plastic spudger or fingers gently remove webcam hardware from front screen. A gentle heat source can be used to easily remove glued down parts.

    • Once webcam hardware is removed from front screen, it can be removed by hand from the wiring and replaced.

    • Perform these steps carefully as smaller parts are more likely to break.

结论

To reassemble your device, follow these instructions in reverse order.

Patrick Raposo

于10/21/17注册

201 声望

创作了2篇指南

团队

UMass Dartmouth, Team S66-G8, Rockett Fall 2017 UMass Dartmouth, Team S66-G8, Rockett Fall 2017 的会员

UMASSD-ROCKETT-F17S66G8

3 名成员

创作了12篇指南

0条评论

添加评论

浏览统计数据:

过去 24 小时: 0

过去 7 天: 7

过去 30 天: 9

总计 115