跳转到主内容

Garmin Nüvi 205W LCD Display Replacement

你所需要的

  1. Garmin Nüvi 205W LCD Display Replacement, LCD Display: 步骤 1 中的图像 1,3 Garmin Nüvi 205W LCD Display Replacement, LCD Display: 步骤 1 中的图像 2,3 Garmin Nüvi 205W LCD Display Replacement, LCD Display: 步骤 1 中的图像 3,3
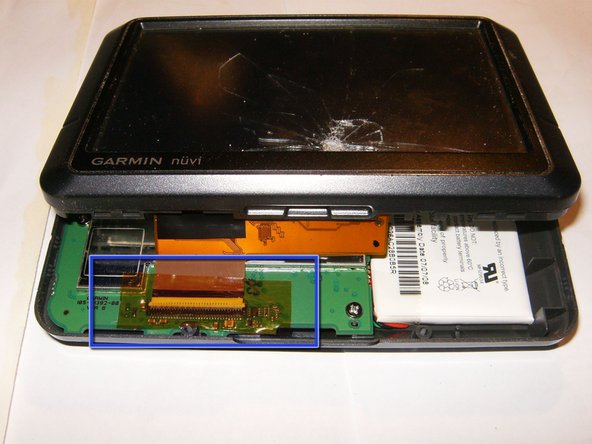
    • The cracked screen is clearly visible. LCD is still functioning, but obviously no touch function.

    • Remove the holder as well as the power cord from the back of the GPS unit.

    • The Nüvi uses two screws that are hidden underneath the label on the bottom.

  2. Garmin Nüvi 205W LCD Display Replacement: 步骤 2 中的图像 1,3 Garmin Nüvi 205W LCD Display Replacement: 步骤 2 中的图像 2,3 Garmin Nüvi 205W LCD Display Replacement: 步骤 2 中的图像 3,3
    • Remove the label, then remove the two Torx T5 screws

    • Use a plastic opening tool to start splitting the front and back case.

    • Work your way around the separation line, gently applying continous pressure to the back case.

  3. Garmin Nüvi 205W LCD Display Replacement: 步骤 3 中的图像 1,3 Garmin Nüvi 205W LCD Display Replacement: 步骤 3 中的图像 2,3 Garmin Nüvi 205W LCD Display Replacement: 步骤 3 中的图像 3,3
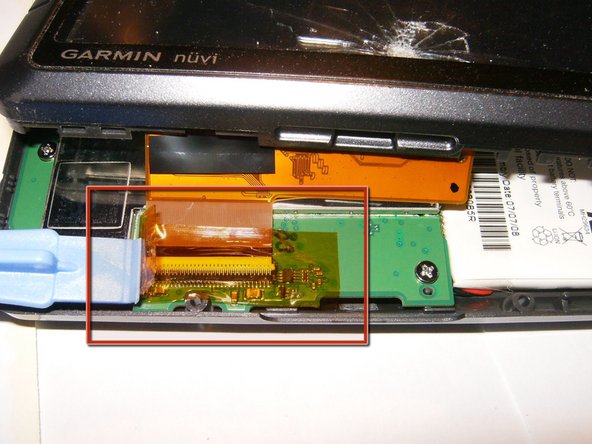
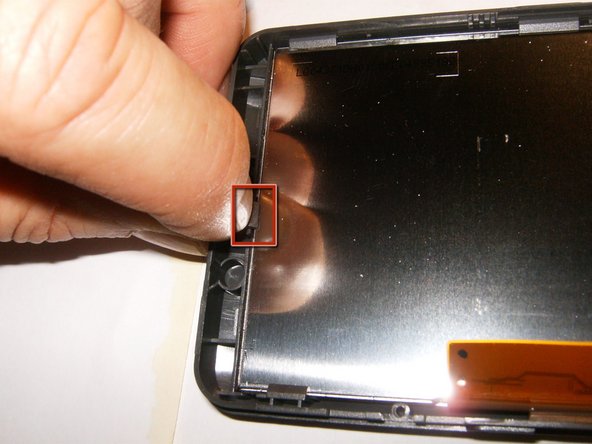
    • Once the front and back case are split, do not yet totally remove it. The LCD is still attached via a ribbon cable.

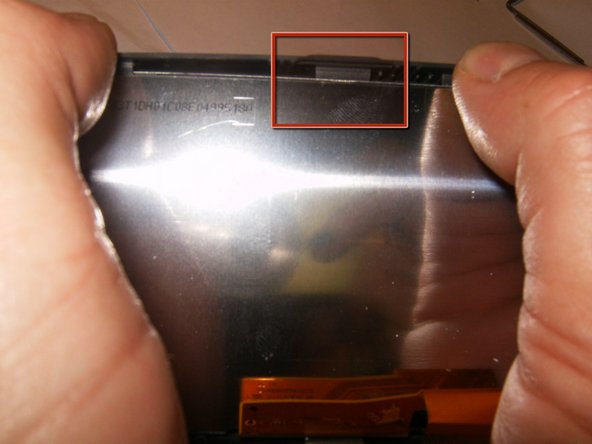
    • The ribbon cable and connector are covered with a strip of Kapton tape

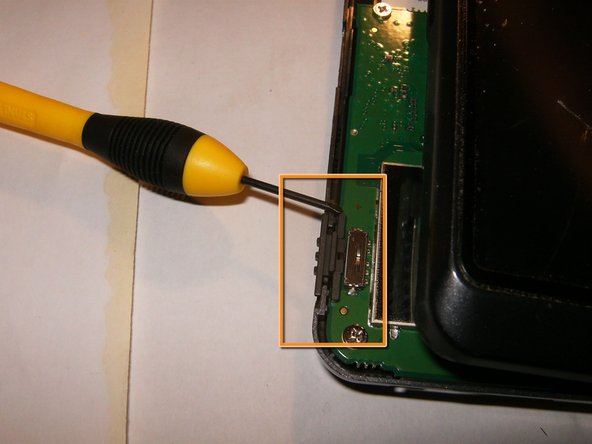
    • Remove the tape. Use the plastic opening tool, or any other appropriate tool (i.e. guitar pick, fingernails etc), to remove the tape.

  4. Garmin Nüvi 205W LCD Display Replacement: 步骤 4 中的图像 1,3 Garmin Nüvi 205W LCD Display Replacement: 步骤 4 中的图像 2,3 Garmin Nüvi 205W LCD Display Replacement: 步骤 4 中的图像 3,3
    • Once the tape is removed, flip the white clasp open, by moving it away from the cable end, disconnect the LCD.

    • Remove the On/Off switch

    • Remove the complete front assembly.

  5. Garmin Nüvi 205W LCD Display Replacement: 步骤 5 中的图像 1,3 Garmin Nüvi 205W LCD Display Replacement: 步骤 5 中的图像 2,3 Garmin Nüvi 205W LCD Display Replacement: 步骤 5 中的图像 3,3
    • The LCD assembly is held in the front bezel by seven plastic tabs.

    • Move those tabs slightly back while applying pressure from the opposite side (front of the LCD)

    • Continue to push the tabs on the bezel away from the LCD assembly, pushing the LCD away from the bezel

  6. Garmin Nüvi 205W LCD Display Replacement: 步骤 6 中的图像 1,3 Garmin Nüvi 205W LCD Display Replacement: 步骤 6 中的图像 2,3 Garmin Nüvi 205W LCD Display Replacement: 步骤 6 中的图像 3,3
    • Ensure that the LCD assembly clears all the tabs.

    • Remove the LCD from the front bezel

    • Totally separate the assembly from the bezel. Now it is time to replace it with a new assembly.

结论

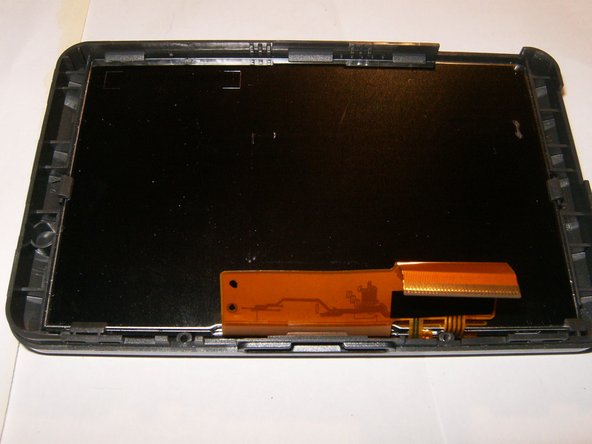
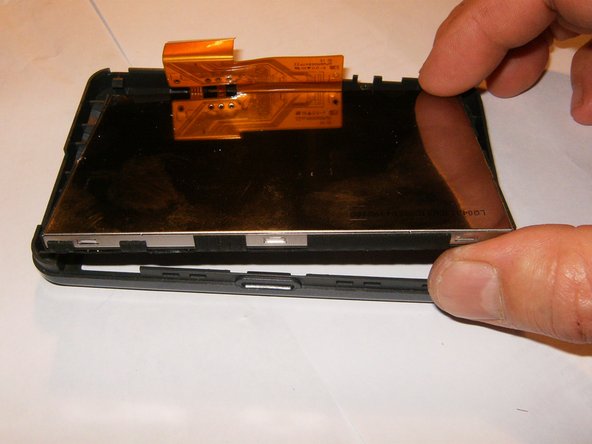
To reassemble your device, follow these instructions in reverse order.

3等其他人完成本指南。

oldturkey03

于09/29/10注册

781,574 声望

创作了119篇指南

团队

Global Fixers Global Fixers 的会员

Community

32 名成员

创作了531篇指南

2条评论

After reinstalling LCD screen how do I reconnect the ribbon cable? Any tips would be GREATLY appreciated :) Thank You

John - 回复

Thank you! Saved me a new GPS!

worthless0000 - 回复

添加评论

浏览统计数据:

过去 24 小时: 0

过去 7 天: 0

过去 30 天: 5

总计 3,340