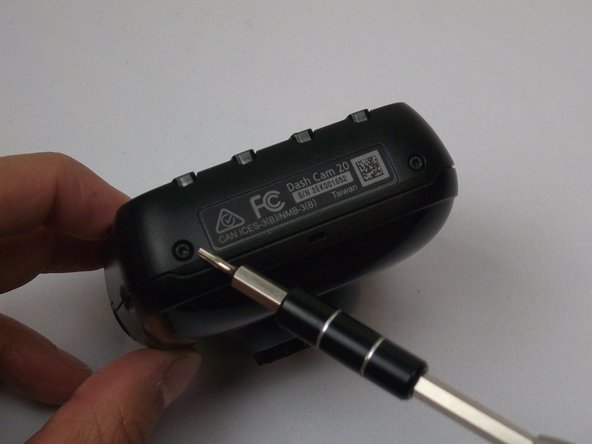
跳转到主内容

Garmin Dash Cam 20 Internal Assembly

仅作为前提条件
本指南仅用作其他指南的先决条件。不能单独食用。

你所需要的

  1. Garmin Dash Cam 20 Internal Assembly, Internal Assembly: 步骤 1 中的图像 1,2 Garmin Dash Cam 20 Internal Assembly, Internal Assembly: 步骤 1 中的图像 2,2
    • Be sure to turn off the Dash Cam by pressing the power button.

  2. Garmin Dash Cam 20 Internal Assembly: 步骤 2 中的图像 1,2 Garmin Dash Cam 20 Internal Assembly: 步骤 2 中的图像 2,2
    • Rotate the Dash Cam to where the socket faces you.

    • Remove the 9 mm screw using the Torx T6 screwdriver.

  3. Garmin Dash Cam 20 Internal Assembly: 步骤 3 中的图像 1,2 Garmin Dash Cam 20 Internal Assembly: 步骤 3 中的图像 2,2
    • Remove the Dash Cam socket piece.

  4. Garmin Dash Cam 20 Internal Assembly: 步骤 4 中的图像 1,2 Garmin Dash Cam 20 Internal Assembly: 步骤 4 中的图像 2,2
    • Rotate the Dash Cam to where the product information faces you.

    • Remove the two 5 mm screws using the Torx T5 screwdriver.

  5. Garmin Dash Cam 20 Internal Assembly: 步骤 5 中的图像 1,3 Garmin Dash Cam 20 Internal Assembly: 步骤 5 中的图像 2,3 Garmin Dash Cam 20 Internal Assembly: 步骤 5 中的图像 3,3
    • Remove top case from the bottom case.

    • The compact nature of the casing requires use of the metal spudger for needed leverage.

  6. Garmin Dash Cam 20 Internal Assembly: 步骤 6 中的图像 1,3 Garmin Dash Cam 20 Internal Assembly: 步骤 6 中的图像 2,3 Garmin Dash Cam 20 Internal Assembly: 步骤 6 中的图像 3,3
    • Remove the two 5mm screws using the Torx T5 screwdriver

    • By removing the screws, the metal battery frame will now become free from the rest of the device.

结论

To reassemble your device, follow these instructions in reverse order.

另外一个人完成了本指南。

Jesse Hillman

于10/04/16注册

757 声望

创作了5篇指南

团队

USF Tampa, Team 2-1, Cagle Fall 2016 USF Tampa, Team 2-1, Cagle Fall 2016 的会员

USFT-CAGLE-F16S2G1

4 名成员

创作了5篇指南

0条评论

添加评论

浏览统计数据:

过去 24 小时: 0

过去 7 天: 0

过去 30 天: 0

总计 57