简介
This guide demonstrates how to replace the joystick covers on your GameSir Tarantula Pro controller. The joysticks are used to control movement and navigate on-screen menus, while the joystick covers are the removable caps your thumbs rest on during use.
Joystick issues can develop over time due to normal wear, dust buildup, or oxidation inside the joystick module, which may lead to inaccurate movement or stick drift. For more information, see the GameSir Tarantula Pro Stick Drift troubleshooting page.
If you have difficulty removing the battery in Step 5, use the iFixit adhesive remover to loosen the double-sided tape. Don't bend or puncture the battery as it can cause a fire.
Before beginning the repair, unplug the controller if it is charging or being used in wired mode, then power it off completely.
你所需要的
-
-
Use the tip of a spudger to remove the rubber screw covers from the backs of the handles and the top edge of the back case.
-
Gently pry up each screw cover and lift it out.
 询问修复机器人
-
-
-
-
Use the point of a spudger to push on alternating sides of each JST connector to "walk" it out of its socket.
-
If that doesn't work, use a pair of tweezers to firmly grip the sides of the connector and pull straight away from the socket. Hold the tweezers closer to the connector to get a better grip.
-
If the connector's socket has cutouts, you can insert the arms of a pair of sharp tweezers into the cutouts and gently push the connector out of its socket.
-
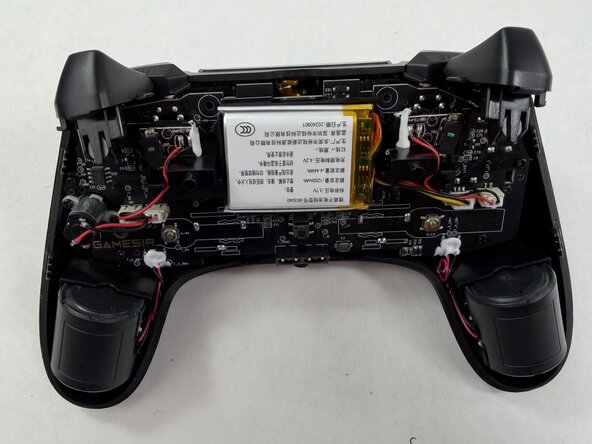
Carefully remove the battery from the controller.
-


To reassemble your device, follow these instructions in reverse order. Take your e-waste to an R2 or e-Stewards certified recycler.
团队

UMass Dartmouth, Team 3-5, Shaddix Spring 2026 UMass Dartmouth, Team 3-5, Shaddix Spring 2026 的会员
UMASSD-SHADDIX-S26S3G5
3 名成员
创作了1篇指南