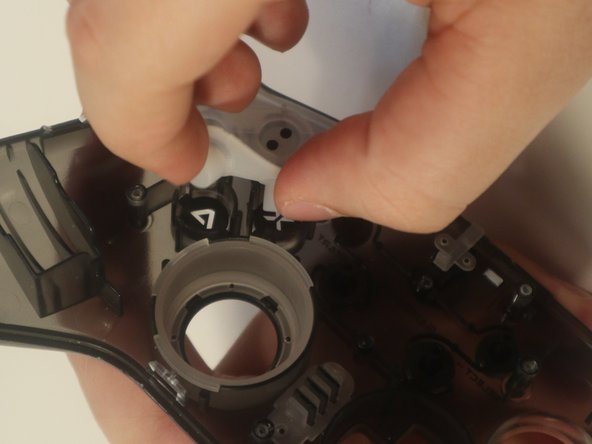
跳转到主内容

GameSir T4 Pro Action Buttons Replacement

你所需要的

  1. GameSir T4 Pro Action Buttons Replacement, Battery: 步骤 1 中的图像 1,1
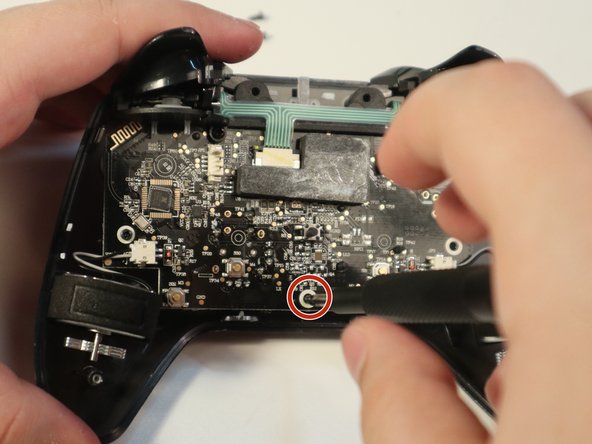
    • Using the Phillips 1 screwdriver, gently turn the screw to the left (repeat this step until all four screws are taken out).

  2. GameSir T4 Pro Action Buttons Replacement: 步骤 2 中的图像 1,1
    • Use your iFixit opening tool to break the seam of the back of your controller.

    • Be careful when pulling apart, as the charging port wires are connected to both sides of the controller.

  3. GameSir T4 Pro Action Buttons Replacement: 步骤 3 中的图像 1,1
    • Using the plastic spudger, wiggle the connection out of place.

  4. GameSir T4 Pro Action Buttons Replacement: 步骤 4 中的图像 1,1
    • Apply a slow, but consistent pull to the old 600 maH battery.

    • Attach new battery onto the pad.

  5. GameSir T4 Pro Action Buttons Replacement, Action Buttons: 步骤 5 中的图像 1,2 GameSir T4 Pro Action Buttons Replacement, Action Buttons: 步骤 5 中的图像 2,2
    • Remove the three 5mm screws on the motherboard.

  6. GameSir T4 Pro Action Buttons Replacement: 步骤 6 中的图像 1,1
    • Disconnect all white connectors from the motherboard.

  7. GameSir T4 Pro Action Buttons Replacement: 步骤 7 中的图像 1,1
    • Carefully pull the motherboard away to reveal the front panel.

  8. GameSir T4 Pro Action Buttons Replacement: 步骤 8 中的图像 1,2 GameSir T4 Pro Action Buttons Replacement: 步骤 8 中的图像 2,2
    • Remove the white rubber panel to get access to the buttons.

    • Put a small dab of isopropyl alcohol on a cotton swab, and clean around the area of your sticky button.

结论

To reassemble your device, follow these instructions in reverse order.

4等其他人完成本指南。

0条评论

添加评论

浏览统计数据:

过去 24 小时: 5

过去 7 天: 32

过去 30 天: 126

总计 2,735