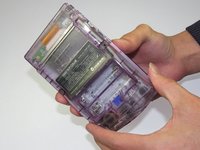
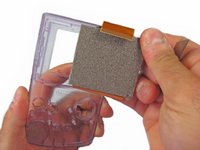
跳转到主内容

Game Boy Color LCD显示屏 更换

你所需要的

  1. Game Boy Color LCD显示屏 更换, 电池: 步骤 1 中的图像 1,2 Game Boy Color LCD显示屏 更换, 电池: 步骤 1 中的图像 2,2
    • 在Game Boy Color背后找到电池仓。

    • 向下按压卡舌并向外翻动来取下电池盖。

  2. Game Boy Color LCD显示屏 更换: 步骤 2 中的图像 1,1
    • 从电池仓中取出电池。

  3. Game Boy Color LCD显示屏 更换, 后盖: 步骤 3 中的图像 1,1
    • 使用Y1螺丝刀,来卸下如图上6颗将设备与设备固定的螺丝。 底部的两颗位于电池仓内。

  4. Game Boy Color LCD显示屏 更换: 步骤 4 中的图像 1,2 Game Boy Color LCD显示屏 更换: 步骤 4 中的图像 2,2
    • 小心的将后壳与设备的其余部分分离。现在你已经成功将其分离。

  5. Game Boy Color LCD显示屏 更换, LCD 排线: 步骤 5 中的图像 1,1
    • 使用撬棒将两侧的卡舌推起。

  6. Game Boy Color LCD显示屏 更换: 步骤 6 中的图像 1,1
    • 小心的从插座中取出排线。

  7. Game Boy Color LCD显示屏 更换, 主板: 步骤 7 中的图像 1,2 Game Boy Color LCD显示屏 更换, 主板: 步骤 7 中的图像 2,2
    • 使用#1号十字螺丝刀来拆下图中所示的3颗螺丝。

  8. Game Boy Color LCD显示屏 更换: 步骤 8 中的图像 1,1
    • 从前面板上小心取下主板。

  9. Game Boy Color LCD显示屏 更换, LCD 显示屏: 步骤 9 中的图像 1,2 Game Boy Color LCD显示屏 更换, LCD 显示屏: 步骤 9 中的图像 2,2
    • 小心地将LCD显示屏从前面板提起。

    • 扭动前面板可能更有助于拆解。

结论

想要重新组装您的设备,请按照本指南相反顺序进行。

38等其他人完成本指南。

由衷感谢以下译者:

en zh

100%

Leon赵国鑫正在帮助我们修复这个世界! 您也想加入吗?
开始翻译 ›

团队

Cal Poly, Team 19-47, Regan Winter 2013 Cal Poly, Team 19-47, Regan Winter 2013 的会员

CPSU-REGAN-W13S19G47

4 名成员

创作了56篇指南

7条评论

I broke my screen doing this. Be really gentle!

Andrew - 回复

Broke my screen just like the last commenter. These instructions are retarded. DON’T pry the screen from the back. Take the front cover off and PUSH it from the front. The circuity for the display is encased in the thin piece of glass all around the LCD. Prying WILL break it!

VoopTech - 回复

Horrible instructions, TBH.

Michelle Fernandez - 回复

Broke the plastic around the screen and doesn't turn on anymore -_- . Guess now I can put a backlit in but not how I wanted it to go

Daniel Guerrero - 回复

Same thing happened to me, but its not really an issue. The way I see it, this is an article for replacing the screen, so it doesnt much matter if the one you’re taking out is broken.

DJ Gunter -

添加评论

浏览统计数据:

过去 24 小时: 17

过去 7 天: 100

过去 30 天: 518

总计 51,742