跳转到主内容

Galaxy Tab S 10.5 Charge port Replacement

你所需要的

  1. Galaxy Tab S 10.5 Charge port Replacement, Disassembling Galaxy Tab S 10.5 Back Cover: 步骤 1 中的图像 1,2 Galaxy Tab S 10.5 Charge port Replacement, Disassembling Galaxy Tab S 10.5 Back Cover: 步骤 1 中的图像 2,2
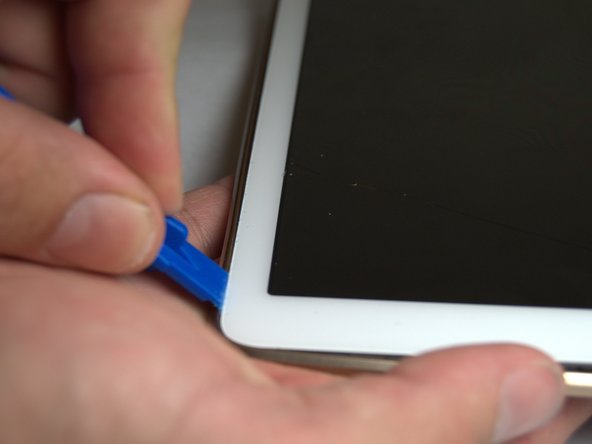
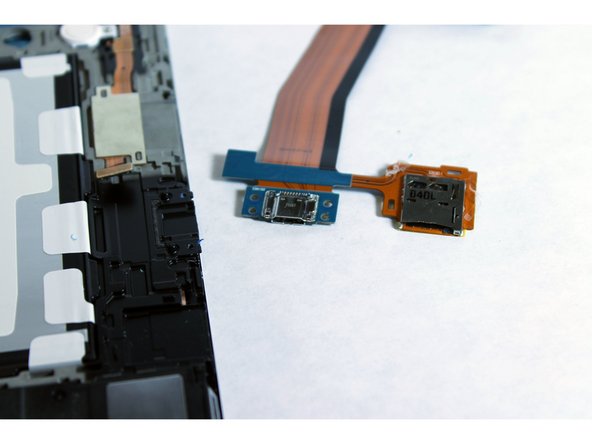
    • Place the plastic opening tool into the SD card slot or charge port.

    • Try in an upward motion until you see a separation between the tablet and back cover.

  2. Galaxy Tab S 10.5 Charge port Replacement: 步骤 2 中的图像 1,1
    • Work around the entire device by sliding the plastic opening tool around the rim.

    • If this is the first time, it will be hard to separate the back cover from the tablet.

    • The clips are approximately 5 cm apart. While working around the device, the clips will make a dislocating sound when disconnected.

  3. Galaxy Tab S 10.5 Charge port Replacement: 步骤 3 中的图像 1,1
    • Remove the back cover once all links have been separated.

    • Be careful when touching any of the internal components of the tablet.

  4. Galaxy Tab S 10.5 Charge port Replacement, Back Rim Cover: 步骤 4 中的图像 1,3 Galaxy Tab S 10.5 Charge port Replacement, Back Rim Cover: 步骤 4 中的图像 2,3 Galaxy Tab S 10.5 Charge port Replacement, Back Rim Cover: 步骤 4 中的图像 3,3
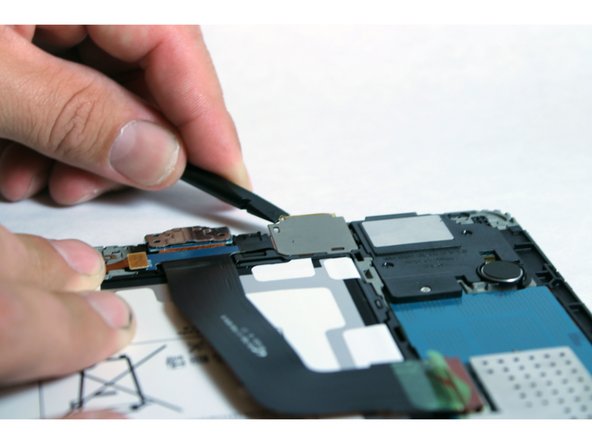
    • Place the plastic opening tool in between the outer rim.

    • Move the tool in a downward motion to separate the 2 parts.

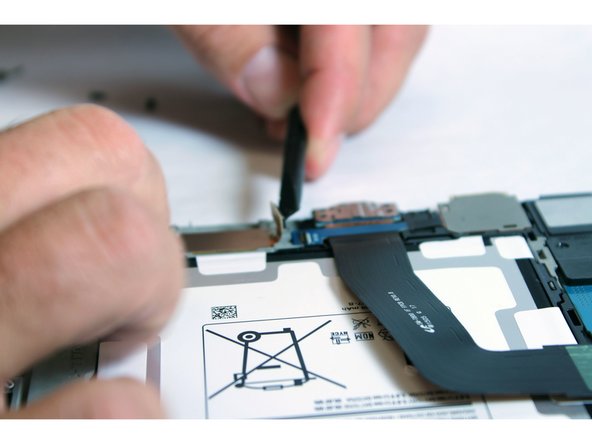
    • Run the tool along the rim to disconnect all connectors holding the outer rim to the back of the device.

  5. Galaxy Tab S 10.5 Charge port Replacement: 步骤 5 中的图像 1,1
    • Repeat this step for all four sides, then remove the rim.

  6. Galaxy Tab S 10.5 Charge port Replacement, Charge port: 步骤 6 中的图像 1,2 Galaxy Tab S 10.5 Charge port Replacement, Charge port: 步骤 6 中的图像 2,2
    • Remove the two 2 mm Phillips #000 screws in the charge port bracket.

  7. Galaxy Tab S 10.5 Charge port Replacement: 步骤 7 中的图像 1,3 Galaxy Tab S 10.5 Charge port Replacement: 步骤 7 中的图像 2,3 Galaxy Tab S 10.5 Charge port Replacement: 步骤 7 中的图像 3,3
    • Using the spudger, pry out the SD card slot.

  8. Galaxy Tab S 10.5 Charge port Replacement: 步骤 8 中的图像 1,3 Galaxy Tab S 10.5 Charge port Replacement: 步骤 8 中的图像 2,3 Galaxy Tab S 10.5 Charge port Replacement: 步骤 8 中的图像 3,3
    • Using the spudger, disconnect the charge port from the motherboard.

  9. Galaxy Tab S 10.5 Charge port Replacement: 步骤 9 中的图像 1,2 Galaxy Tab S 10.5 Charge port Replacement: 步骤 9 中的图像 2,2
    • Pry out the charge port bracket.

  10. Galaxy Tab S 10.5 Charge port Replacement: 步骤 10 中的图像 1,2 Galaxy Tab S 10.5 Charge port Replacement: 步骤 10 中的图像 2,2
    • Pull out the charge port and the SD card slot.

结论

To reassemble your device, follow these instructions in reverse order.

52等其他人完成本指南。

Jordan Soto

于08/26/15注册

3,249 声望

创作了6篇指南

团队

USF Tampa, Team 3-2, Eyestone Fall 2015 USF Tampa, Team 3-2, Eyestone Fall 2015 的会员

USFT-EYESTONE-F15S3G2

3 名成员

创作了20篇指南

27条评论

Very easy, but first part was bad... SD card wouldn't latch. So TIL to test ports for mechanical function before doing the repair.

Ted Simpson - 回复

You might want to add a description on how to disconnect / reconnect the ribbon cable at the other end of the port. I pried up and did not slide out the ribbon cable. Thus breaking off the connector. Totally my fault and not reflective on your tutorial. I just want others not to experience my goof.

brandonmdozier - 回复

I broke mine as well. Do you know where I can purchase a new connector??

Abby -

Same happened to me. I broke that connector and I had to stick it with a tape and put some paper to strengthen it before covering the back. It is a very fragile and tricky part. The correct way is just to pull the cable back without moving it up. Please add this note to step 10

Mohamed Elsayeh -

Alright tutorial. Missed 2 things: 1) I was able to spludge around the rim and easily removed it and the back at the same time. 2) Forgetting to include how to disconnect the ribbon on the inside end could be problematic for first timers.

However, the pictures of how to get the port out were first rate (another tutorial showed different and potentially damaging way to remove it). I am glad I read both. All together it took less than 10 minutes to get everything back together and now it is charging like a champ! Thanks for taking the time to make this.

Michael Williams - 回复

添加评论

浏览统计数据:

过去 24 小时: 2

过去 7 天: 17

过去 30 天: 113

总计 45,812