当前版本的文档还未经巡查,您可以查看最新的已查核版本 。
仅作为前提条件
本指南仅用作其他指南的先决条件。不能单独食用。
Use a Phillips #0 driver to unscrew the eight 10mm screws.
Remove the base ring after unscrewing all the screws.
Be careful when lifting the base ring from the Furby. There are sharp edges that hold the base ring in place.
Locate the two middle clips first.
Locate the two remaining clips on Furby's sides, they are opposite each other.
Orient the Furby upside down with the tail facing away from you.
Insert a metal prying tool directly into the clip opening.
Press upward into the clip. At the same time, use your other hand to pull away the plastic seam from the Furby's body.
Repeat the previous step to remove the remaining three clips.
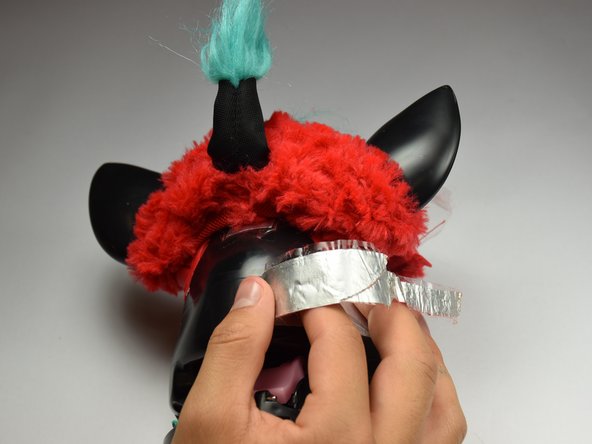
Orient the Furby on its side to where the beak is facing left and locate the edge of the aluminum tape.
Lift tape gently and peel back until the tape is nearly removed.
Do not pull on the yellow wire located on the opposite end of the tape.
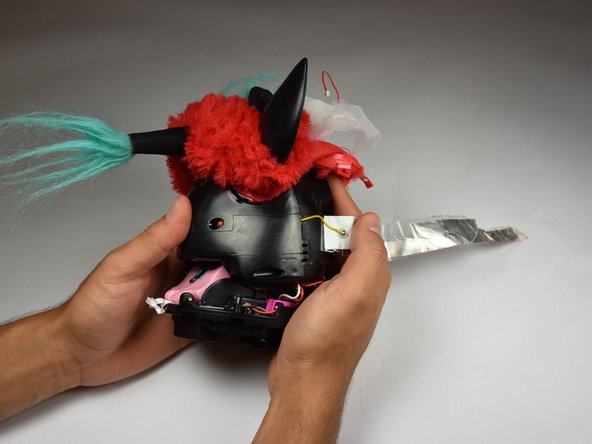
Locate the four 10mm screws. Two on either side of body, and two on top of back plate, around the tape.
Remove the 10mm screws with the Phillips#0 screwdriver.
Peel the tape gently, grabbing it from the bottom edge and folding the tape upward.
Peel the tape up until it is nearly detached from the black case.
Orient the Furby face down, with the base facing away from you.
Locate the clips below the ears.
Repeat the technique used in Step 6. Create leverage using a metal prying tool to press upward into the clip, while also pulling back on the clip itself.
嵌入本指南
选择一个尺寸并复制下面的代码,将本指南作为一个小插件嵌入到你的网站/论坛中。
单个步骤
完整指南
小——600像素
中——800像素
大——1200像素
预览