简介
The quality of air in our homes can directly and significantly impact our overall health. Keeping a functioning air purifier can help to pull any pollutants that might be causing you harm, out of the air. In this guide, you will learn how to disassemble and replace the ionizer wires in a Fulminare H13 True HEPA Air Purifier.
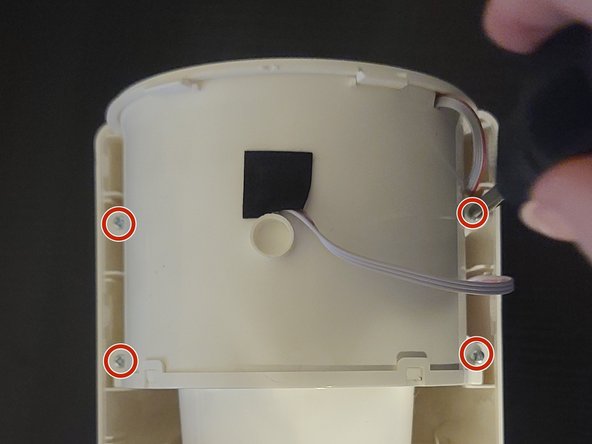
The ionizer wire is what removes small particles from the air and "clean" the air using negative ions. If the wire isn't working, the air going through won't be cleaned. If the ionizer wires in your Fulminare H13 True HEPA Air Purifier fail, follow this guide to replace them.
Before starting this repair, turn off your unit and unplug it from the power outlet.
你所需要的
-
-
Turn off the unit and unplug it.
-
Twist the lid counterclockwise and lift it up to reveal the black filter.
-
-


To reassemble your device, follow these instructions in reverse order.
To reassemble your device, follow these instructions in reverse order.

团队

University of North Texas, Team 2-18, Kilpatrick Summer 2023 University of North Texas, Team 2-18, Kilpatrick Summer 2023 的会员
UNT-KILPATRICK-SU23S2G18
1 名成员
创作了1篇指南