跳转到主内容

当前版本的文档还未经巡查,您可以查看最新的已查核版本

你所需要的

  1. 这个步骤还没有翻译 帮忙翻译一下

    : 步骤 1 中的图像 1,1
    • Locate the two clips on the bottom of the computer that support the battery.

  2. 这个步骤还没有翻译 帮忙翻译一下

    : 步骤 2 中的图像 1,1
    • Using your fingers, push the clips inward and then upward.

    • Lift the battery out of the computer.

  3. 这个步骤还没有翻译 帮忙翻译一下

    : 步骤 3 中的图像 1,3 : 步骤 3 中的图像 2,3 : 步骤 3 中的图像 3,3
    • Use a spudger to lift the back of the hinge cover on the left and right sides of the computer.

  4. 这个步骤还没有翻译 帮忙翻译一下

    : 步骤 4 中的图像 1,1
    • Lay the computer flat on a stable surface with the monitor pointing away from you.

  5. 这个步骤还没有翻译 帮忙翻译一下

    : 步骤 5 中的图像 1,3 : 步骤 5 中的图像 2,3 : 步骤 5 中的图像 3,3
    • Use a spudger to partially lift the hinge cover.

  6. 这个步骤还没有翻译 帮忙翻译一下

    : 步骤 6 中的图像 1,2 : 步骤 6 中的图像 2,2
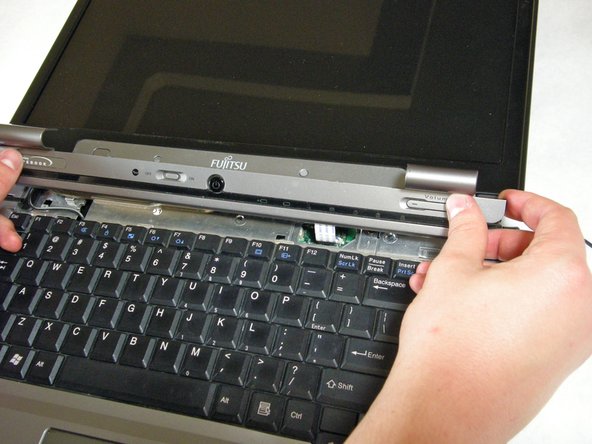
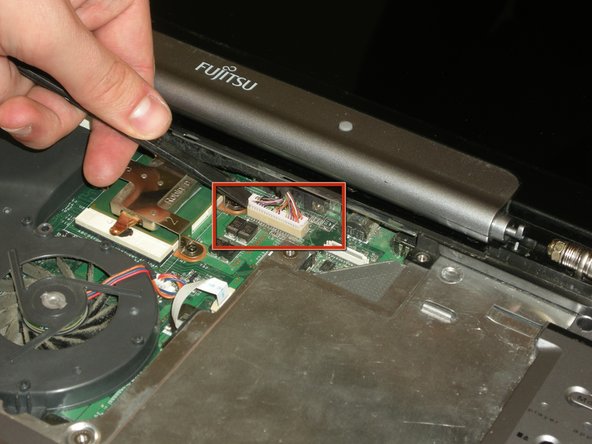
    • The hinge cover has a ribbon cable that is attached to the motherboard. To prevent damage, lift the hinge cover slowly.

    • Lift the hinge cover enough to expose the ribbon cable.

  7. 这个步骤还没有翻译 帮忙翻译一下

    : 步骤 7 中的图像 1,2 : 步骤 7 中的图像 2,2
    • Disconnect the ribbon cable from the motherboard and remove the hinge cover from the computer.

  8. 这个步骤还没有翻译 帮忙翻译一下

    : 步骤 8 中的图像 1,3 : 步骤 8 中的图像 2,3 : 步骤 8 中的图像 3,3
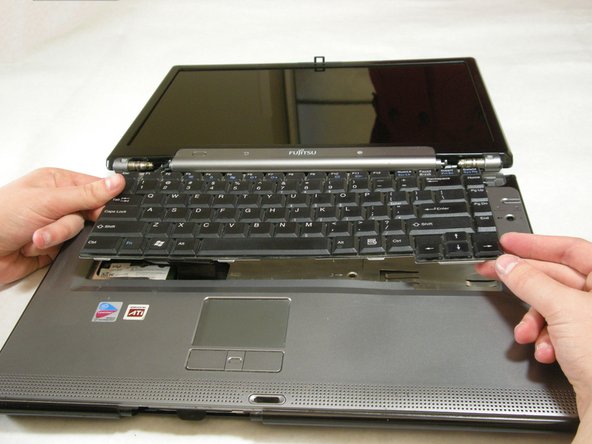
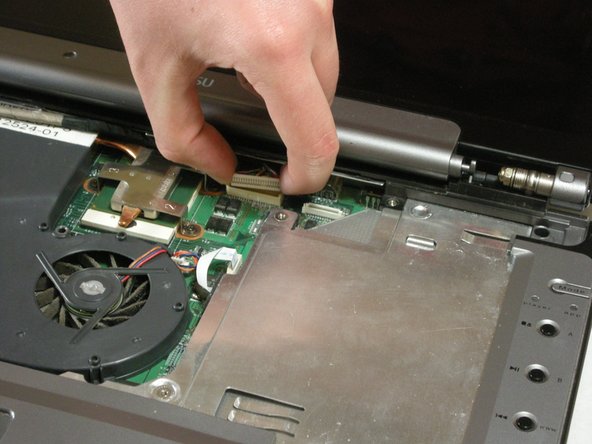
    • The keyboard has a ribbon cable that is attached to the motherboard. To prevent damage, lift keyboard slowly.

    • Lift the keyboard enough to expose the ribbon cable.

  9. 这个步骤还没有翻译 帮忙翻译一下

    : 步骤 9 中的图像 1,2 : 步骤 9 中的图像 2,2
    • Use a spudger to release the ribbon cable from the motherboard.

  10. 这个步骤还没有翻译 帮忙翻译一下

    : 步骤 10 中的图像 1,2 : 步骤 10 中的图像 2,2
    • After the ribbon has been detached, carefully remove the keyboard.

  11. 这个步骤还没有翻译 帮忙翻译一下

    : 步骤 11 中的图像 1,1
    • Remove the following screws, all labeled "3."

    • Two 8.63mm screws.

    • One 7.65mm screw.

    • One 5.74mm screw.

    • Remove the following screw, labeled "15."

    • One 17.81mm screw.

  12. 这个步骤还没有翻译 帮忙翻译一下

    : 步骤 12 中的图像 1,3 : 步骤 12 中的图像 2,3 : 步骤 12 中的图像 3,3
    • Lift the cover with fingers and remove.

  13. 这个步骤还没有翻译 帮忙翻译一下

    : 步骤 13 中的图像 1,1
    • Remove labeled screws.

  14. 这个步骤还没有翻译 帮忙翻译一下

    : 步骤 14 中的图像 1,1
    • Remove the screws from the bottom of the hinge as shown in the image.

  15. 这个步骤还没有翻译 帮忙翻译一下

    : 步骤 15 中的图像 1,3 : 步骤 15 中的图像 2,3 : 步骤 15 中的图像 3,3
    • Use a spudger to detach and remove cables from the motherboard.

  16. 这个步骤还没有翻译 帮忙翻译一下

    : 步骤 16 中的图像 1,3 : 步骤 16 中的图像 2,3 : 步骤 16 中的图像 3,3
    • Unplug highlighted cables from the wireless module.

  17. 这个步骤还没有翻译 帮忙翻译一下

    : 步骤 17 中的图像 1,3 : 步骤 17 中的图像 2,3 : 步骤 17 中的图像 3,3
    • Hold down the body of the computer by placing your hands in the pictured positions. Then, lift the display from the body.

  18. 这个步骤还没有翻译 帮忙翻译一下

    : 步骤 18 中的图像 1,1
    • Remove the 4 labeled screws.

  19. 这个步骤还没有翻译 帮忙翻译一下

    : 步骤 19 中的图像 1,1
    • Remove screws from bottom of laptop as shown in the picture.

  20. 这个步骤还没有翻译 帮忙翻译一下

    : 步骤 20 中的图像 1,1
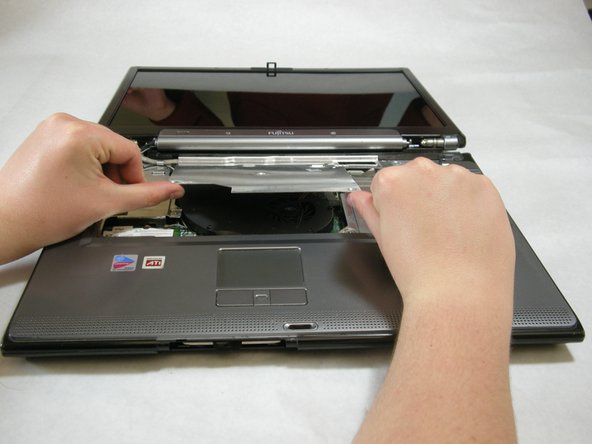
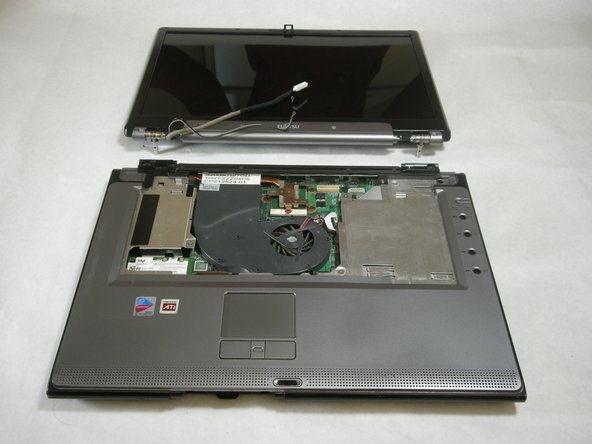
    • Lift the palm rest cover from the base of the laptop.

    • You may use spudger if needed, lift from the front corners as shown.

  21. 这个步骤还没有翻译 帮忙翻译一下

    : 步骤 21 中的图像 1,1
    • Great job! You have successfully removed the old palm rest cover.

  22. 这个步骤还没有翻译 帮忙翻译一下

    : 步骤 22 中的图像 1,3 : 步骤 22 中的图像 2,3 : 步骤 22 中的图像 3,3
    • Push securing clips outward, the wireless module will pop out.

    • Remove the wireless module.

  23. 这个步骤还没有翻译 帮忙翻译一下

    : 步骤 23 中的图像 1,1
    • A picture of the removed wireless module is shown to the left.

终点

Neil Daniels

于01/17/11注册

1,411 声望

创作了11篇指南

团队

Cal Poly, Team 5-18, Amido Winter 2011 Cal Poly, Team 5-18, Amido Winter 2011 的会员

CPSU-AMIDO-W11S5G18

3 名成员

创作了22篇指南

0条评论

添加评论

浏览统计数据:

过去 24 小时: 2

过去 7 天: 4

过去 30 天: 6

总计 2,359