跳转到主内容

Fujifilm FinePix XP10SE Rear Control Panel Replacement

你所需要的

  1. Fujifilm FinePix XP10SE Rear Control Panel Replacement, Front Cover: 步骤 1 中的图像 1,3 Fujifilm FinePix XP10SE Rear Control Panel Replacement, Front Cover: 步骤 1 中的图像 2,3 Fujifilm FinePix XP10SE Rear Control Panel Replacement, Front Cover: 步骤 1 中的图像 3,3
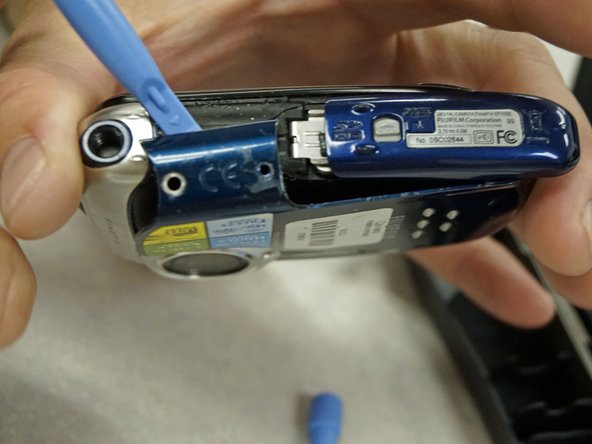
    • Use a screwdriver to remove the four screws from the top and bottom of the camera. Remove the screws securing the lanyard as well.

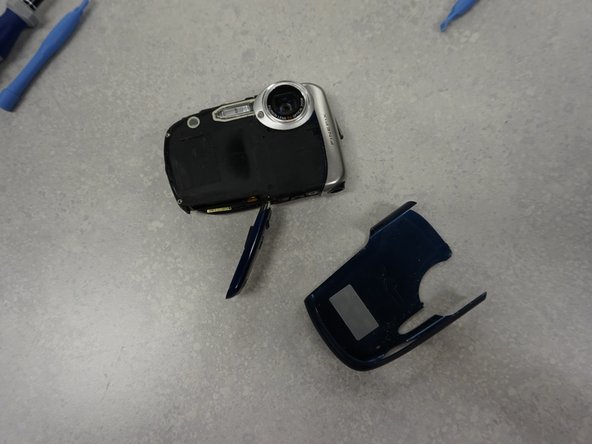
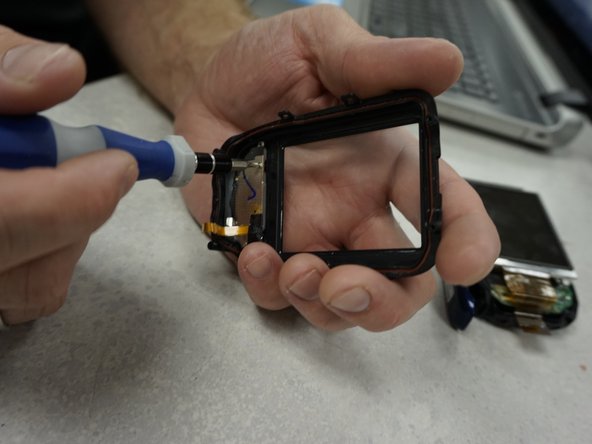
    • Use a T5 Torx bit to secure the exterior decorative cover of the device.

  2. Fujifilm FinePix XP10SE Rear Control Panel Replacement: 步骤 2 中的图像 1,2 Fujifilm FinePix XP10SE Rear Control Panel Replacement: 步骤 2 中的图像 2,2
    • Use a plastic opening tool to detach the case.

  3. Fujifilm FinePix XP10SE Rear Control Panel Replacement: 步骤 3 中的图像 1,2 Fujifilm FinePix XP10SE Rear Control Panel Replacement: 步骤 3 中的图像 2,2
    • Use the plastic opening tool to cautiously pry the casing off of the camera.

  4. Fujifilm FinePix XP10SE Rear Control Panel Replacement: 步骤 4 中的图像 1,3 Fujifilm FinePix XP10SE Rear Control Panel Replacement: 步骤 4 中的图像 2,3 Fujifilm FinePix XP10SE Rear Control Panel Replacement: 步骤 4 中的图像 3,3
    • Carefully slide the case to the left. Avoid cracking the case on the lens.

  5. Fujifilm FinePix XP10SE Rear Control Panel Replacement, Lens: 步骤 5 中的图像 1,1
    • Remove the screws from the lens cover

  6. Fujifilm FinePix XP10SE Rear Control Panel Replacement: 步骤 6 中的图像 1,1
    • Remove the screws from the side metal cover of outer case.

  7. Fujifilm FinePix XP10SE Rear Control Panel Replacement: 步骤 7 中的图像 1,2 Fujifilm FinePix XP10SE Rear Control Panel Replacement: 步骤 7 中的图像 2,2
    • Gently remove the Lens from the housing.

  8. Fujifilm FinePix XP10SE Rear Control Panel Replacement, LCD: 步骤 8 中的图像 1,1
    • Locate the securing tabs of the housing unit.

    • Using the spongerslowly work your way around the outside of the case using the sponging tool to pry open the case.

    • *** Take extreme caution when doing this being careful not to break the securing tabs of the housing.

  9. Fujifilm FinePix XP10SE Rear Control Panel Replacement: 步骤 9 中的图像 1,1
    • Once the case is open locate the Ribbon cable attachment for the LCD screen.

    • Carefully ensure that the LCD screen is free from all attachments and any tape securing the ribbon cable is released.

  10. Fujifilm FinePix XP10SE Rear Control Panel Replacement: 步骤 10 中的图像 1,2 Fujifilm FinePix XP10SE Rear Control Panel Replacement: 步骤 10 中的图像 2,2
    • Gently lift up on the black securing bar of the ribbon cable in order to free it from the units motherboard, thus releasing the LCD from the computer.

  11. Fujifilm FinePix XP10SE Rear Control Panel Replacement, Rear Control Panel: 步骤 11 中的图像 1,3 Fujifilm FinePix XP10SE Rear Control Panel Replacement, Rear Control Panel: 步骤 11 中的图像 2,3 Fujifilm FinePix XP10SE Rear Control Panel Replacement, Rear Control Panel: 步骤 11 中的图像 3,3
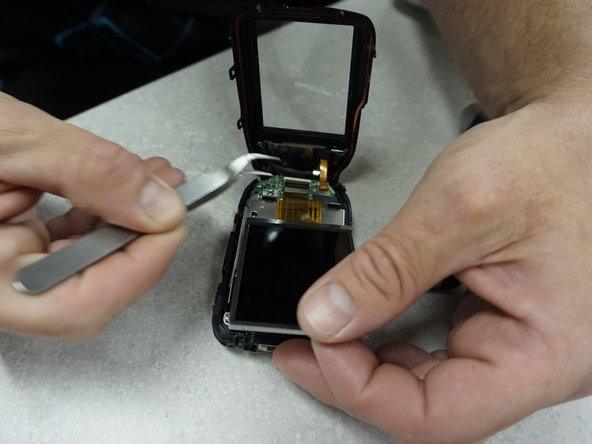
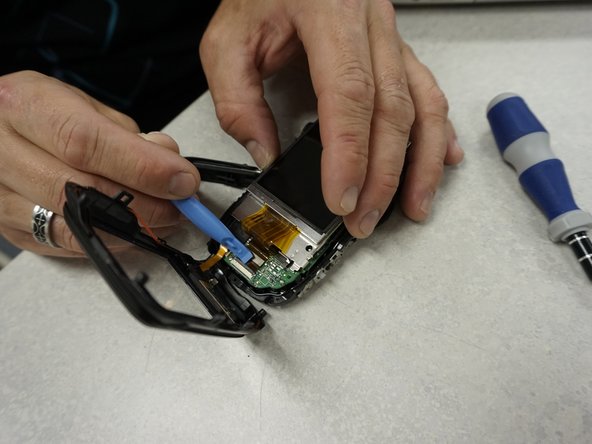
    • Locate the ribbon cable attachment for the rear panel controls.

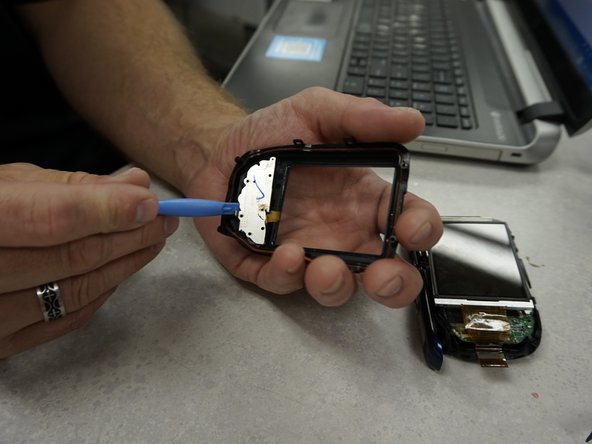
    • Gently lift the ribbon cable securing bar and slide the ribbon cable from the socket in order to remove the rear control panel.

  12. Fujifilm FinePix XP10SE Rear Control Panel Replacement: 步骤 12 中的图像 1,3 Fujifilm FinePix XP10SE Rear Control Panel Replacement: 步骤 12 中的图像 2,3 Fujifilm FinePix XP10SE Rear Control Panel Replacement: 步骤 12 中的图像 3,3
    • Locate the six screws on the control panel.

    • **two of the screws may be covered by tape. Remove the tape to access them.

    • Use the PH000 Phillip’s screwdriver bit from the Ifixit driver kit to remove the screws and free the control panel from the unit.

结论

To reassemble your device, follow these instructions in reverse order.

2等其他人完成本指南。

Bryan

于01/25/15注册

598 声望

创作了5篇指南

团队

Pasco Hernando, Team 5-1, Prince Winter 2015 Pasco Hernando, Team 5-1, Prince Winter 2015 的会员

PHSC-PRINCE-W15S5G1

5 名成员

创作了10篇指南

0条评论

添加评论

浏览统计数据:

过去 24 小时: 0

过去 7 天: 0

过去 30 天: 0

总计 128