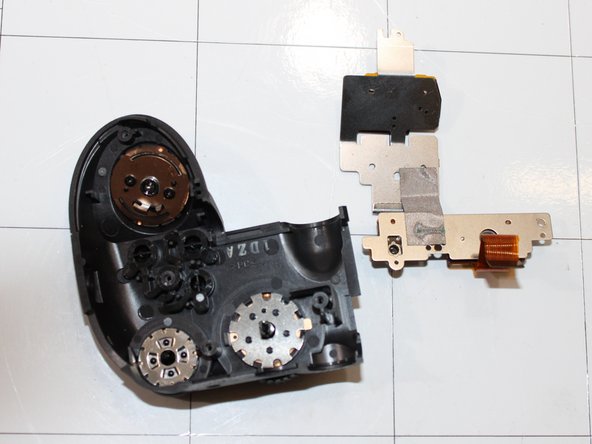
跳转到主内容

Fujifilm FinePix S9500 Command Dial Replacement

你所需要的

  1. Fujifilm FinePix S9500 Command Dial Replacement, Fujifilm FinePix S9500 Case Top Removal: 步骤 1 中的图像 1,3 Fujifilm FinePix S9500 Command Dial Replacement, Fujifilm FinePix S9500 Case Top Removal: 步骤 1 中的图像 2,3 Fujifilm FinePix S9500 Command Dial Replacement, Fujifilm FinePix S9500 Case Top Removal: 步骤 1 中的图像 3,3
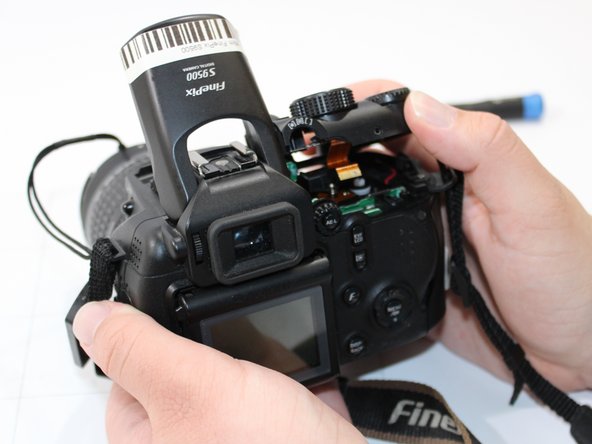
    • Locate and remove two screws. They are M1.7 x 5.0 in size.

    • The first screw is below and to the left of the command dial on the back of the camera.

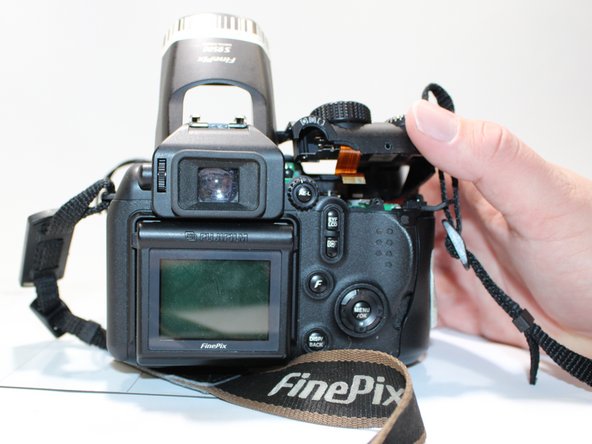
    • The second screw is on the right side of the camera, to the right of the strap mount.

  2. Fujifilm FinePix S9500 Command Dial Replacement: 步骤 2 中的图像 1,3 Fujifilm FinePix S9500 Command Dial Replacement: 步骤 2 中的图像 2,3 Fujifilm FinePix S9500 Command Dial Replacement: 步骤 2 中的图像 3,3
    • To access the flash on the camera, locate the button on the left side and press it to open.

    • It's important to have the flash open to avoid any interference during disassembly.

  3. Fujifilm FinePix S9500 Command Dial Replacement: 步骤 3 中的图像 1,3 Fujifilm FinePix S9500 Command Dial Replacement: 步骤 3 中的图像 2,3 Fujifilm FinePix S9500 Command Dial Replacement: 步骤 3 中的图像 3,3
    • To open the case, gently push upward in the area just below the command dial with your thumb.

    • The top should pop up, but not fully detach.

    • To release the catch located on the left of the command dial and at the base of the flash, place your thumb to the right of the command dial and push upwards at a 45° angle towards the flash.

  4. Fujifilm FinePix S9500 Command Dial Replacement, Command Dial: 步骤 4 中的图像 1,3 Fujifilm FinePix S9500 Command Dial Replacement, Command Dial: 步骤 4 中的图像 2,3 Fujifilm FinePix S9500 Command Dial Replacement, Command Dial: 步骤 4 中的图像 3,3
    • Remove the four Phillips screws (M1.7 x 5.0) on the back of the metal bracket.

  5. Fujifilm FinePix S9500 Command Dial Replacement: 步骤 5 中的图像 1,3 Fujifilm FinePix S9500 Command Dial Replacement: 步骤 5 中的图像 2,3 Fujifilm FinePix S9500 Command Dial Replacement: 步骤 5 中的图像 3,3
    • Remove the metal assembly that has been released by the screws.

结论

To reassemble your device, follow these instructions in reverse order.

Ben Stevens

于03/24/23注册

292 声望

创作了3篇指南

团队

Casper College, Team 1-1, Lareau Spring 2023 Casper College, Team 1-1, Lareau Spring 2023 的会员

CASC-LAREAU-S23S1G1

3 名成员

创作了4篇指南

0条评论

添加评论

浏览统计数据:

过去 24 小时: 0

过去 7 天: 5

过去 30 天: 18

总计 159