跳转到主内容

当前版本的文档还未经巡查,您可以查看最新的已查核版本

你所需要的

  1. 这个步骤还没有翻译 帮忙翻译一下

    : 步骤 1 中的图像 1,3 : 步骤 1 中的图像 2,3 : 步骤 1 中的图像 3,3
    • Use the Phillips #00 screwdriver to remove the 7 screws on the sides of the camera:

    • Four 3.95mm Phillips screws located on the bottom of the camera

    • Two 3.95mm Phillips screws located on the right side of the camera

    • One 3.95mm Phillips screw located on the left side of the camera

  2. 这个步骤还没有翻译 帮忙翻译一下

    : 步骤 2 中的图像 1,1
    • Slide open the battery compartment cover with your thumb.

  3. 这个步骤还没有翻译 帮忙翻译一下

    : 步骤 3 中的图像 1,3 : 步骤 3 中的图像 2,3 : 步骤 3 中的图像 3,3
    • Wedge the edge of the spudger between the front and back case, near the corner of the flash.

    • Carefully run the spudger along the right edge of the camera, creating an opening.

    • Insert the spudger into the left side of the camera, above the screwhole. Then carefully run it along this edge.

  4. 这个步骤还没有翻译 帮忙翻译一下

    : 步骤 4 中的图像 1,2 : 步骤 4 中的图像 2,2
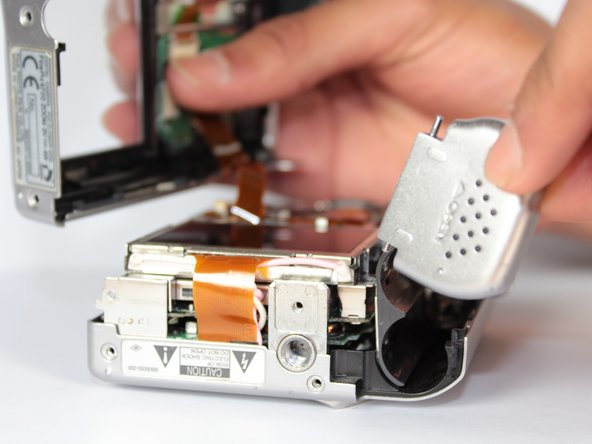
    • Watch out for the orange ribbon that is still attached to the back cover when you lift it up. It is very delicate and might rip.

    • Slowly lift the back cover straight up, lightly jiggling it if necessary.

    • Remove the battery compartment cover.

  5. 这个步骤还没有翻译 帮忙翻译一下

    : 步骤 5 中的图像 1,1
    • Gently insert the spudger under the clip holding the orange ribbon. The clip should lift up and the ribbon will slide out.

    • This step will free the back cover from the rest of the camera.

  6. 这个步骤还没有翻译 帮忙翻译一下

    : 步骤 6 中的图像 1,1
    • Pull gently when removing the speaker so you don't rip the wire attached to it.

    • Use the tweezers to grab the speaker (located on left side of the camera) and pull straight up.

    • The speaker will still be connected to the motherboard, but it will not be attached to the front case.

  7. 这个步骤还没有翻译 帮忙翻译一下

    : 步骤 7 中的图像 1,1
    • Use the tweezers to pull gently on the small orange ribbon, located in upper left hand corner near the flash, to remove the square insert.

  8. 这个步骤还没有翻译 帮忙翻译一下

    : 步骤 8 中的图像 1,1
    • Use your fingers to slowly pull the flash straight up.

    • The step may take a little jiggling.

  9. 这个步骤还没有翻译 帮忙翻译一下

    : 步骤 9 中的图像 1,2 : 步骤 9 中的图像 2,2
    • Do not fully separate the motherboard unit from the front cover. There is still a ribbon attached and it will rip.

    • Slightly separate the front cover from the motherboard unit (which consists of the motherboard, speaker, screen, and battery compartment).

    • Rotate the bottom portion of the motherboard unit (the screen and battery compartment) over the lens unit.

  10. 这个步骤还没有翻译 帮忙翻译一下

    : 步骤 10 中的图像 1,1
    • Use your fingers to remove the tripod mount.

  11. 这个步骤还没有翻译 帮忙翻译一下

    : 步骤 11 中的图像 1,3 : 步骤 11 中的图像 2,3 : 步骤 11 中的图像 3,3
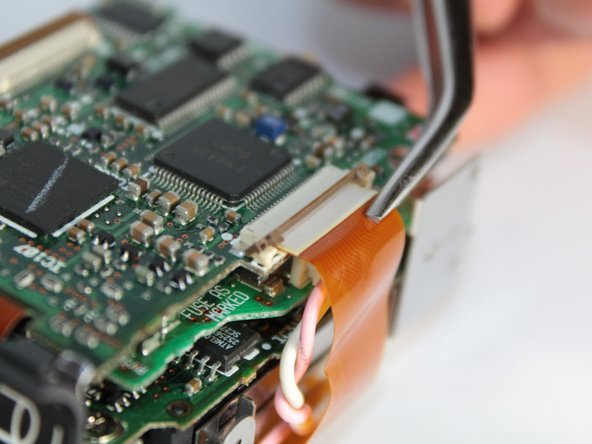
    • Be gentle when undoing the ribbon clips. They break easily.

    • Gently stick the spudger under the ribbon clips and lift them up.

    • Use the tweezers to pull both ribbons out of the ribbon clips.

    • The motherboard unit should now be free from the rest of the camera.

  12. 这个步骤还没有翻译 帮忙翻译一下

    : 步骤 12 中的图像 1,3 : 步骤 12 中的图像 2,3 : 步骤 12 中的图像 3,3
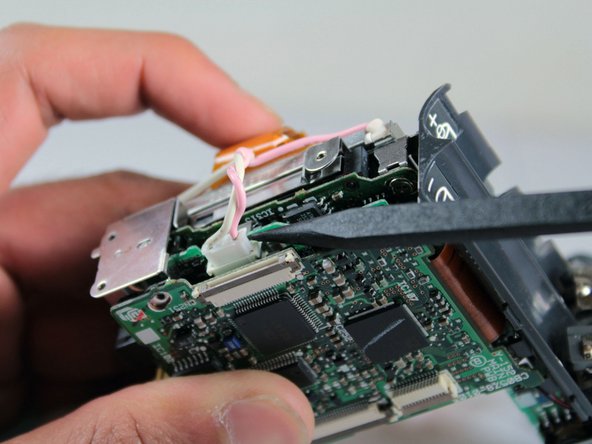
    • Be gentle when undoing the ribbon clip. It breaks easily.

    • Locate the orange ribbon that goes from the screen to the bottom side of the motherboard.

    • Stick the spudger under the ribbon clip connecting and lift it up. Use the tweezers to pull out the ribbon.

    • Use the pointed end of the spudger to unplug the connector for the pink and white screen wires by pulling it straight out.

  13. 这个步骤还没有翻译 帮忙翻译一下

    : 步骤 13 中的图像 1,3 : 步骤 13 中的图像 2,3 : 步骤 13 中的图像 3,3
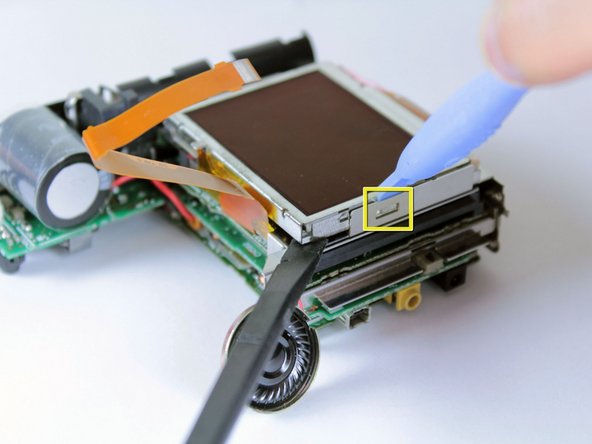
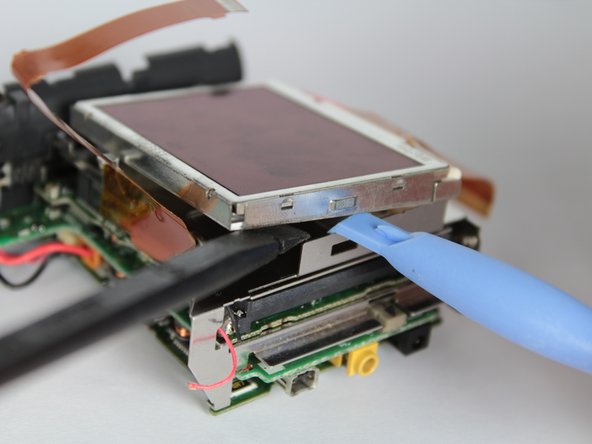
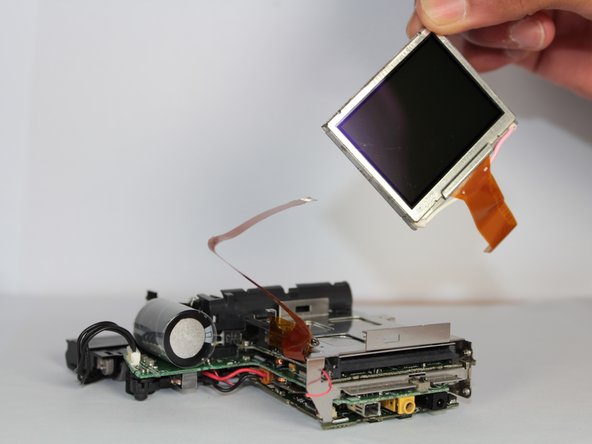
    • Wedge the plastic opening tool between the edge of the screen and the metal bracket, on the opposite side of the battery compartment.

    • Use the spudger to pry up the corner of the screen adjacent to the metal bracket.

    • The best place to wedge the tool is directly above the rectangular space in the bracket.

    • The screen should come out easily. If it doesn't, jiggle it a little bit. If jiggling doesn't work, use the plastic opening tool to create a larger gap between the screen and the bracket.

终点

Sarah Daliva

于04/04/12注册

14 声望

创作了2篇指南

团队

Cal Poly, Team 14-8, Forte Spring 2012 Cal Poly, Team 14-8, Forte Spring 2012 的会员

CPSU-FORTE-S12S14G8

5 名成员

创作了17篇指南

0条评论

添加评论

浏览统计数据:

过去 24 小时: 3

过去 7 天: 12

过去 30 天: 16

总计 1,135