-
-
Fixing method: Adhesive
-
Tear apart the adhesive section by hand
-
-
-
Fixing method: Adhesive
-
Disassemble it by hand
-
If it is hard to take it off, you can use a knife cutting into the parting line to help
-
-
-
Fixing method: Screw-fixed
-
After the last step, the screws appear
-
5 screws in total
-
2 kinds of screw
-
Rotate the screwdriver counterclockwise
-
-
-
-
Use a knife or a "-" head screwdriver to cut into the parting line
-
It is a snap structure so it may require a bit of force to disassemble
-
-
-
This is also a snap structure. It requires more force to disassemble by hand
-
-
-
Fixing method: Screw-fixed
-
4 screws in total
-
Rotate the screwdriver counterclockwise
-
-
-
It is an inclined plane, so just pull it slightly to take it off
-
-
-
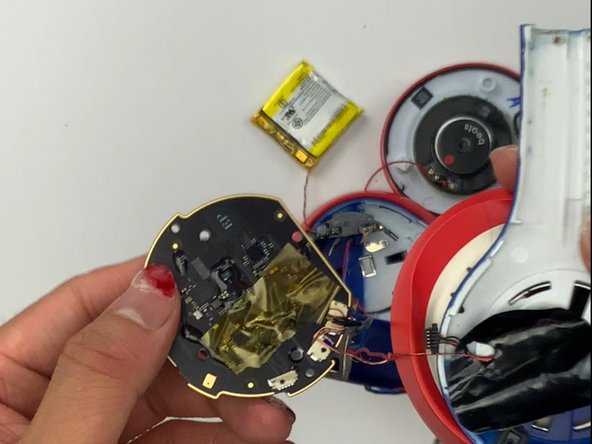
Fix method: Snap structure
-
Peel it off by hand
-
This is the last disassembly step of the left earpiece. Most of the steps for the right earpiece are the same.
-
-
-
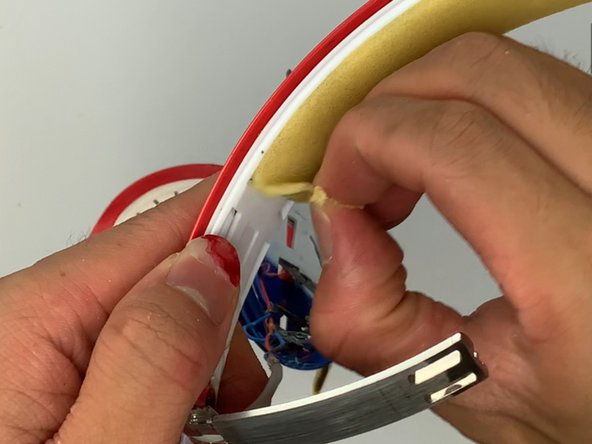
Fixing method: Adhesive
-
Peel it off slightly by hand
-
-
-
Fixing method: Adhesive
-
Peel off the rubber part
-
The screws and the sponge then appear
-
-
-
Fixing method: Screw-fixed
-
2 on each side
-
4 in total
-
Rotate the screwdriver counterclockwise
-
-
-
Fixing method: Snap structure
-
Disassemble it by hand
-
-
-
After the last step, turn it over and the metal piece will drop out
-
-
-
8 categories are included
-
Sponge, Leather, Rubber, Screws, Metal, Plastic, adhesive components, electronic components
-


当重新组装你的设备时,请按照说明的相反顺序进行操作。
另外一个人完成了本指南。
