跳转到主内容

Fender Champion 600 Volume Pot Replacement

你所需要的

  1. Fender Champion 600 Volume Pot Replacement, Volume Pot: 步骤 1 中的图像 1,1
    • If you're an experienced iFixer - it'll take you about 10 minutes to get it done.

    • Check the list of gear needed for this project. I offered the tools that I used but it’s absolutely doable with less or some other similar tools.

    • Important: disconnect an amp from the power outlet!

    • Please be careful - tube amps can hold a serious amount of electrical charge that can cause injuries or even death. Avoid touching any wires or contacts with your bare hands or instruments that have no reliable insulation.

  2. Fender Champion 600 Volume Pot Replacement: 步骤 2 中的图像 1,3 Fender Champion 600 Volume Pot Replacement: 步骤 2 中的图像 2,3 Fender Champion 600 Volume Pot Replacement: 步骤 2 中的图像 3,3
    • Let's start by removing the rear chassis screws. All of the screws we are going to deal with work nicely with a PH2 bit.

    • Then remove two side screws that also hold the amp chassis in place. Those are 4x30 mm btw.

  3. Fender Champion 600 Volume Pot Replacement: 步骤 3 中的图像 1,1
    • Below the chassis you'll find 4 more phillips screws holding a rear cover in place - remove them as well.

  4. Fender Champion 600 Volume Pot Replacement: 步骤 4 中的图像 1,2 Fender Champion 600 Volume Pot Replacement: 步骤 4 中的图像 2,2
    • Now it's time to remove the nuts on the input jacks and our broken volume pot - I used pliers to do that, but it is advisable to use a small adjustable wrench in order to avoid any unwanted scratches.

  5. Fender Champion 600 Volume Pot Replacement: 步骤 5 中的图像 1,2 Fender Champion 600 Volume Pot Replacement: 步骤 5 中的图像 2,2
    在这个步骤中使用的工具:
    Magnetic Project Mat
    $19.95
    购买
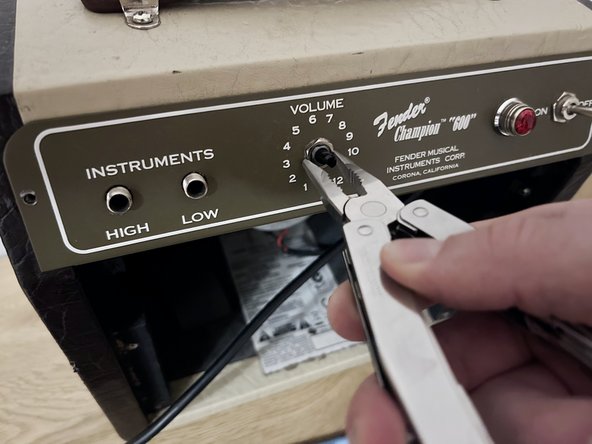
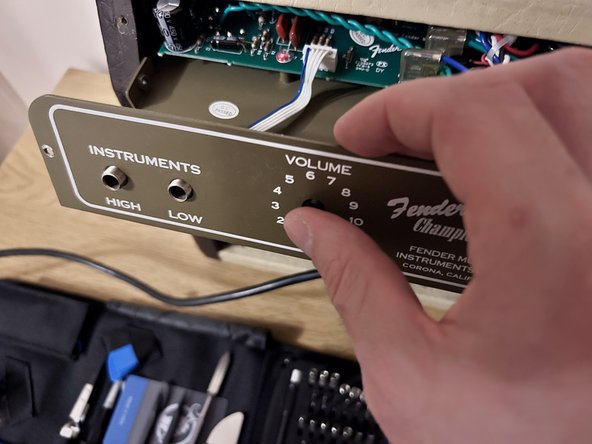
    • Next let's remove the volume knob - you'll need a flat 2.5 bit for that. Carefully insert the bit into the hole on the rear side of the knob to undo a tiny screw inside of it.

    • That's it - chassis is free 👍.

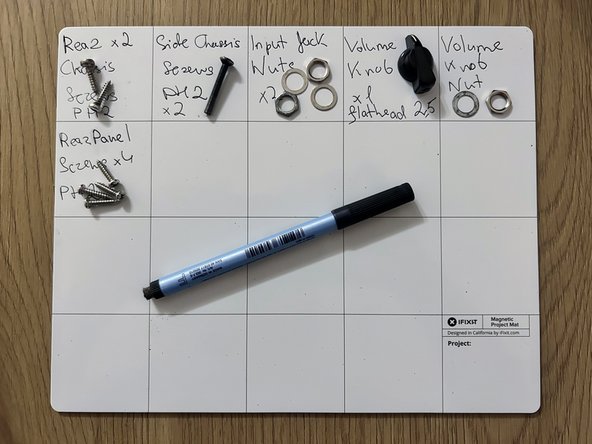
    • Hint: use a plastic tray or a magnetic mat to safely store all of those screws and nuts. You can even write where all those parts come from.

  6. Fender Champion 600 Volume Pot Replacement: 步骤 6 中的图像 1,2 Fender Champion 600 Volume Pot Replacement: 步骤 6 中的图像 2,2
    • Slightly lift it up and pull towards you with just a hand to access the internals.

    • That's it - the amp's chassis is right in front of you.

  7. Fender Champion 600 Volume Pot Replacement: 步骤 7 中的图像 1,3 Fender Champion 600 Volume Pot Replacement: 步骤 7 中的图像 2,3 Fender Champion 600 Volume Pot Replacement: 步骤 7 中的图像 3,3
    • Disconnect the panel that holds the input jacks and our volume pot. For this you may either use your fingers or an IC Extractor/Connector Puller.

    • Then lightly push one of the input jacks inside of the chassis to remove the panel.

  8. Fender Champion 600 Volume Pot Replacement: 步骤 8 中的图像 1,2 Fender Champion 600 Volume Pot Replacement: 步骤 8 中的图像 2,2
    • Here's our panel safely removed from the chassis - front and rear view.

  9. Fender Champion 600 Volume Pot Replacement: 步骤 9 中的图像 1,1
    在这个步骤中使用的工具:
    Desoldering Pump
    $3.99
    购买
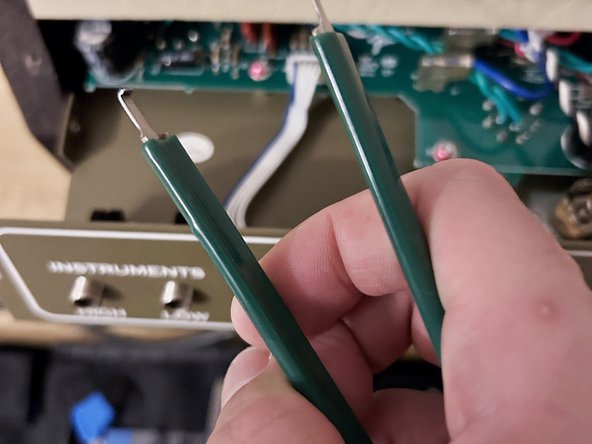
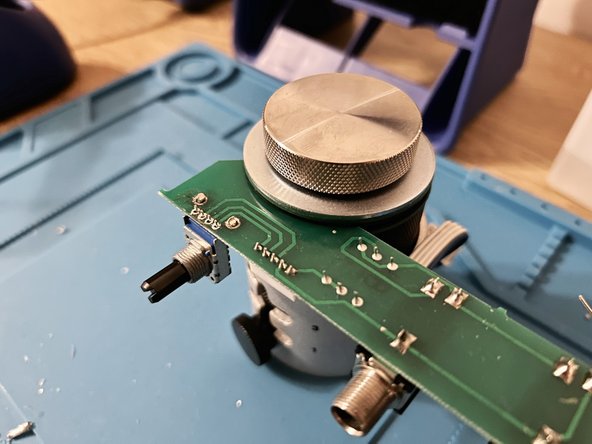
    • Now let's replace a broken volume pot. For this we are obviously going to need a soldering iron, a flush cutter and a desoldering pump.

    • Hint - I used flush cutters to cut a broken pot off from the PCB and then used a desoldering pump to clean the mounting holes in order to get them ready for a new pot.

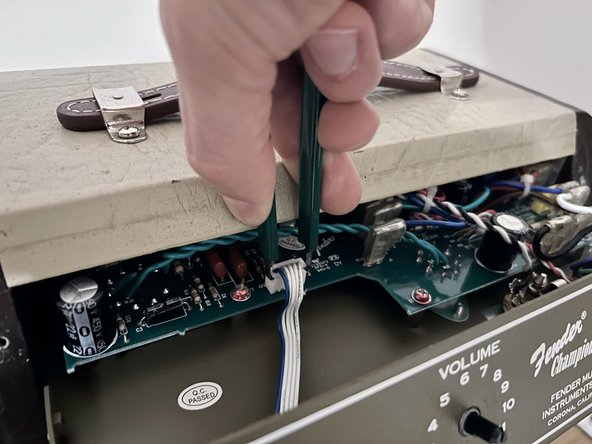
    • Also a good PCB holder may come in handy as you may see in my example.

  10. Fender Champion 600 Volume Pot Replacement: 步骤 10 中的图像 1,3 Fender Champion 600 Volume Pot Replacement: 步骤 10 中的图像 2,3 Fender Champion 600 Volume Pot Replacement: 步骤 10 中的图像 3,3
    • After removing a broken pot and preparing a PCB for the replacement put a new pot into place.

    • Add more flux - don't be shy there - and solder a new pot in place.

  11. Fender Champion 600 Volume Pot Replacement: 步骤 11 中的图像 1,1
    • Clean any flux residue with isopropyl alcohol and a cotton swab.

  12. Fender Champion 600 Volume Pot Replacement: 步骤 12 中的图像 1,1
    • Connect a fixed PCB to the amp's main board and assemble everything back together.

  13. Fender Champion 600 Volume Pot Replacement: 步骤 13 中的图像 1,1
    • Check if everything works as it should - plug in your guitar and adjust a volume - if it works and it's smooth and quiet...

结论

...congratulations - you've fixed it 🏆.

3等其他人完成本指南。

in_sympathy

于07/01/13注册

817 声望

创作了2篇指南

6条评论

Where can you purchase this volume control pod? Is it possible only clean the interior, if yes, do you know how?

R Ze - 回复

Hi there, I bought a replacement volume pot via the link above - https://www.amprepairparts.com/fenderpot...

in_sympathy -

Good pictures and directions.

R Ze - 回复

thanks 🙏 hope it helps

in_sympathy -

Thanks for the guide!

Chris - 回复

添加评论

浏览统计数据:

过去 24 小时: 0

过去 7 天: 9

过去 30 天: 29

总计 626