跳转到主内容

Epson VS240 Stand Replacement

你所需要的

  1. Epson VS240 Stand Replacement, Shell: 步骤 1 中的图像 1,3 Epson VS240 Stand Replacement, Shell: 步骤 1 中的图像 2,3 Epson VS240 Stand Replacement, Shell: 步骤 1 中的图像 3,3
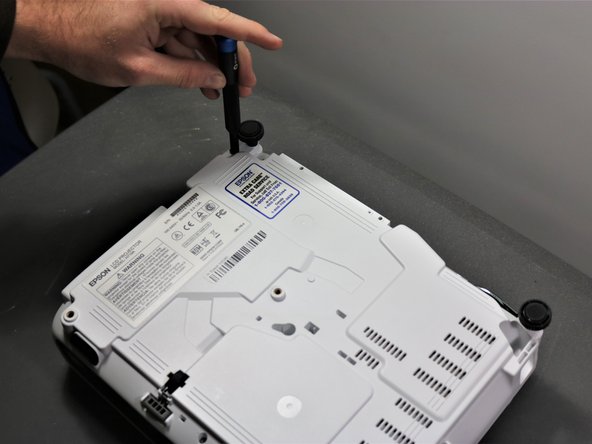
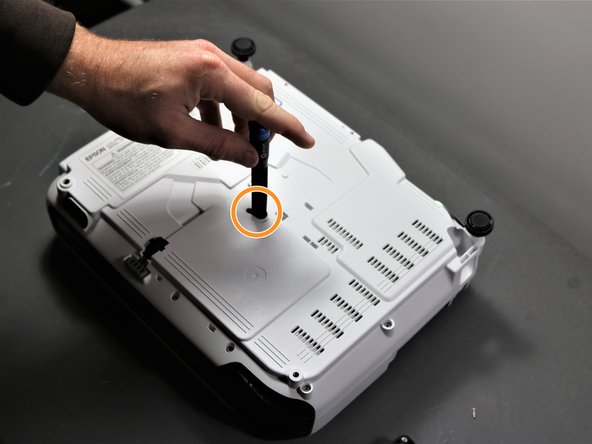
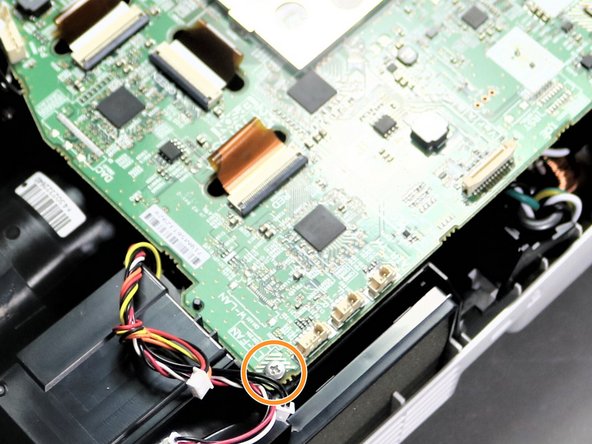
    • Using the Phillips #2 screwdriver, loosen the single captive screw on the left side of the projector.

    • The captive screw will loosen, but it cannot be fully removed.

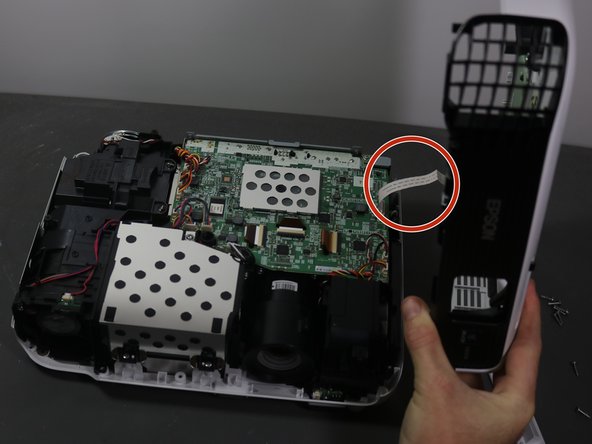
    • Slide the panel off and remove it from the device.

  2. Epson VS240 Stand Replacement: 步骤 2 中的图像 1,2 Epson VS240 Stand Replacement: 步骤 2 中的图像 2,2
    • Use the Phillips #2 screwdriver to remove the three 5 mm screws.

    • Using the same Phillips #2 screwdriver, remove the single 8 mm silver screw.

  3. Epson VS240 Stand Replacement: 步骤 3 中的图像 1,1
    • Use a Phillips #1 screwdriver to remove the two 10 mm silver screws from the bottom of the device.

  4. Epson VS240 Stand Replacement: 步骤 4 中的图像 1,1
    • Use a Phillips #1 screwdriver to remove the single 10 mm screw where the panel was removed in Step 1.

    • Remove the white back plate from the device.

  5. Epson VS240 Stand Replacement: 步骤 5 中的图像 1,3 Epson VS240 Stand Replacement: 步骤 5 中的图像 2,3 Epson VS240 Stand Replacement: 步骤 5 中的图像 3,3
    • Flip the projector over so that the underside (side with the feet) is facing you.

    • Use a Phillips #1 screwdriver to remove five 10 mm screws on the underside of projector.

    • Using the same Phillips #1 screwdriver, remove a single 10 mm screw in the center hole.

    • You may need to use a screwdriver extender to reach the single screw.

  6. Epson VS240 Stand Replacement: 步骤 6 中的图像 1,3 Epson VS240 Stand Replacement: 步骤 6 中的图像 2,3 Epson VS240 Stand Replacement: 步骤 6 中的图像 3,3
    • Use a Phillips #1 screwdriver to remove two 10 mm screws from the openings on each side of the air filter, on the topside of the projector.

    • You may need to use a screwdriver extender to reach the two screws.

    • Using the same Phillips #1 screwdriver, remove the two 10 mm screws where the white panel was removed on the topside of the projector in Step 1.

  7. Epson VS240 Stand Replacement: 步骤 7 中的图像 1,2 Epson VS240 Stand Replacement: 步骤 7 中的图像 2,2
    • Be careful when removing the top cover of projector as there is as white ribbon cable connecting it to the motherboard.

    • Gently lift top cover and place it on its top next to the projector so that the ribbon has no tension on it.

    • Gently pull the brown tape connecting the cable to the motherboard and then remove the shell from the device.

  8. Epson VS240 Stand Replacement, Motherboard: 步骤 8 中的图像 1,2 Epson VS240 Stand Replacement, Motherboard: 步骤 8 中的图像 2,2
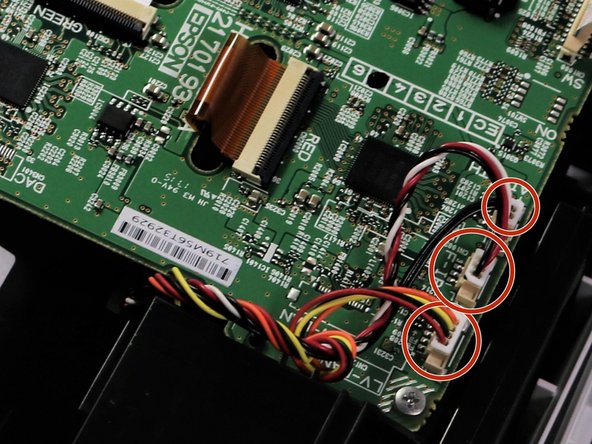
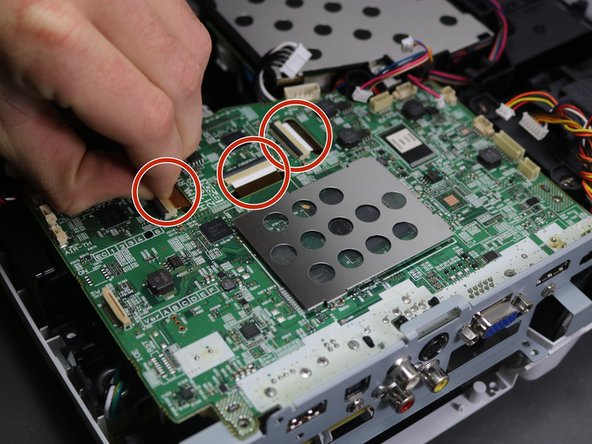
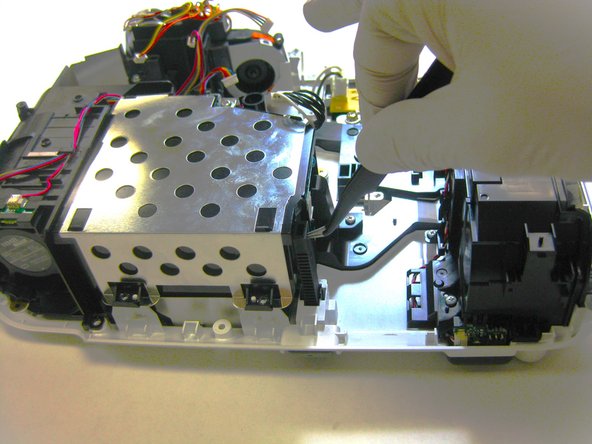
    • Using a spudger or a plastic opening tool, disconnect all of the wires connected to the motherboard.

  9. Epson VS240 Stand Replacement: 步骤 9 中的图像 1,2 Epson VS240 Stand Replacement: 步骤 9 中的图像 2,2
    • Using the Phillips #1 screwdriver, remove three 6 mm screws.

    • Using the same Phillips #1 screwdriver, remove a single 10 mm screw in bottom right corner of motherboard.

  10. Epson VS240 Stand Replacement: 步骤 10 中的图像 1,2 Epson VS240 Stand Replacement: 步骤 10 中的图像 2,2
    • Using a spudger or your fingernails, lift up the black locking tabs and disconnect the three ribbon cables from the motherboard.

    • For more information on Zero Insertion Force (ZIF) connectors, please visit this guide.

    • Using the Phillips #1 screwdriver, remove three 10 mm screws on the grey piece that is located on the side of the motherboard.

  11. Epson VS240 Stand Replacement: 步骤 11 中的图像 1,1
    • Lift and remove the motherboard up and away from the device.

  12. Epson VS240 Stand Replacement, Lens: 步骤 12 中的图像 1,2 Epson VS240 Stand Replacement, Lens: 步骤 12 中的图像 2,2
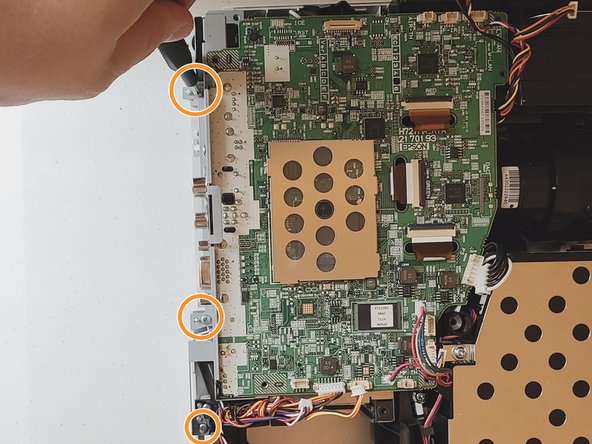
    • Rotate the projector 180 degrees to match orientation in images.

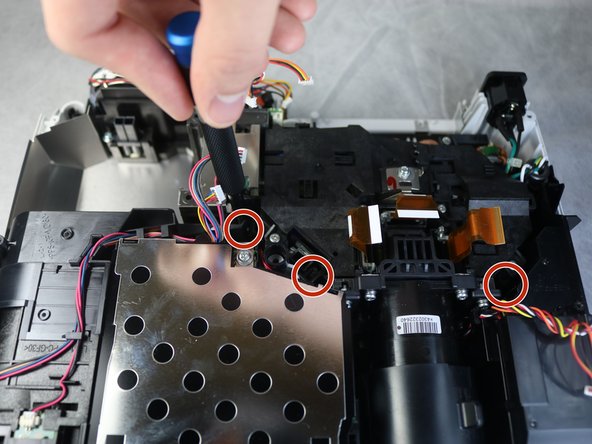
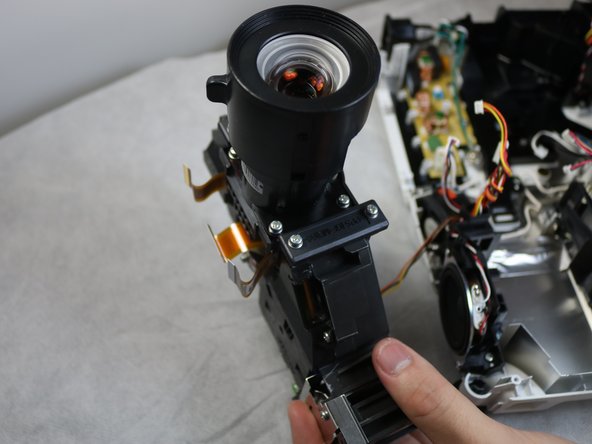
    • Using the Phillips #2 screwdriver, remove four inner 11 mm screws under the black box connected to the lens.

    • These screws are located deep into the projector and you may need a screwdriver extender to reach two of the four screws.

  13. Epson VS240 Stand Replacement: 步骤 13 中的图像 1,2 Epson VS240 Stand Replacement: 步骤 13 中的图像 2,2
    • Detach the wire above the lens using plastic pry bar.

    • These wires can also be removed by hand; however, a plastic opening tool may be used for more prying power.

    • Slowly lift the black assembly out of the device.

    • Be careful of the wire still connected. It does not need to be removed so lay the black assembly close to the projector so no tension is on the wire.

  14. Epson VS240 Stand Replacement, Stand: 步骤 14 中的图像 1,2 Epson VS240 Stand Replacement, Stand: 步骤 14 中的图像 2,2
    • Using hook nose tweezers, break off the two large prongs that are located at the left and right of the stand at the very top.

    • This can be done by bending them out and snapping them off, pushing them in and out of the way, or a combination of the two. Additionally, if there is no intention to reuse the stand for any other purpose, the entire upper half could be snapped off.

  15. Epson VS240 Stand Replacement: 步骤 15 中的图像 1,2 Epson VS240 Stand Replacement: 步骤 15 中的图像 2,2
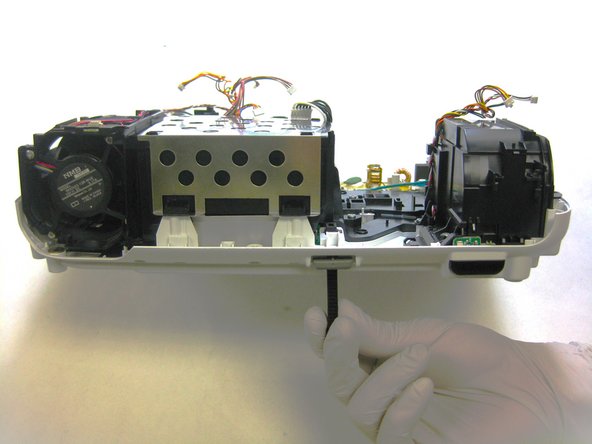
    • Gently raise the front of the projector and push the tab that adjusts the stand upwards. This shall result in the stand extending out of the base of the projector.

    • If the stand does not entirely slide out of the base, grab the part of the stand that has been exposed and pull it until you have removed the entire piece from the base.

    • Keep pushing the tab upwards as you pull the stand out to ensure it is removed as smoothly as possible.

终点

0条评论

添加评论

浏览统计数据:

过去 24 小时: 2

过去 7 天: 2

过去 30 天: 2

总计 133