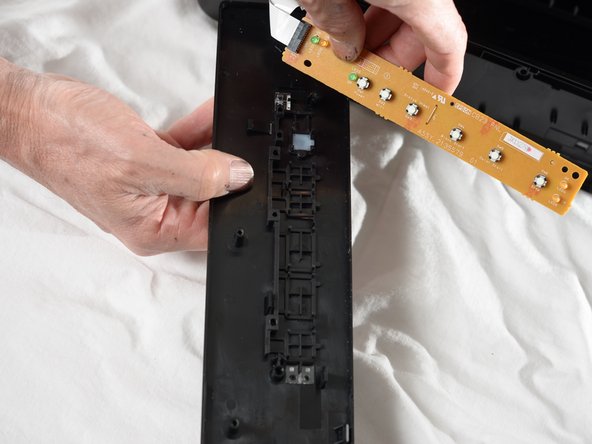
跳转到主内容

Epson Stylus NX230 Front Button Replacement

你所需要的

  1. Epson Stylus NX230 Front Button Replacement, Front Buttons: 步骤 1 中的图像 1,1
    • Before beginning, make sure the printer is unplugged and turned off to avoid electric shock.

    • Lift the top of the printer to see the inside.

  2. Epson Stylus NX230 Front Button Replacement: 步骤 2 中的图像 1,3 Epson Stylus NX230 Front Button Replacement: 步骤 2 中的图像 2,3 Epson Stylus NX230 Front Button Replacement: 步骤 2 中的图像 3,3
    • Locate the control panel, the part of the printer with the buttons on it.

    • Push the control panel away from the outside of the printer, taking the panel out of the holes that hold it in place.

    • Repeat the above step for the other side of the control panel.

  3. Epson Stylus NX230 Front Button Replacement: 步骤 3 中的图像 1,2 Epson Stylus NX230 Front Button Replacement: 步骤 3 中的图像 2,2
    • The front control panel is attached to the printer on both sides by a grey piece of plastic that runs on a track. Remove the control panel from the track by pushing it away from the track on both sides.

    • The ribbon cable on the left side of the control panel, also known as the ribbon cable, must stay attached to the printer. If the cable becomes detached the front buttons will not be responsive.

  4. Epson Stylus NX230 Front Button Replacement: 步骤 4 中的图像 1,1
    • Flip the detached control panel over so that the buttons are facing down.

    • Remove the two 3mm Phillips #2 screws from the back of the control panel.

  5. Epson Stylus NX230 Front Button Replacement: 步骤 5 中的图像 1,1
    • Lift up the gray plastic piece.

    • Remove the 3mm Phillips #2 screw.

  6. Epson Stylus NX230 Front Button Replacement: 步骤 6 中的图像 1,1
    • Split the control panel in half by gently pulling on both sides of the seam that runs through the control panel.

  7. Epson Stylus NX230 Front Button Replacement: 步骤 7 中的图像 1,2 Epson Stylus NX230 Front Button Replacement: 步骤 7 中的图像 2,2
    • Separate the two pieces to reveal the green circuit board.

    • Be sure to not detach the circuit board from the white tap.

    • Remove the green circuit board by lifting it up gently with your hands.

  8. Epson Stylus NX230 Front Button Replacement: 步骤 8 中的图像 1,1
    • Remove the buttons with the plastic opening tool by pressing the front panel down and lifting the buttons up.

结论

To reassemble your device, follow these instructions in the reverse order.

2等其他人完成本指南。

Danielle Purdy

于04/07/14注册

309 声望

创作了2篇指南

团队

Cal Poly, Team 6-1, Forte Spring 2014 Cal Poly, Team 6-1, Forte Spring 2014 的会员

CPSU-FORTE-S14S6G1

4 名成员

创作了10篇指南

一条评论

Wow! this guide is clear and concise. wahoo!!!

kyle price - 回复

添加评论

浏览统计数据:

过去 24 小时: 0

过去 7 天: 0

过去 30 天: 3

总计 823