跳转到主内容

Ematic EGQ307 Battery Replacement

你所需要的

  1. Ematic EGQ307 Battery Replacement, Battery: 步骤 1 中的图像 1,2 Ematic EGQ307 Battery Replacement, Battery: 步骤 1 中的图像 2,2
    • There are two screws on the side with the micro USB power port. Remove the two 2mm x 0.5mm screws with a Phillips #0 Screwdriver head.

  2. Ematic EGQ307 Battery Replacement: 步骤 2 中的图像 1,2 Ematic EGQ307 Battery Replacement: 步骤 2 中的图像 2,2
    • Pry off the plastic backing with the spudger and the plastic opening tools. Anything that can provide enough leverage and not conduct electricity will also work for this purpose.

    • Carefully separate the front and back plates because the wire that connects the speaker is connected to both the front and back plates.

  3. Ematic EGQ307 Battery Replacement: 步骤 3 中的图像 1,1
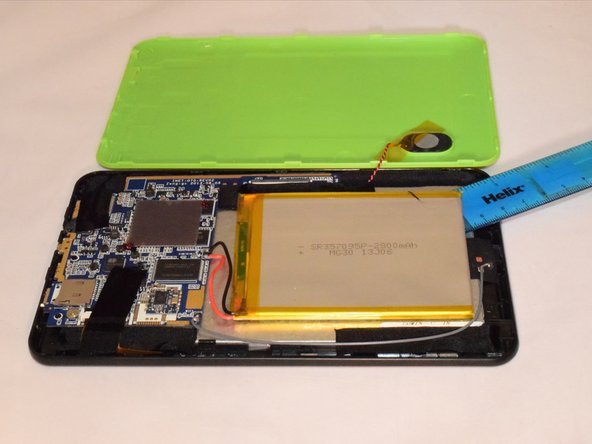
    • 3. Once you pry off the plastic backing, you will expose the battery.

    • Carefully separate the front and back plates because the wire that connects the speaker is connected to both the front and back plates

  4. Ematic EGQ307 Battery Replacement: 步骤 4 中的图像 1,3 Ematic EGQ307 Battery Replacement: 步骤 4 中的图像 2,3 Ematic EGQ307 Battery Replacement: 步骤 4 中的图像 3,3
    在这个步骤中使用的工具:
    Plastic Cards
    $2.99
    购买
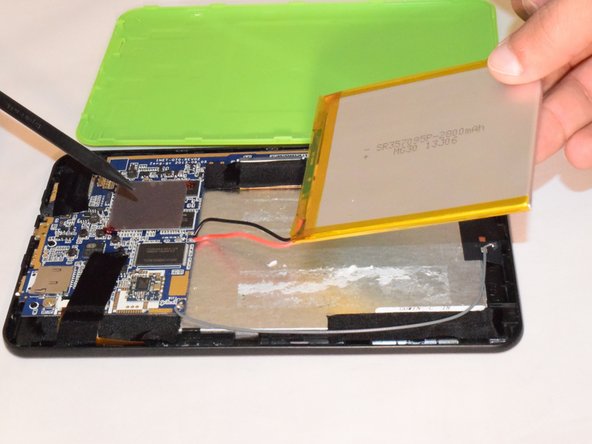
    • 4. Remove the tape holding the battery to the plastic frame. The battery is glued to the back of the LED. Pry the battery off the LED using a plastic card.

    • Do not bend or warp the battery. Even though the battery may not be working, it is still dangerous.

  5. Ematic EGQ307 Battery Replacement: 步骤 5 中的图像 1,1
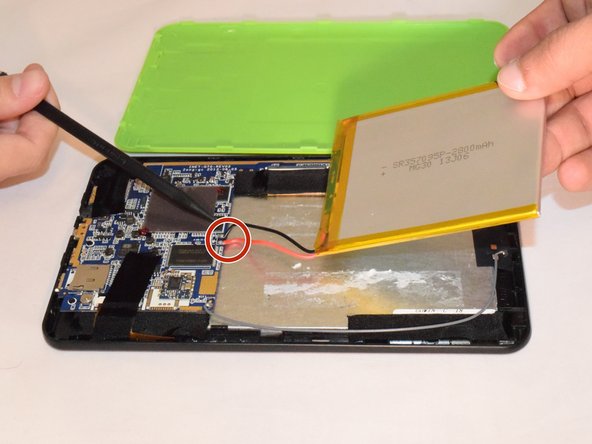
    • If replacing the battery, unplug the black and red wires gently from the hardware and take off the battery .

    • If not replacing it, do not disconnect the red and black wires.

    • If replacing the battery, you will need a soldering kit to reconnect the wires with the new battery after disconnecting the old battery.

    • How To Solder and Desolder Connections.

结论

To reassemble your device, follow these instructions in reverse order. Note, you need to solder the battery wires onto the motherboard.

2等其他人完成本指南。

0条评论

添加评论

浏览统计数据:

过去 24 小时: 0

过去 7 天: 1

过去 30 天: 4

总计 5,079