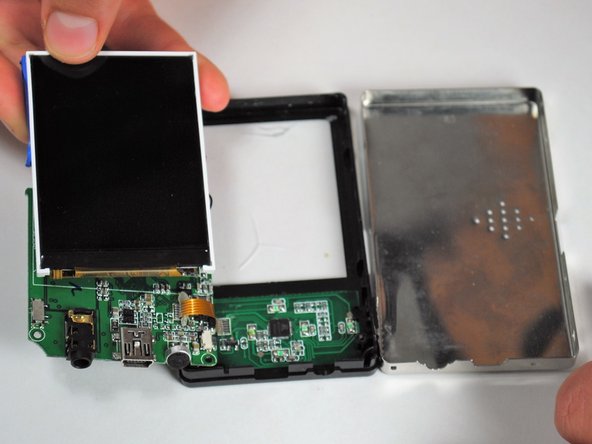
跳转到主内容

Element GC-1020 Display Replacement

你所需要的

  1. Element GC-1020 Display Replacement, Back Cover Replacement Guide: 步骤 1 中的图像 1,1
    • Unscrew the four screws (size: 3.175mm) on the left and right side of the Element Electronics GC-1020 device using the PH#0 screwdriver.

  2. Element GC-1020 Display Replacement: 步骤 2 中的图像 1,1
    • Carefully pull the back of the device (the silver portion) apart from the rest of the device.

    • If you pull back too forcefully the power button would move out of place.

  3. Element GC-1020 Display Replacement, Display: 步骤 3 中的图像 1,1
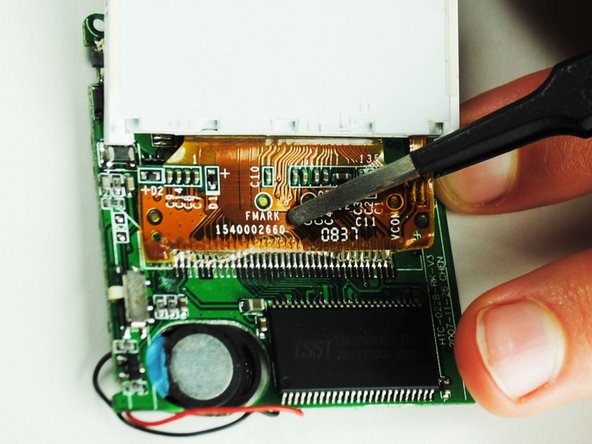
    • Unscrew the visible Philips head screws (size: 3.968 mm) on the motherboard located on the top of left and right sides. Use a PH #0 sized screw driver head for removal.

  4. Element GC-1020 Display Replacement: 步骤 4 中的图像 1,2 Element GC-1020 Display Replacement: 步骤 4 中的图像 2,2
    • Carefully bend the plastic frame to remove the motherboard.

    • Upon doing this make sure your power button on the bottom left side stays attached to the outer frame because it will loosen as the motherboard is moved upwards.

  5. Element GC-1020 Display Replacement: 步骤 5 中的图像 1,1
    • The display is attached to a dark yellow, flimsy, plastic material. This material is then attached to the motherboard. Tear off the plastic, successfully detaching the motherboard and display from each other.

  6. Element GC-1020 Display Replacement: 步骤 6 中的图像 1,3 Element GC-1020 Display Replacement: 步骤 6 中的图像 2,3 Element GC-1020 Display Replacement: 步骤 6 中的图像 3,3
    • Once the display is by itself, separate from the rest of the device, you are ready to put in your new display.

结论

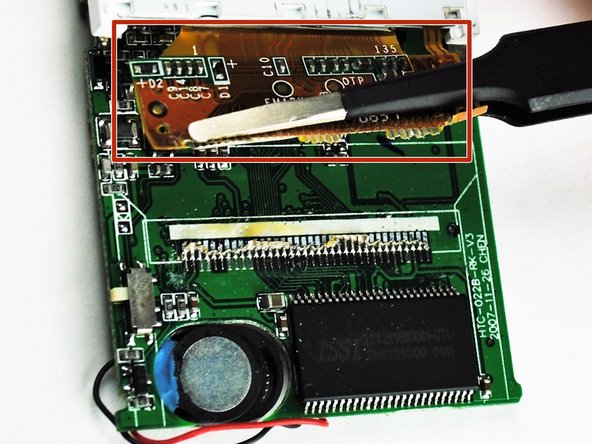
To reassemble your device, follow these instructions in reverse order.

2等其他人完成本指南。

Lashaun Noel

于09/25/15注册

591 声望

创作了5篇指南

团队

一条评论

but can i ask do you know how to reboot the software ?

i mean we try to put in our music or video or image inside. can it be done

Nisha Najihah - 回复

添加评论

浏览统计数据:

过去 24 小时: 0

过去 7 天: 0

过去 30 天: 2

总计 318