跳转到主内容

EDCO Floor Stripper TS8 .75L (2017) Striker Plate Replacement

你所需要的

  1. EDCO Floor Stripper TS8 .75L (2017) Striker Plate Replacement, Safety precautions: 步骤 1 中的图像 1,1
    • Before you begin, ensure the device is powered down and cool to the touch.

    • Ensure the machine is unplugged.

    • Turn the power switch counterclockwise into the OFF position.

  2. EDCO Floor Stripper TS8 .75L (2017) Striker Plate Replacement, Remove the hood bolts: 步骤 2 中的图像 1,2 EDCO Floor Stripper TS8 .75L (2017) Striker Plate Replacement, Remove the hood bolts: 步骤 2 中的图像 2,2
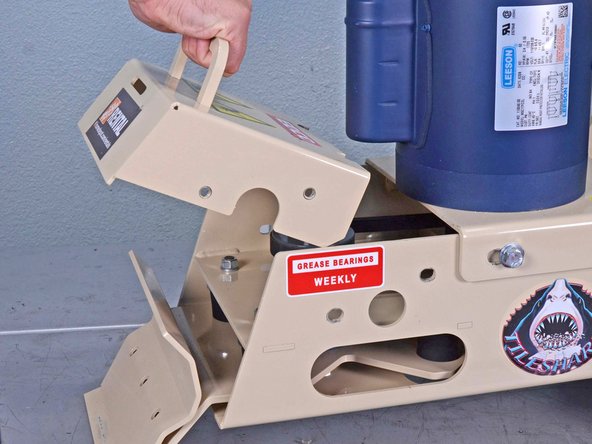
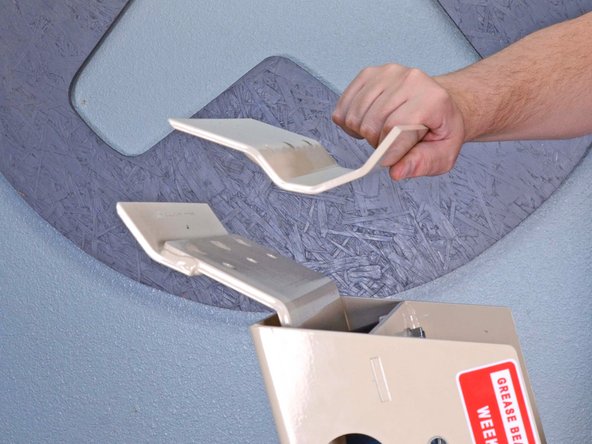
    • Use a 1/2 inch socket to remove the four bolts securing the hood to the frame, two on each side.

    • During reassembly, ensure each bolt is reinstalled with both its flat washer and lock washer.

  3. EDCO Floor Stripper TS8 .75L (2017) Striker Plate Replacement, Remove the hood: 步骤 3 中的图像 1,2 EDCO Floor Stripper TS8 .75L (2017) Striker Plate Replacement, Remove the hood: 步骤 3 中的图像 2,2
    • Pull the hood away from the device to remove it.

  4. EDCO Floor Stripper TS8 .75L (2017) Striker Plate Replacement, Loosen the motor mount bolts: 步骤 4 中的图像 1,2 EDCO Floor Stripper TS8 .75L (2017) Striker Plate Replacement, Loosen the motor mount bolts: 步骤 4 中的图像 2,2
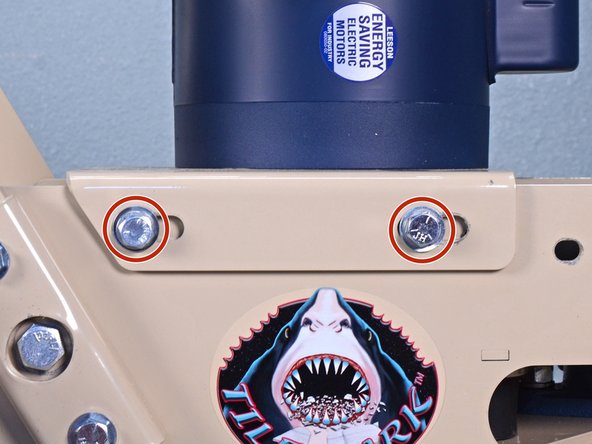
    • Use a 9/16 inch socket to loosen, but not remove, the four bolts securing the motor mount to the frame, two on each side.

  5. EDCO Floor Stripper TS8 .75L (2017) Striker Plate Replacement, Slide motor mount forward: 步骤 5 中的图像 1,2 EDCO Floor Stripper TS8 .75L (2017) Striker Plate Replacement, Slide motor mount forward: 步骤 5 中的图像 2,2
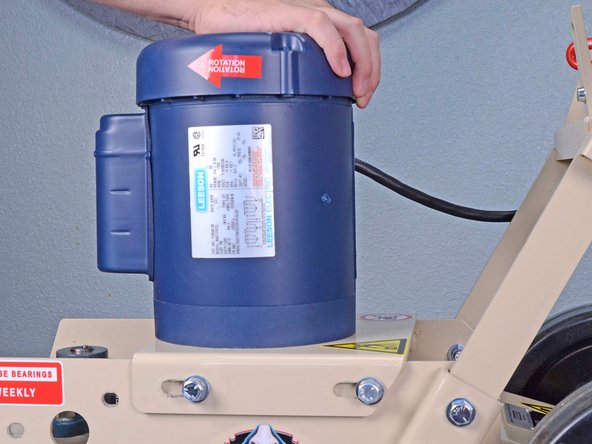
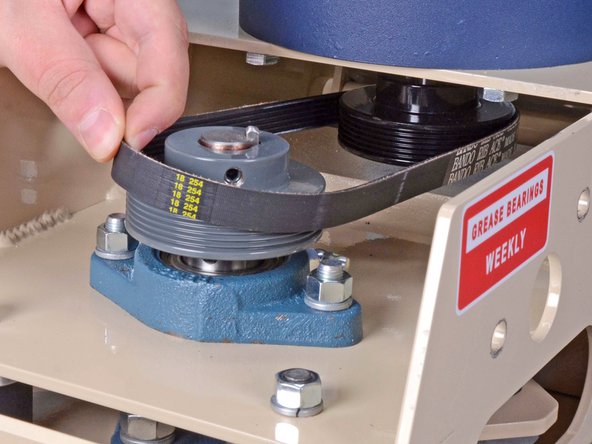
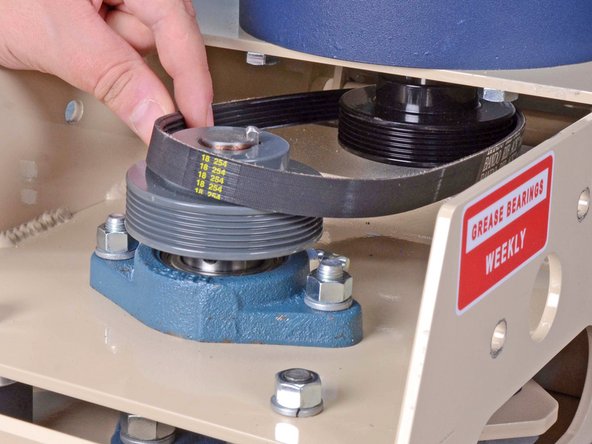
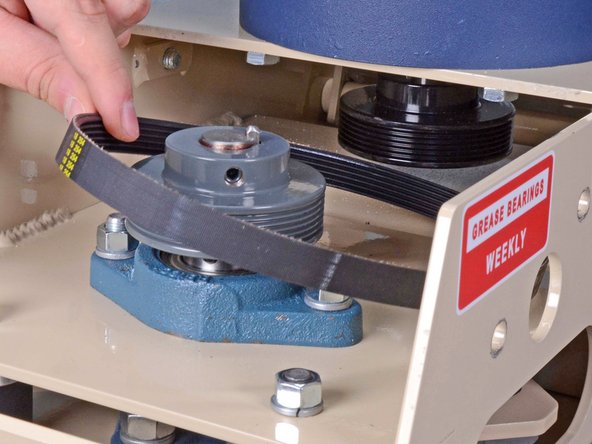
    • Slide the motor towards the front of the device to release tension in the belt."

    • Reassembly tip: Tilt the device onto its handles to use the weight of the motor to tension the belt, then tighten down the bolts.

  6. EDCO Floor Stripper TS8 .75L (2017) Striker Plate Replacement, Remove the belt: 步骤 6 中的图像 1,3 EDCO Floor Stripper TS8 .75L (2017) Striker Plate Replacement, Remove the belt: 步骤 6 中的图像 2,3 EDCO Floor Stripper TS8 .75L (2017) Striker Plate Replacement, Remove the belt: 步骤 6 中的图像 3,3
    • Remove the belt from the cam shaft pulley.

  7. EDCO Floor Stripper TS8 .75L (2017) Striker Plate Replacement: 步骤 7 中的图像 1,2 EDCO Floor Stripper TS8 .75L (2017) Striker Plate Replacement: 步骤 7 中的图像 2,2
    • Disengage the belt from the motor pulley.

    • Remove the belt.

  8. EDCO Floor Stripper TS8 .75L (2017) Striker Plate Replacement, Tilt the device: 步骤 8 中的图像 1,3 EDCO Floor Stripper TS8 .75L (2017) Striker Plate Replacement, Tilt the device: 步骤 8 中的图像 2,3 EDCO Floor Stripper TS8 .75L (2017) Striker Plate Replacement, Tilt the device: 步骤 8 中的图像 3,3
    • Tilt the device back to rest on its handle.

    • Ensure that the four 9/16 inch motor mount bolts are tightened before tilting the device.

  9. EDCO Floor Stripper TS8 .75L (2017) Striker Plate Replacement, Chock the wheels: 步骤 9 中的图像 1,1
    • Insert wheel chocks behind the wheels to ensure the device does not move or fall during the repair."

  10. EDCO Floor Stripper TS8 .75L (2017) Striker Plate Replacement, Remove the blade retainer: 步骤 10 中的图像 1,1
    • Use a 3/16 inch hex key to remove the three bolts securing the blade retainer.

  11. EDCO Floor Stripper TS8 .75L (2017) Striker Plate Replacement: 步骤 11 中的图像 1,2 EDCO Floor Stripper TS8 .75L (2017) Striker Plate Replacement: 步骤 11 中的图像 2,2
    • Remove the blade retainer.

  12. EDCO Floor Stripper TS8 .75L (2017) Striker Plate Replacement, Loosen set screws: 步骤 12 中的图像 1,1
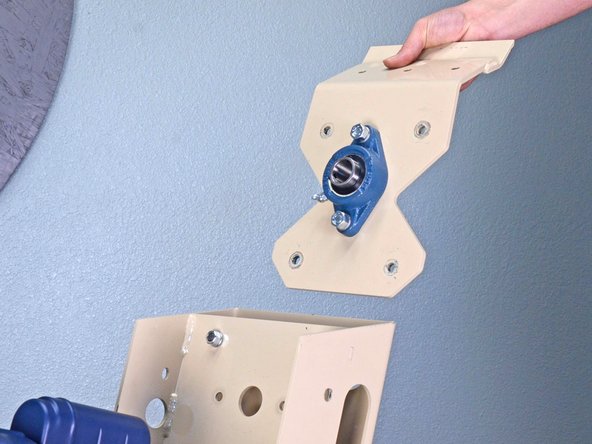
    • Use a 1/8 inch hex key to loosen the two set screws on the lower flange bearing.

  13. EDCO Floor Stripper TS8 .75L (2017) Striker Plate Replacement: 步骤 13 中的图像 1,1
    • Use a 1/8 inch hex key to loosen the two set screws on the middle flange bearing.

    • These set screws require either a long hex key or an extension to reach. They can be accessed from the front of the floor stripper or from the slots on either side of the frame.

  14. EDCO Floor Stripper TS8 .75L (2017) Striker Plate Replacement: 步骤 14 中的图像 1,1
    • Use a 9/16 inch socket to remove the two nuts securing the upper flange bearing to the frame.

    • If you are unable to fit a socket on the nuts due to the cam shaft pulley, try using a wrench.

    • If the bolts spin without loosening, use a 9/16 inch wrench to hold the bolt head from underneath.

  15. EDCO Floor Stripper TS8 .75L (2017) Striker Plate Replacement, Remove the cam shaft assembly: 步骤 15 中的图像 1,2 EDCO Floor Stripper TS8 .75L (2017) Striker Plate Replacement, Remove the cam shaft assembly: 步骤 15 中的图像 2,2
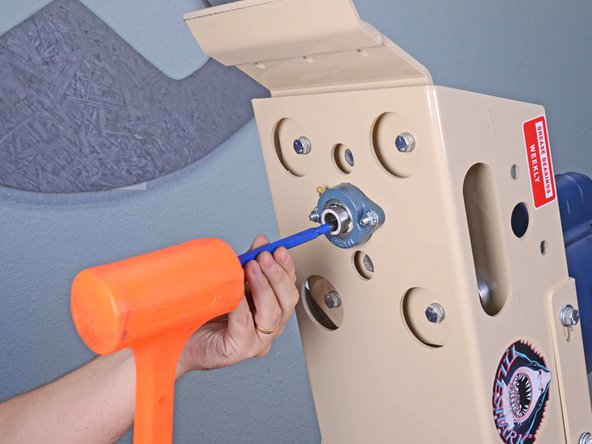
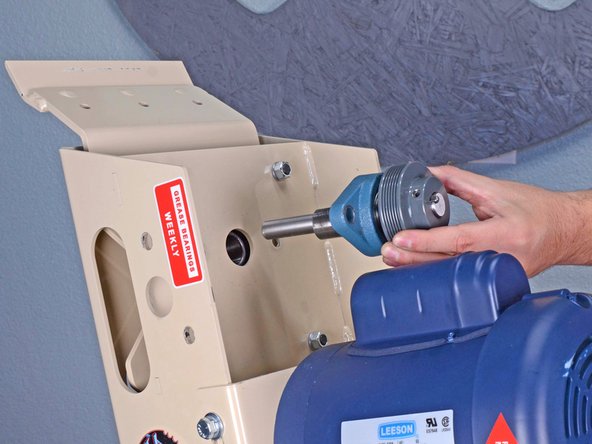
    • Use a mallet and an appropriately-sized brass punch to tap out the cam shaft assembly if you cannot remove it by hand.

    • Once loose, the cam shaft assembly can fall out quickly.

  16. EDCO Floor Stripper TS8 .75L (2017) Striker Plate Replacement: 步骤 16 中的图像 1,2 EDCO Floor Stripper TS8 .75L (2017) Striker Plate Replacement: 步骤 16 中的图像 2,2
    • Remove the cam shaft assembly

  17. EDCO Floor Stripper TS8 .75L (2017) Striker Plate Replacement, Remove the striker plate: 步骤 17 中的图像 1,1
    • Use a 9/16 inch socket to remove the four bolts securing the striker plate to the isolators.

  18. EDCO Floor Stripper TS8 .75L (2017) Striker Plate Replacement: 步骤 18 中的图像 1,2 EDCO Floor Stripper TS8 .75L (2017) Striker Plate Replacement: 步骤 18 中的图像 2,2
    • Remove the striker plate.

结论

To reassemble your device, follow these instructions in reverse order.

2等其他人完成本指南。

Robert Boyd

于02/01/21注册

26,559 声望

创作了94篇指南

0条评论

添加评论

浏览统计数据:

过去 24 小时: 2

过去 7 天: 6

过去 30 天: 16

总计 508