跳转到主内容

Durofix RV332 Battery LED Replacement

你所需要的

  1. Durofix RV332 Battery LED Replacement, Battery LED: 步骤 1 中的图像 1,1
    • Remove the six 13 mm case screws with a #0 Phillips screwdriver from the side of the power screwdriver.

  2. Durofix RV332 Battery LED Replacement: 步骤 2 中的图像 1,2 Durofix RV332 Battery LED Replacement: 步骤 2 中的图像 2,2
    • Using a plastic opening tool, separate the case in two to expose the internals of the cordless screwdriver.

  3. Durofix RV332 Battery LED Replacement: 步骤 3 中的图像 1,3 Durofix RV332 Battery LED Replacement: 步骤 3 中的图像 2,3 Durofix RV332 Battery LED Replacement: 步骤 3 中的图像 3,3
    • Remove printed circuit board, LED, battery, and motor assembly from the screwdriver casing.

    • Use a soldering iron to melt the solder from the LED's two pins on the printed circuit board.

    • Remove the LED from the circuit board while the solder is still melted.

  4. Durofix RV332 Battery LED Replacement: 步骤 4 中的图像 1,2 Durofix RV332 Battery LED Replacement: 步骤 4 中的图像 2,2
    • Place the positive leg of the new LED through the positive hole in the printed circuit board and solder it into place.

    • Place the negative leg of the LED through the negative hold in the printed circuit board and solder it into place.

结论

To reassemble your device, follow these instructions in reverse order.

另外一个人完成了本指南。

Tyler Vincent

于02/24/14注册

479 声望

创作了4篇指南

团队

Michigan Tech, Team 5-5, Lauer Spring 2014 Michigan Tech, Team 5-5, Lauer Spring 2014 的会员

MTU-LAUER-S14S5G5

3 名成员

创作了5篇指南

一条评论

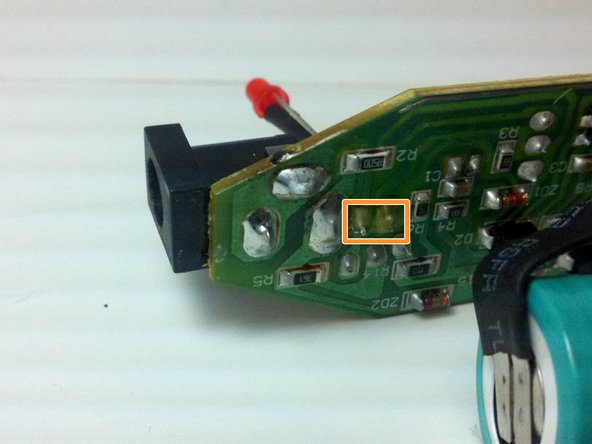
Hello, I would ask the author about the type and model number of the electronic element marked as Q1 on the PCB (transistor or thyristor) on the third picture in Step 3 of this article, because mine is burnt out, and on this picture can't be read anything.

Greetings,

Plam

Пламен Петракиев - 回复

添加评论

浏览统计数据:

过去 24 小时: 0

过去 7 天: 0

过去 30 天: 2

总计 1,088