跳转到主内容
加入维修社区 - 创建账户

DualShock 4 CUH-ZCT2U D-pad Gasket Replacement

你所需要的

    1. DualShock 4 CUH-ZCT2U D-pad Gasket Replacement, D-pad Gasket: 步骤 1 中的图像 1,2 DualShock 4 CUH-ZCT2U D-pad Gasket Replacement, D-pad Gasket: 步骤 1 中的图像 2,2
      • Use a Phillips #00 screwdriver to remove the four 6.0 mm-long screws on the back of the controller.

      询问修复机器人

      添加评论

    2. DualShock 4 CUH-ZCT2U D-pad Gasket Replacement: 步骤 2 中的图像 1,2 DualShock 4 CUH-ZCT2U D-pad Gasket Replacement: 步骤 2 中的图像 2,2
      • Four fragile plastic clips hold the front and back case together. You can see their locations more clearly in this guide.

      • If you break these clips, the controller will still work.

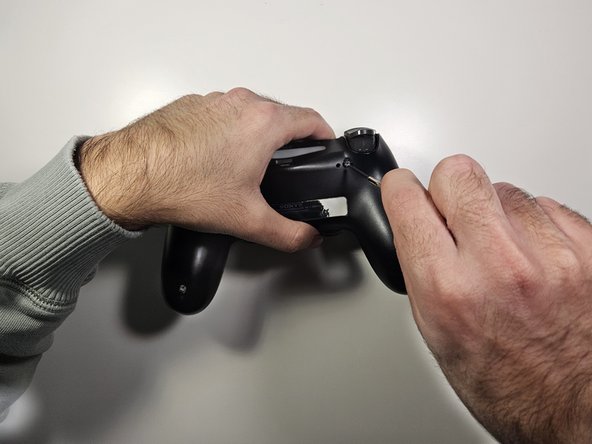
      • Insert the tip of an opening tool or spudger into the seam of the device and gently release the clips around the perimeter of the controller to separate the front and back sections.

      询问修复机器人

      添加评论

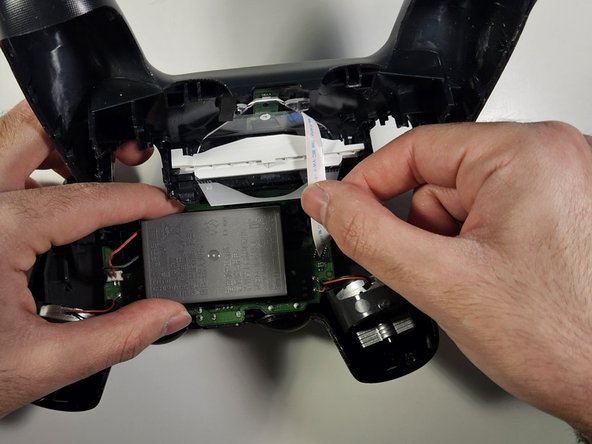
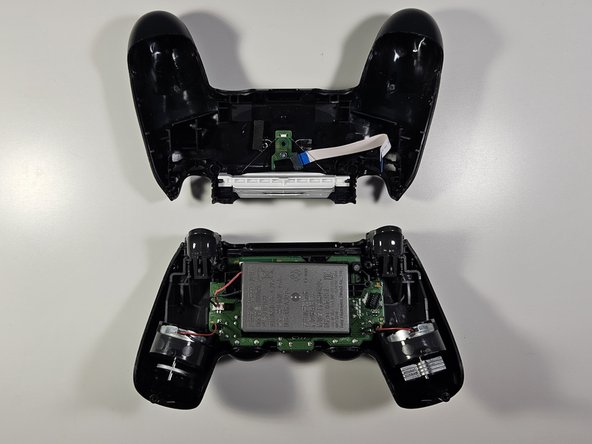
    3. DualShock 4 CUH-ZCT2U D-pad Gasket Replacement: 步骤 3 中的图像 1,3 DualShock 4 CUH-ZCT2U D-pad Gasket Replacement: 步骤 3 中的图像 2,3 DualShock 4 CUH-ZCT2U D-pad Gasket Replacement: 步骤 3 中的图像 3,3
      • Use your fingers to gently pull the ribbon cable straight out of its connector on the motherboard.

      • Since this cable's pull tab is too small to grab with your fingers or tweezers, grab the cable itself. Otherwise utilize pull tabs whenever possible.

      • Do not remove the entire socket from the motherboard, just the ribbon cable. The blue part of the cable should be visible if done correctly.

      • During reassembly, grab the ribbon cable by the blue tab and gently press the cable straight into the connector. Push the blue tab rather than the ribbon cable itself.

      询问修复机器人

      添加评论

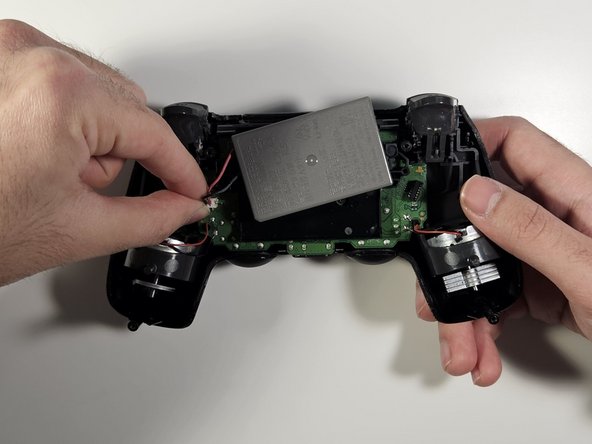
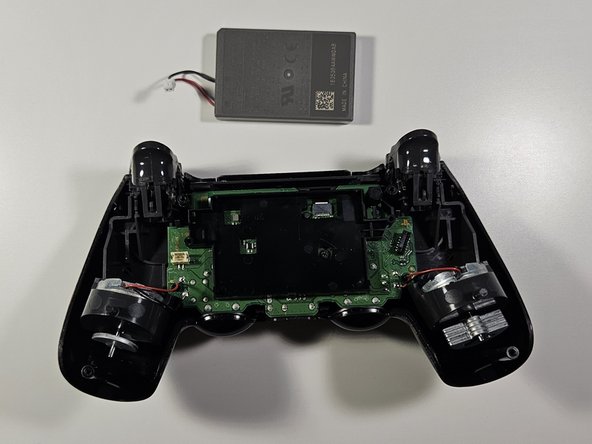
    4. DualShock 4 CUH-ZCT2U D-pad Gasket Replacement: 步骤 4 中的图像 1,3 DualShock 4 CUH-ZCT2U D-pad Gasket Replacement: 步骤 4 中的图像 2,3 DualShock 4 CUH-ZCT2U D-pad Gasket Replacement: 步骤 4 中的图像 3,3
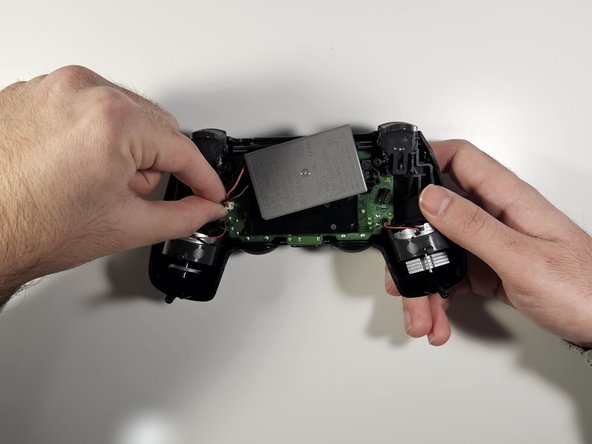
      • Use a pair of tweezers or your fingers to pull the battery's power connector straight up from the motherboard.

      询问修复机器人

      添加评论

    5. DualShock 4 CUH-ZCT2U D-pad Gasket Replacement: 步骤 5 中的图像 1,3 DualShock 4 CUH-ZCT2U D-pad Gasket Replacement: 步骤 5 中的图像 2,3 DualShock 4 CUH-ZCT2U D-pad Gasket Replacement: 步骤 5 中的图像 3,3
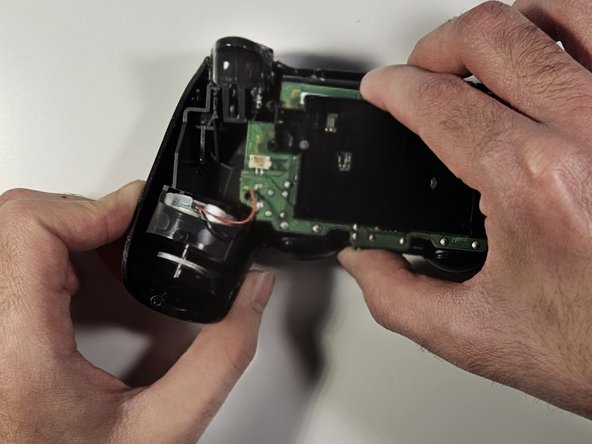
      • Use a spudger to disconnect the red cable from the motherboard under the black plastic the battery was lying on.

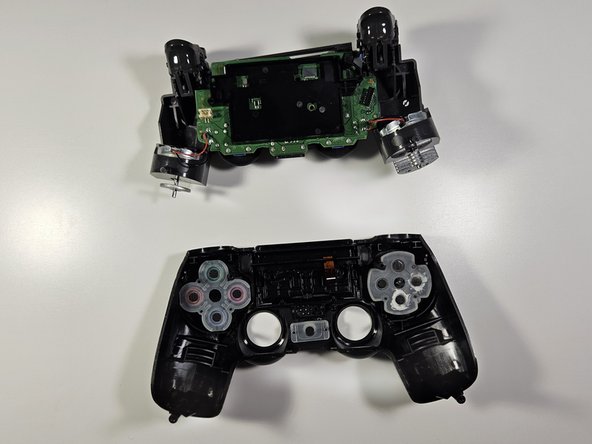
      • Carefully pull apart the front of the controller (the part with the silicon Dpad visible) from the back half.

      • Tweezers were used in the image. However, using metal tools on the internals of your controller can damage them so it is best to avoid using them for prying.

      询问修复机器人

      添加评论

    6. DualShock 4 CUH-ZCT2U D-pad Gasket Replacement: 步骤 6 中的图像 1,2 DualShock 4 CUH-ZCT2U D-pad Gasket Replacement: 步骤 6 中的图像 2,2
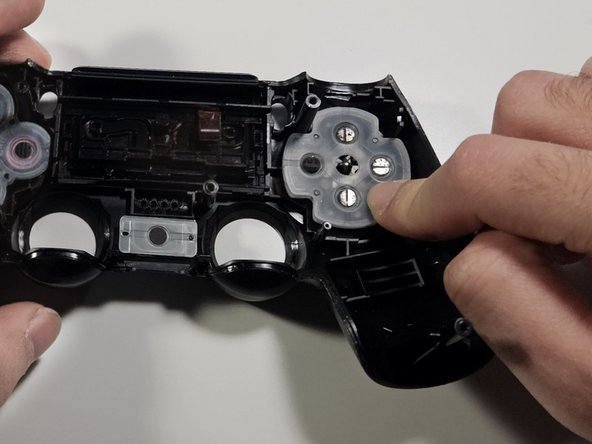
      • Pull off the old silicone pads.

      • Place the new silicone rubber pads on top of the four arrow keys with the flat side up.

      • The orientation does not matter.

      询问修复机器人

      添加评论

    7. DualShock 4 CUH-ZCT2U D-pad Gasket Replacement: 步骤 7 中的图像 1,3 DualShock 4 CUH-ZCT2U D-pad Gasket Replacement: 步骤 7 中的图像 2,3 DualShock 4 CUH-ZCT2U D-pad Gasket Replacement: 步骤 7 中的图像 3,3
      • To reassemble, follow these instructions in reverse order.

      询问修复机器人

      添加评论

结论

To reassemble your device, follow these instructions in reverse order.

取消:我没有完成这个指南。

4等其他人完成本指南。

Ryan Zareh

于01/09/24注册

238 声望

撰写一个指南

团队

York University, Team 2-30, O'Regan Winter 2024 York University, Team 2-30, O'Regan Winter 2024 的会员

YORK-O'REGAN-W24S2G30

1 名成员

创作了12篇指南

0指南评论

添加评论

浏览统计数据:

过去 24 小时: 5

过去 7 天: 46

过去 30 天: 181

总计 3,891