跳转到主内容

DualShock 4 CHU-ZCT2U Rear Panel Replacement

你所需要的

  1. DualShock 4 CHU-ZCT2U Rear Panel Replacement, Remove the rear panel screws: 步骤 1 中的图像 1,2 DualShock 4 CHU-ZCT2U Rear Panel Replacement, Remove the rear panel screws: 步骤 1 中的图像 2,2
    • Use a Phillips screwdriver to remove the four 6.4 mm-long screws from the rear panel.

  2. DualShock 4 CHU-ZCT2U Rear Panel Replacement, Separate the rear panel: 步骤 2 中的图像 1,2 DualShock 4 CHU-ZCT2U Rear Panel Replacement, Separate the rear panel: 步骤 2 中的图像 2,2
    • Insert an opening tool into the crease where the front and rear panel meet, starting from the outside edge of either handle.

    • Gently pry the rear panel off of the front panel until they become partially separated.

  3. DualShock 4 CHU-ZCT2U Rear Panel Replacement, Release the plastic clips: 步骤 3 中的图像 1,3 DualShock 4 CHU-ZCT2U Rear Panel Replacement, Release the plastic clips: 步骤 3 中的图像 2,3 DualShock 4 CHU-ZCT2U Rear Panel Replacement, Release the plastic clips: 步骤 3 中的图像 3,3
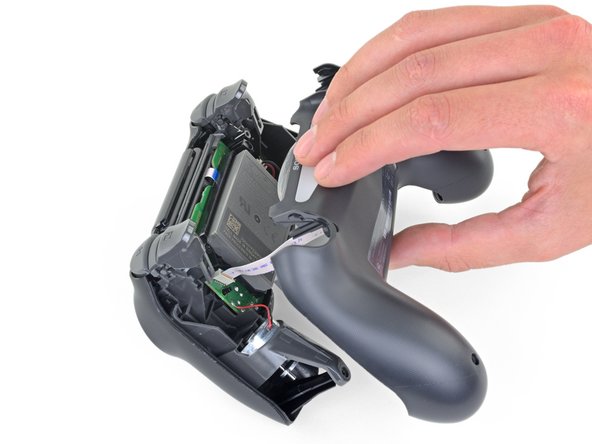
    • Use the opening tool to separate the panels by releasing the plastic clips around the perimeter of the controller.

  4. DualShock 4 CHU-ZCT2U Rear Panel Replacement, Remove the rear panel: 步骤 4 中的图像 1,2 DualShock 4 CHU-ZCT2U Rear Panel Replacement, Remove the rear panel: 步骤 4 中的图像 2,2
    • Lift the rear panel directly away from the controller.

    • Do not completely remove the rear panel. It is still attached to the controller by a ribbon cable.

  5. DualShock 4 CHU-ZCT2U Rear Panel Replacement: 步骤 5 中的图像 1,2 DualShock 4 CHU-ZCT2U Rear Panel Replacement: 步骤 5 中的图像 2,2
    • Use your fingers to gently pull the ribbon cable straight out of its connector on the motherboard.

    • Since this cable's pull tab is too small to grab with fingers or tweezers, grab the cable itself. Otherwise utilize pull tabs whenever possible.

    • During reassembly, grab the ribbon cable by the blue tab and gently press the cable straight into the connector. Push the blue tab rather than the ribbon cable itself.

结论

To reassemble your device, follow the above steps in reverse order.

Repair didn’t go as planned? Check out our Answers community for troubleshooting help.

2等其他人完成本指南。

Sam Omiotek

于02/25/19注册

72,547 声望

创作了288篇指南

0条评论

添加评论

浏览统计数据:

过去 24 小时: 0

过去 7 天: 11

过去 30 天: 84

总计 2,625