跳转到主内容

当前版本的文档还未经巡查,您可以查看最新的已查核版本

已存档的指南
本指南只作为历史记录保留。请使用指南的最新版本来进行维修。

你所需要的

  1. , 外壳: 步骤 1 中的图像 1,3 , 外壳: 步骤 1 中的图像 2,3 , 外壳: 步骤 1 中的图像 3,3
    • 用十字螺丝刀拧下四个6.5毫米螺钉。

    • 用塑料开口工具撬开壳体的两半。

    • 小心,因为有一个排线连接控制器的内部接口。它不会通过打开壳子就断开连接

  2. : 步骤 2 中的图像 1,3 : 步骤 2 中的图像 2,3 : 步骤 2 中的图像 3,3
    • 用镊子将带状电缆从主板端口拔出,以完全分开两部分。

  3. 这个步骤还没有翻译 帮忙翻译一下

    : 步骤 3 中的图像 1,3 : 步骤 3 中的图像 2,3 : 步骤 3 中的图像 3,3
    • Unplug the black and red wires from the power port located on the motherboard.

    • Remove the old battery from the controller.

  4. 这个步骤还没有翻译 帮忙翻译一下

    : 步骤 4 中的图像 1,2 : 步骤 4 中的图像 2,2
    • Remove the 6.43mm screw connecting the motherboard to the inner workings of the controller, using a Phillips-Head screwdriver.

  5. 这个步骤还没有翻译 帮忙翻译一下

    : 步骤 5 中的图像 1,3 : 步骤 5 中的图像 2,3 : 步骤 5 中的图像 3,3
    • Unhook the battery case from the motherboard, and pull it off.

  6. 这个步骤还没有翻译 帮忙翻译一下

    : 步骤 6 中的图像 1,3 : 步骤 6 中的图像 2,3 : 步骤 6 中的图像 3,3
    • Pull out the second CPU ribbon to separate the inner workings from the top of the outer shell.

  7. 这个步骤还没有翻译 帮忙翻译一下

    : 步骤 7 中的图像 1,3 : 步骤 7 中的图像 2,3 : 步骤 7 中的图像 3,3
    • Pry the button from the controller using the plastic opening tool. Slide the tool between the buttons. There will be a tab you can push in to remove the button.

    • If too much force is applied, the button could go flying upon separating. Try not to force the buttons too much.

  8. 这个步骤还没有翻译 帮忙翻译一下

    : 步骤 8 中的图像 1,2 : 步骤 8 中的图像 2,2
    • Insert the plastic opening tool into the space created when the button is pressed down. Make sure the tool is situated directly in the center of the space, before attempting to pry the button out.

终点

26等其他人完成本指南。

Michelle Joseph

于10/09/17注册

1,762 声望

创作了3篇指南

团队

USF Tampa, Team S1-G5, Leahy Fall 2017 USF Tampa, Team S1-G5, Leahy Fall 2017 的会员

USFT-LEAHY-F17S1G5

3 名成员

创作了22篇指南

4条评论

Is it possible to replace the zct2u triggers with custom 1st gen triggers? It seems like the only major difference is the extra piece on the latest models to prevent losing the trigger.

FTC Gaming - 回复

Does this stops the issue I have that is when I press L2, my character sometimes goes forward, like the L2 would be creating contact with the left directional going forward option.

Erick Xavier - 回复

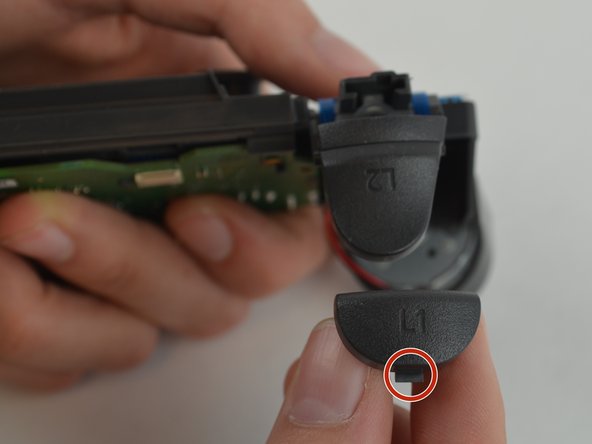
My controller lost the R1, so I need to buy one to replace it. After pulling apart my controller, I noticed the back of the L1 button looks different (the plastic connection pieces are completely different) than the photos in your directions. Are there different types of shoulder buttons available? Or is it that my controller is a different generation? If so, do you supply the pieces for this controller type?

Corbin - 回复

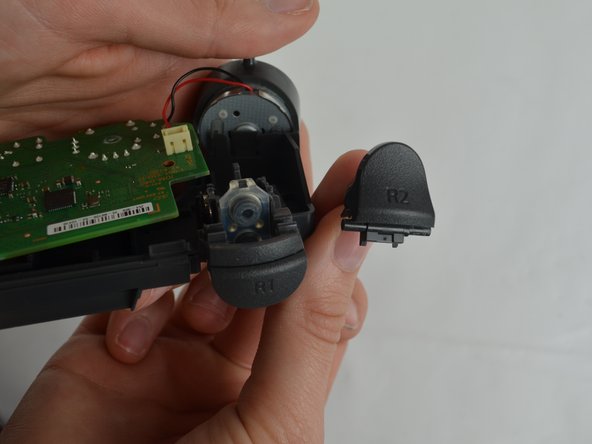
Hey, can you explain the differences between the V1 and V2 Trigger buttons, they are different. I stepped on the R2 button and it ripped out the R2 button and damaged the housing (my father is the trades guy, obviously).

I don’t know if it’s worth fixing, or if I should just buy a new controller.

Andrew Ahmed - 回复

添加评论

浏览统计数据:

过去 24 小时: 19

过去 7 天: 95

过去 30 天: 388

总计 37,102