简介
Follow this guide to replace the battery on a Sony DualShock 4 CHU-ZCT2U Playstation controller.
This guide will also work for the older CHU-ZCT1U model controller but be sure to order the JDM-030 battery, which has a different sized connector. You can check which model controller you have by referencing the sticker on the rear panel.
If your battery is swollen, take appropriate precautions.
你所需要的
-
-
Use a Phillips screwdriver to remove the four 6.4 mm-long screws from the rear panel.
-
-
-
Insert an opening tool into the crease where the front and rear panel meet, starting from the outside edge of either handle.
-
Gently pry the rear panel off of the front panel until they become partially separated.
-
-
-
Use the opening tool to separate the panels by releasing the plastic clips around the perimeter of the controller.
-
-
-
-
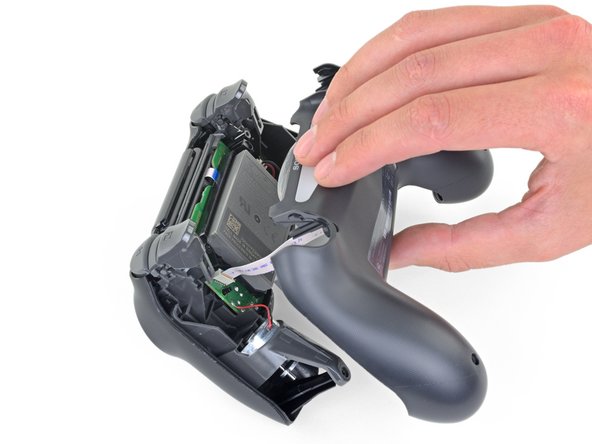
Use a pair of tweezers to pull the battery's power connector straight up from the motherboard.
-


To reassemble your device, follow the above steps in reverse order.
Take your e-waste to an R2 or e-Stewards certified recycler.
Repair didn’t go as planned? Check out our Answers community for troubleshooting help.
To reassemble your device, follow the above steps in reverse order.
Take your e-waste to an R2 or e-Stewards certified recycler.
Repair didn’t go as planned? Check out our Answers community for troubleshooting help.
28等其他人完成本指南。

3条评论
For this DualShock 4 CHU-ZCT2U Battery Replacement, shouldn’t the battery model be JDM-040 and not JDM-030 for this controller. I ordered the battery listed but the connector was too large. So I believe this needs to be edited to match accordingly to avoid confusion and incorrect orders. Thanks!
Tom Nguyen - 回复
Good catch! I just pulled apart the ZCT1U and ZCT2U models and you are right. I will fix this in the guide. Thank you!