跳转到主内容

DualShock 4 Battery Replacement

你所需要的

  1. DualShock 4 Battery Replacement, Controller: 步骤 1 中的图像 1,1
    • Using the Phillips #00 Screwdriver, remove the four 6.0 mm screws securing the rear cover to the controller.

    • Be careful loosening the screws, using the wrong sized screwdriver, or letting the screwdriver slip can permanently damage the screw heads, making removal extremely difficult.

  2. DualShock 4 Battery Replacement: 步骤 2 中的图像 1,3 DualShock 4 Battery Replacement: 步骤 2 中的图像 2,3 DualShock 4 Battery Replacement: 步骤 2 中的图像 3,3
    • Four fragile plastic clips hold the casing together. You can see their locations more clearly in this guide.

    • The clips help hold the seams together. If you break these clips, the controller will still work.

    • Beginning with the left handle:

    • Pinch the left handle of the controller to introduce an opening.

    • Wedge a plastic opening tool into the opening and slide it up towards the joystick.

    • Pull down on tool to pry open the casing.

    • Repeat these steps for the right handle.

  3. DualShock 4 Battery Replacement: 步骤 3 中的图像 1,3 DualShock 4 Battery Replacement: 步骤 3 中的图像 2,3 DualShock 4 Battery Replacement: 步骤 3 中的图像 3,3
    • Wedge a plastic opening tool into the case-splittings and pull down to crack open the casing near the following buttons:

    • Share button

    • Options button

    • Split the plastic covers of the controller apart, taking note that they will still be attached by circuit board ribbons.

    • Three small pieces are often released from the framework. To prevent loss, maintain a controlled work field.

    • 2 Trigger Springs

    • 1 Grey Reset Button Extension

  4. DualShock 4 Battery Replacement, Battery: 步骤 4 中的图像 1,3 DualShock 4 Battery Replacement, Battery: 步骤 4 中的图像 2,3 DualShock 4 Battery Replacement, Battery: 步骤 4 中的图像 3,3
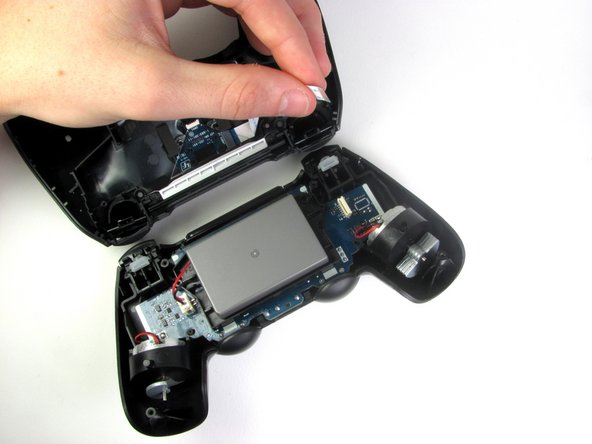
    • Detach the motherboard ribbon connecting the two sides of the controller by pulling it straight out with your fingers.

    • Note the orientation of the cable and make sure it faces the right way when you reconnect it.

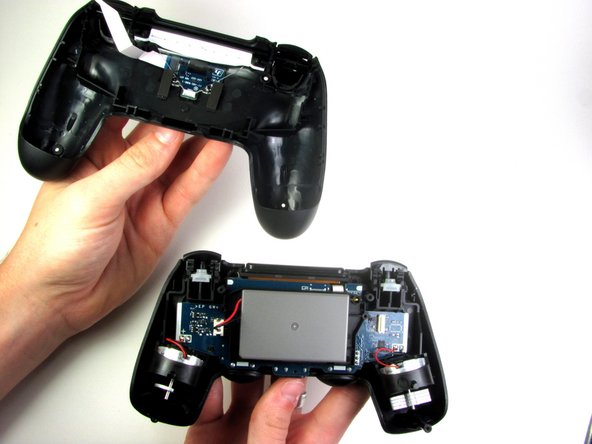
    • After the two halves are separated, place the top of the controller off to the side.

  5. DualShock 4 Battery Replacement: 步骤 5 中的图像 1,3 DualShock 4 Battery Replacement: 步骤 5 中的图像 2,3 DualShock 4 Battery Replacement: 步骤 5 中的图像 3,3
    • Using the blunt forceps, remove the battery plug by gently rocking the forceps side-by-side to loosen the plug.

    • After removal of the plug from the motherboard, the battery can be lifted off of the controller.

    • Hasty removal of the battery plug could warp the plastic grips of the plug.

结论

To reassemble your device, follow these instructions in reverse order.

206等其他人完成本指南。

Mark

于01/21/14注册

7,719 声望

创作了7篇指南

团队

Cal Poly, Team 6-21, Maness Winter 2014 Cal Poly, Team 6-21, Maness Winter 2014 的会员

CPSU-MANESS-W14S6G21

4 名成员

创作了40篇指南

29条评论

My Dualshock 4 wont turn on after the battery replacement.

Any idea on why this happened?

Alexander - 回复

have you tried to charge it?

Mohamed Aden -

I had a problem with my console but with your guide it is possible to solve this one I think.

Praska - 回复

I found a replacement battery here, you have to mod the tray a little, but it works like a champ and doubles the life.

http://www.ebay.com/itm/PS4-Controller-B...

binazriel - 回复

The x button on my controller want working properly so I ordered new rubber mounts. I followed the guide, taking my time to make sure I didn't damage anything.

With the new rubber in place I put everything back together and the controller was working fine but now I've realised it doesn't charge. The battery goes completely dead and switches off. If I then connect it with usb cable it doesn't charge but will turn on the controller for maybe 10 seconds before switching off again.

Anyone any idea what is going on? Thanks.

Kenny - 回复

添加评论

浏览统计数据:

过去 24 小时: 75

过去 7 天: 707

过去 30 天: 3,156

总计 371,665