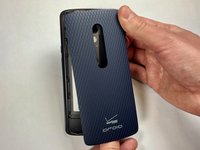
跳转到主内容

Droid MAXX 2 Screen Assembly Replacement

你所需要的

  1. Droid MAXX 2 Screen Assembly  Replacement, Battery: 步骤 1 中的图像 1,1
    • Insert a small pointed object into the hole on the sim card tray to eject the tray from the phone.

  2. Droid MAXX 2 Screen Assembly  Replacement: 步骤 2 中的图像 1,1
    • Pull the sim card tray up out of the phone

  3. Droid MAXX 2 Screen Assembly  Replacement: 步骤 3 中的图像 1,2 Droid MAXX 2 Screen Assembly  Replacement: 步骤 3 中的图像 2,2
    • Wedge your thumb into the indent located on the bottom left corner of the back cover and pull up to remove the back cover.

  4. Droid MAXX 2 Screen Assembly  Replacement: 步骤 4 中的图像 1,1
    • Remove the seventeen 3.2mm Torx T4 screws from the mid-frame.

    • These may be T3 screws. If you are having trouble unscrewing these, stop and try a T3 bit.

  5. Droid MAXX 2 Screen Assembly  Replacement: 步骤 5 中的图像 1,1
    • Pull the mid-frame off of the phone.

    • Keep track of the on/off and volume buttons when you take the phone apart because they are likely to fall out when the halves are separated.

  6. Droid MAXX 2 Screen Assembly  Replacement: 步骤 6 中的图像 1,3 Droid MAXX 2 Screen Assembly  Replacement: 步骤 6 中的图像 2,3 Droid MAXX 2 Screen Assembly  Replacement: 步骤 6 中的图像 3,3
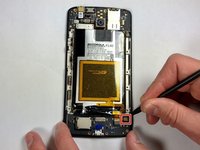
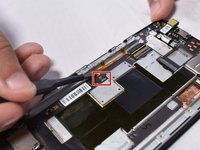
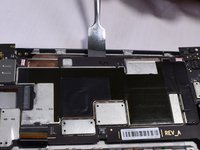
    • Remove the static tape covering the two connectors.

    • Use a spudger to disconnect the battery cables from the motherboard.

    • If battery has adhesive, use heat gun for one to two minutes to loosen it. Be careful of the points outlined in red when prying it up. Use guitar picks or a spudger to gently lift the battery and separate the adhesive.

  7. Droid MAXX 2 Screen Assembly  Replacement: 步骤 7 中的图像 1,1
    • Remove the disconnected battery from the phone.

  8. Droid MAXX 2 Screen Assembly  Replacement, Screen Assembly: 步骤 8 中的图像 1,2 Droid MAXX 2 Screen Assembly  Replacement, Screen Assembly: 步骤 8 中的图像 2,2
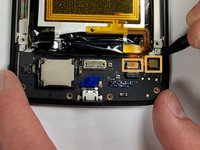
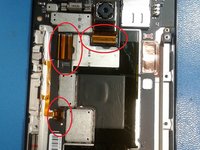
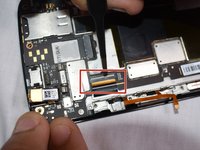
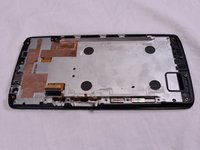
    • We will be removing these 3 ribbon cables.

    • Using an opening pick, lift the grey tab on the rear camera's ZIF connector. Remove the ribbon cable and the camera.

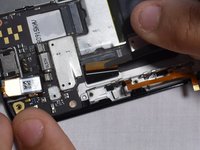
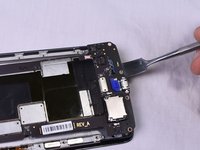
    • Use tweezers to lift up on the grey latch on the ZIF connector.

    • Remove the ribbon cable from the ZIF connector.

  9. Droid MAXX 2 Screen Assembly  Replacement: 步骤 9 中的图像 1,2 Droid MAXX 2 Screen Assembly  Replacement: 步骤 9 中的图像 2,2
    • Use a pair of tweezers to lift up the black latch on the ZIF connector.

    • Pull the ribbon cable out of the ZIF connector.

  10. Droid MAXX 2 Screen Assembly  Replacement: 步骤 10 中的图像 1,3 Droid MAXX 2 Screen Assembly  Replacement: 步骤 10 中的图像 2,3 Droid MAXX 2 Screen Assembly  Replacement: 步骤 10 中的图像 3,3
    • Using a metal spudger, work your way around the perimeter of the main board and screen.

    • There is a lot of adhesive between the two pieces, so be careful to try to remove the adhesive slowly in order to not break anything.

结论

To reassemble your device, follow these instructions in reverse order.

2等其他人完成本指南。

Burke Seggerman

于03/18/18注册

704 声望

创作了5篇指南

团队

Baylor, Team S3-G4, Williams Spring 2018 Baylor, Team S3-G4, Williams Spring 2018 的会员

BU-WILLIAMS-S18S3G4

3 名成员

创作了6篇指南

0条评论

添加评论

浏览统计数据:

过去 24 小时: 0

过去 7 天: 2

过去 30 天: 3

总计 2,007