跳转到主内容
加入维修社区 - 创建账户

Disconnect the Battery

仅作为前提条件
本指南仅提供前提条件!本指南是另一个程序的一部分,不能单独使用。

你所需要的

  1. Disconnect the Battery, Back Cover: 步骤 1 中的图像 1,1
    • Flip the Nook over.

  2. Disconnect the Battery: 步骤 2 中的图像 1,2 Disconnect the Battery: 步骤 2 中的图像 2,2
    • Lift the flap that reads "Nook" to reveal the tape that is underneath. Remove the memory card if one is present.

    • Remove the tape covering the round holes to reveal two T5 Torx screws.

    • Remove the two T5 Torx screws securing the back cover.

  3. Disconnect the Battery: 步骤 3 中的图像 1,2 Disconnect the Battery: 步骤 3 中的图像 2,2
    • Insert the flat end of a spudger between the front panel and the rear assembly.

    • Though these photos show a screwdriver, use a spudger or plastic opening tool in order to prevent damage to the device.

    • Use a spudger to lift the the back panel from the rest of the Nook.

  4. Disconnect the Battery: 步骤 4 中的图像 1,2 Disconnect the Battery: 步骤 4 中的图像 2,2
    • Slide the spudger around the edges of the Nook to loosen the back panel.

  5. Disconnect the Battery: 步骤 5 中的图像 1,1
    • Pull the back panel off the Nook.

  6. Disconnect the Battery, Disconnect the Battery: 步骤 6 中的图像 1,2 Disconnect the Battery, Disconnect the Battery: 步骤 6 中的图像 2,2
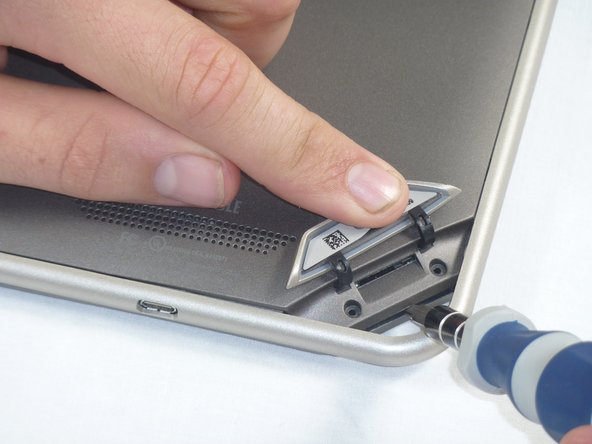
    • Lift up the foam pad at the corner of the battery to reveal the battery connector.

    • Use a spudger or plastic opening tool to disconnect the battery cable from the motherboard.

    • These photos show a screwdriver, but we recommend using a nonconductive tool like a spudger to prevent a potential short.

结论

To reassemble your device, follow these instructions in reverse order.

Holly Lowe

于09/26/12注册

238 声望

创作了3篇指南

0指南评论

添加评论

浏览统计数据:

过去 24 小时: 0

过去 7 天: 1

过去 30 天: 2

总计 41