跳转到主内容

Disassembling Samsung TFT Color YP-T7J USB Connector Dock

你所需要的

  1. Disassembling Samsung TFT Color YP-T7J USB Connector Dock, The Back Cover: 步骤 1 中的图像 1,2 Disassembling Samsung TFT Color YP-T7J USB Connector Dock, The Back Cover: 步骤 1 中的图像 2,2
    • Remove the 2 screws on the back cover using a Phillips head #0 screwdriver.

  2. Disassembling Samsung TFT Color YP-T7J USB Connector Dock: 步骤 2 中的图像 1,2 Disassembling Samsung TFT Color YP-T7J USB Connector Dock: 步骤 2 中的图像 2,2
    • Remove the screw on each side of the device using a Phillips head screwdriver.

  3. Disassembling Samsung TFT Color YP-T7J USB Connector Dock: 步骤 3 中的图像 1,3 Disassembling Samsung TFT Color YP-T7J USB Connector Dock: 步骤 3 中的图像 2,3 Disassembling Samsung TFT Color YP-T7J USB Connector Dock: 步骤 3 中的图像 3,3
    • Using the plastic opening kit, place the prying end of the kit into the opening created by removing the screws.

    • Gently pry open the back cover. Insert the plastic opening tool in between the cover joints.

  4. Disassembling Samsung TFT Color YP-T7J USB Connector Dock, The Battery: 步骤 4 中的图像 1,2 Disassembling Samsung TFT Color YP-T7J USB Connector Dock, The Battery: 步骤 4 中的图像 2,2
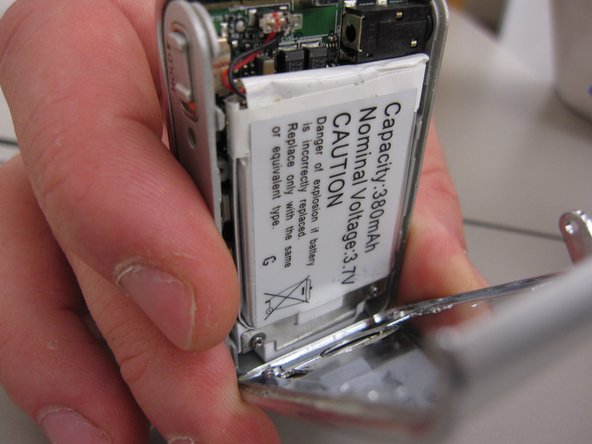
    • Once the back cover has been removed the battery will be visible.

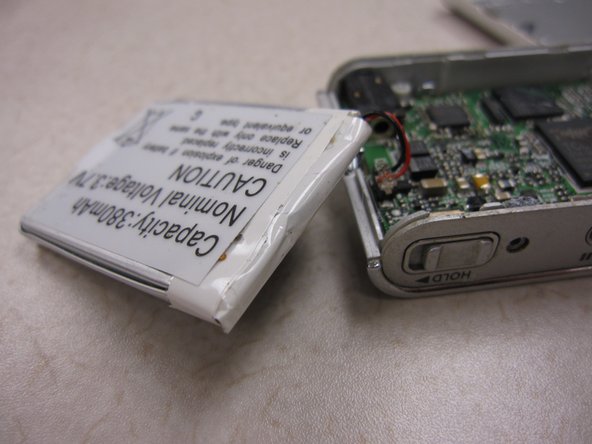
    • Pry the battery from the device.

    • NOTE: The battery should still be connected to the device

  5. Disassembling Samsung TFT Color YP-T7J USB Connector Dock: 步骤 5 中的图像 1,2 Disassembling Samsung TFT Color YP-T7J USB Connector Dock: 步骤 5 中的图像 2,2
    • Unplug the battery connecting cables.

    • NOTE: The battery now should be free from all connections to the device.

  6. Disassembling Samsung TFT Color YP-T7J USB Connector Dock, Disassembling Samsung TFT Color YP-T7J USB Connector Dock: 步骤 6 中的图像 1,3 Disassembling Samsung TFT Color YP-T7J USB Connector Dock, Disassembling Samsung TFT Color YP-T7J USB Connector Dock: 步骤 6 中的图像 2,3 Disassembling Samsung TFT Color YP-T7J USB Connector Dock, Disassembling Samsung TFT Color YP-T7J USB Connector Dock: 步骤 6 中的图像 3,3
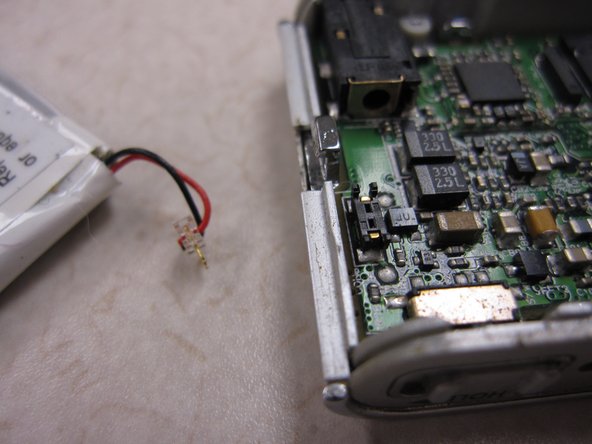
    • Once the battery has been removed you can see the motherboard.

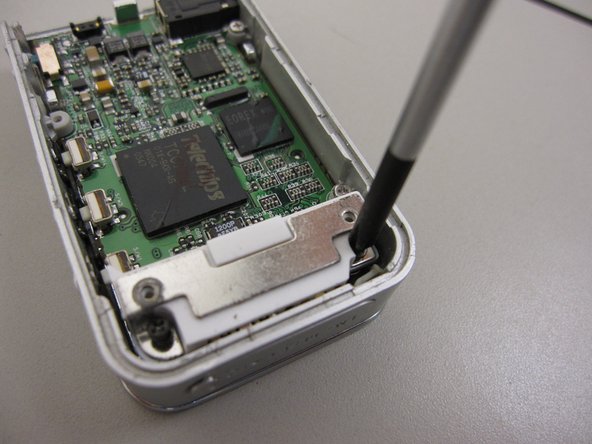
    • Unscrew 4 screws on the metal docket using a Phillips head screw driver.

    • The USB connector can now be taken off of the device.

结论

To reassemble your device, follow these instructions in reverse order.

Dylan Peters

于10/18/13注册

409 声望

创作了4篇指南

团队

Clemson, Team 14-8, Benson Fall 2013 Clemson, Team 14-8, Benson Fall 2013 的会员

CLEM-BENSON-F13S14G8

3 名成员

创作了7篇指南

0条评论

添加评论

浏览统计数据:

过去 24 小时: 0

过去 7 天: 0

过去 30 天: 2

总计 574