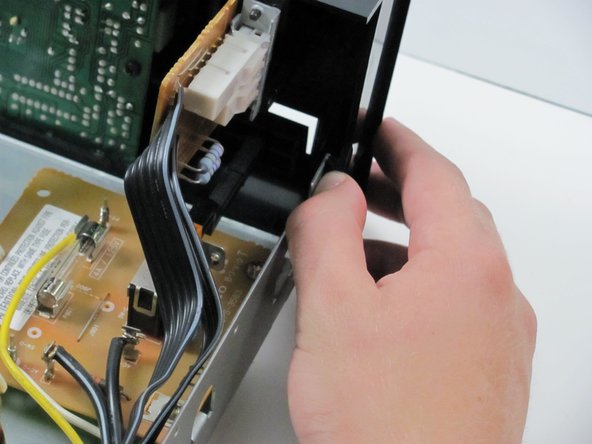
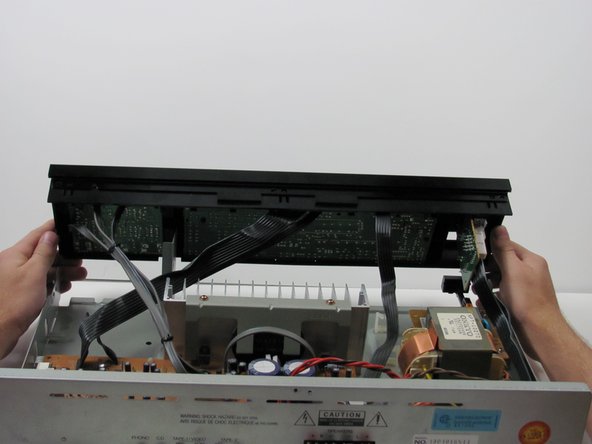
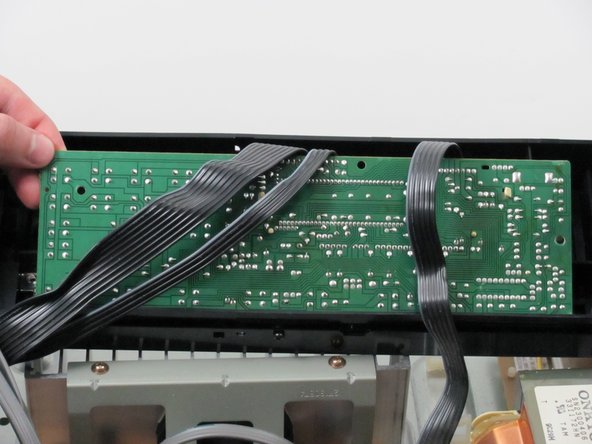
跳转到主内容

Disassembling Onkyo TX-800 Logic board

你所需要的

  1. Disassembling Onkyo TX-800 Logic board, Disassembling Onkyo TX-800 Top case: 步骤 1 中的图像 1,3 Disassembling Onkyo TX-800 Logic board, Disassembling Onkyo TX-800 Top case: 步骤 1 中的图像 2,3 Disassembling Onkyo TX-800 Logic board, Disassembling Onkyo TX-800 Top case: 步骤 1 中的图像 3,3
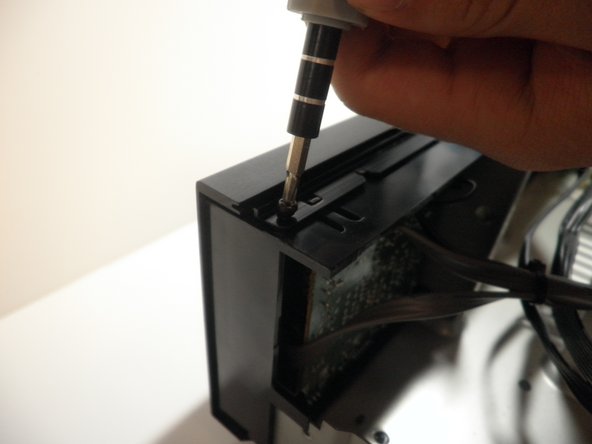
    • Remove the two screws on both sides of the receiver. Keep these and the rest of the screws in a safe place.

  2. Disassembling Onkyo TX-800 Logic board: 步骤 2 中的图像 1,2 Disassembling Onkyo TX-800 Logic board: 步骤 2 中的图像 2,2
    • Remove the top screw on the back panel.

  3. Disassembling Onkyo TX-800 Logic board: 步骤 3 中的图像 1,2 Disassembling Onkyo TX-800 Logic board: 步骤 3 中的图像 2,2
    • Slide off the case to expose the internal components of the receiver.

  4. Disassembling Onkyo TX-800 Logic board, Face plate: 步骤 4 中的图像 1,3 Disassembling Onkyo TX-800 Logic board, Face plate: 步骤 4 中的图像 2,3 Disassembling Onkyo TX-800 Logic board, Face plate: 步骤 4 中的图像 3,3
    • Unscrew the three screws on top of the face plate.

  5. Disassembling Onkyo TX-800 Logic board: 步骤 5 中的图像 1,2 Disassembling Onkyo TX-800 Logic board: 步骤 5 中的图像 2,2
    • Unscrew the one screw on the bottom of the front panel.

  6. Disassembling Onkyo TX-800 Logic board: 步骤 6 中的图像 1,3 Disassembling Onkyo TX-800 Logic board: 步骤 6 中的图像 2,3 Disassembling Onkyo TX-800 Logic board: 步骤 6 中的图像 3,3
    • Simultaneously push down on the head of the snap on each end of the device with your thumbs and push to seperate the face plate. This may take some force.

  7. Disassembling Onkyo TX-800 Logic board, Logic board: 步骤 7 中的图像 1,3 Disassembling Onkyo TX-800 Logic board, Logic board: 步骤 7 中的图像 2,3 Disassembling Onkyo TX-800 Logic board, Logic board: 步骤 7 中的图像 3,3
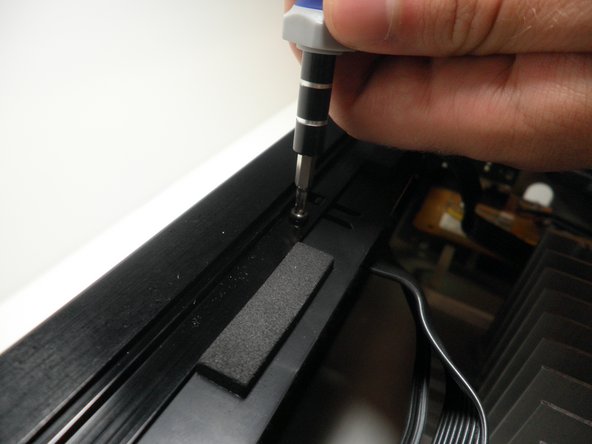
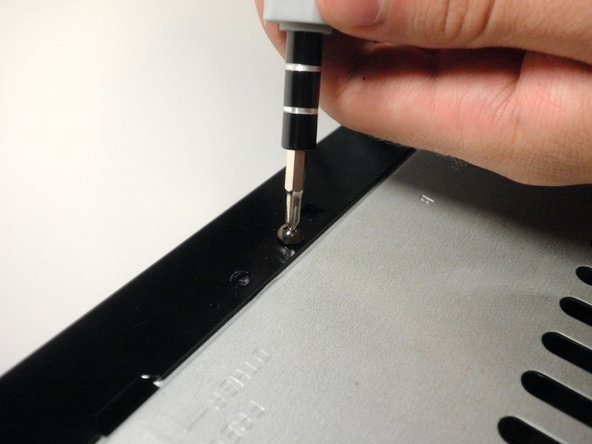
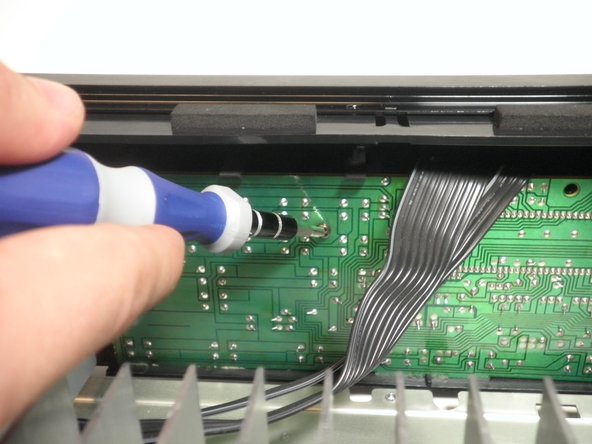
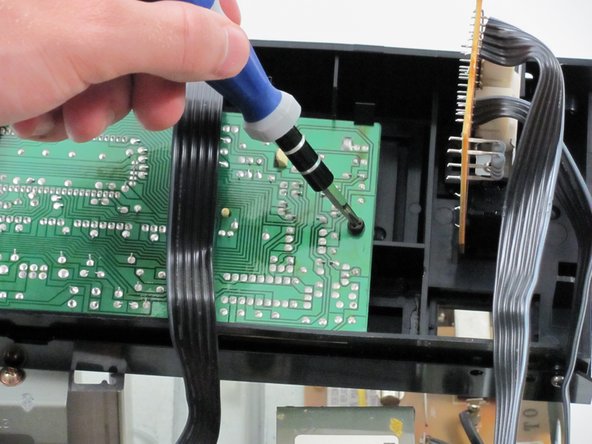
    • On the inside middle of the face plate you will see two screws in the logic board. Unscrew these two screws.

  8. Disassembling Onkyo TX-800 Logic board: 步骤 8 中的图像 1,2 Disassembling Onkyo TX-800 Logic board: 步骤 8 中的图像 2,2
    • You will see the same snaps along the top of the logic board. Press the heads of the snaps down and pull the logic board out and up.

结论

To reassemble your device, follow these instructions in reverse order.

另外一个人完成了本指南。

Ryan

于04/13/10注册

108 声望

创作了3篇指南

团队

Cal Poly, Team 27-92, Amido Spring 2010 Cal Poly, Team 27-92, Amido Spring 2010 的会员

CPSU-AMIDO-S10S27G92

4 名成员

创作了7篇指南

0条评论

添加评论

浏览统计数据:

过去 24 小时: 0

过去 7 天: 1

过去 30 天: 6

总计 2,615