你所需要的
-
-
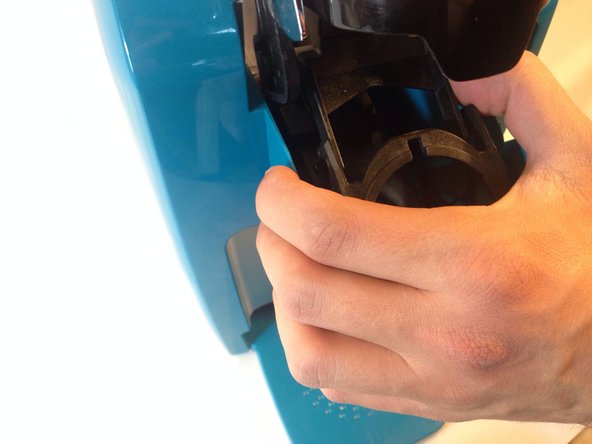
推入连接在K型杯架塑料外壳上的其中一个支撑臂,将其从导轨上取下。两侧的手臂是相同的,所以卸下一边之后,另一边重复该过程。
-
一旦支架被删除,状态应该看起来像图片。 K杯架的外壳应该与支架分开。
My Keurig has white, nylon half-grommets to reduce wear, where the post of each arm slides in its slot. Take care that they do not fall down into the machine and that you do not lose them.
That just happened,( lost the grommet), I can hear it but can't get it out from inside the machine. I put everything back together and it is working. One note: may I suggest removing just the k-cup holder then removing the two screws for the top. you can then access the upper part of the hose. after that I used a long tie wrap (pipe cleaner would have been better, (I had given my tobacco pipes and cleaning equipment away last week.) Also I ran a bread tie down the top connection for the hose and into the needle. That is where I found the last of my clog. So now all I need is to find that little plastic piece and it will be perfect but it is working without it
Getting this part put back together is near impossible. White pieces keep falling off & don't seem to line up correctly with plastic arms. Over 1 hour to get to this point. Frustrating.
Don't take it apart at this point! Move on to the next step, then it is super easy to remove this front part in the same way but from the bottom pegs, if you want to clean all the small spaces covered in coffee dust and
Yes, the arm will break. Apparently after struggling with it for about an hour, it weakened the plastic enough to snap off the left arm of the cup holder. The machine now works, though! I’ll just have to be mindful when I use it. Looking back, I wish I had tried just cleaning out the needle first. Might have saved me significant frustration with the reassembly of this step.
I think you need to tell people that the arms with the white roller will break off after all the struggling the left side broke off Thank for the worthless info. Ron Nelson
At this point, I skipped remaining steps 13-16, mainly because I felt those steps are too much work to end up trying to “push out” grounds with my fingers (as described in step 16). Instead, I ran water through the mini-K as if I were making coffee—to remove all the grounds that I saw gunked up in the hose. I aimed the hose into a large bowl.
I ran water through as many times as needed to get water that was completely clear of any grinds—which took about six 8-ounce cups.
Thanks to others, whose comments helped me as I was going through the previous steps. :D
-
-
-
-
抬起支架并拉起手柄组件。 它应该很容易脱落。
-
这个白色组件很容易脱落,将其取下放在一边,确保不会丢失。
The first picture is a little on the dark side, but I could still tell what you're trying to say in the picture. Maybe make it a little brighter?
The second picture in this step shows the white plastic 'slide guide thinger', it is however upside down. During reassembly make sure to have it the other way so that the handle assembly will stay up when installing a k cup. If not the handle will fall everytime you let it go making for a frustrating coffee going experience especially if your not a morning person. :)
If your clog is in the other end of the hose, you are out of luck. I had only used my machine about 6 times before it wouldn't dispense. I disassembled the contraption, and stuck a pipe cleaner down the hose. There is no clog. Keurig is sending me a $50 coupon to apply toward a new machine.
Jill Kozak - 回复
-


要重新组装您的设备,请按照相反的顺序执行这些指示。
要重新组装您的设备,请按照相反的顺序执行这些指示。
团队

Cal Poly, Team 17-1, Forte Winter 2014 Cal Poly, Team 17-1, Forte Winter 2014 的会员
CPSU-FORTE-W14S17G1
5 名成员
创作了17篇指南